Are you ready for a beautiful and easy spring DIY tablescape idea?
I incorporated simple DIY’s that resulted in the cutest spring tablescape.
It’s not quite time for Easter but I still wanted to create a fun tablescape. So here it is!
I transformed several items and added them to my tablescape using only paint and a rubber stamp.
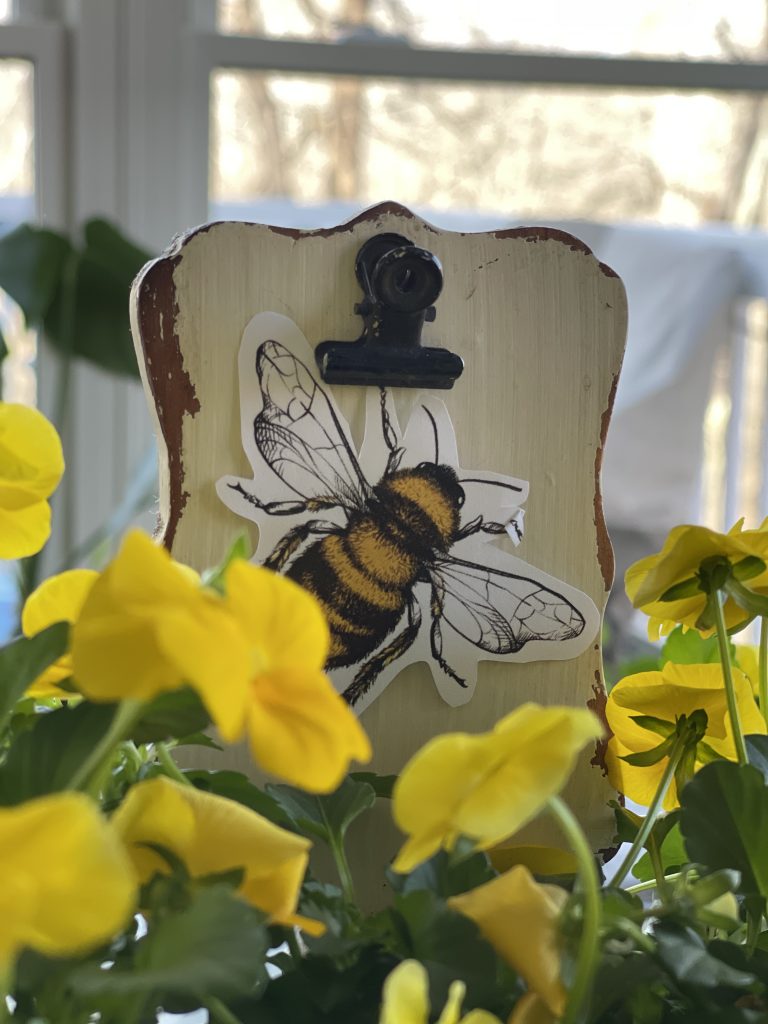
Purchasing this bee stamp was the start, and everything else sort of fell into place.
Table of Contents
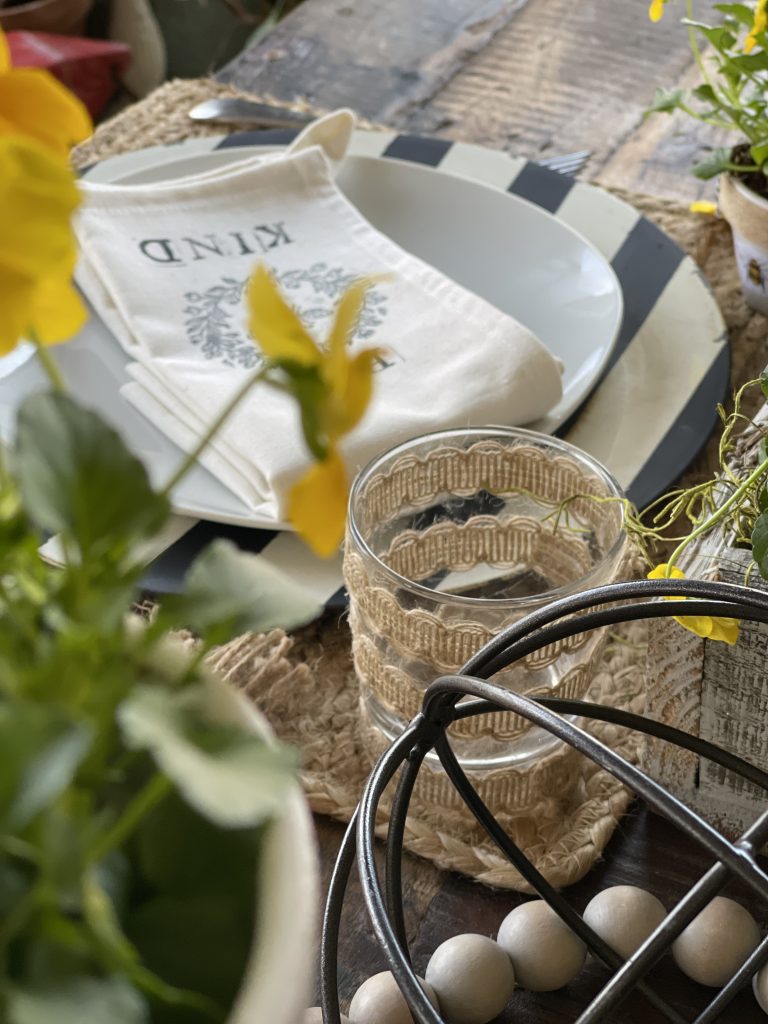
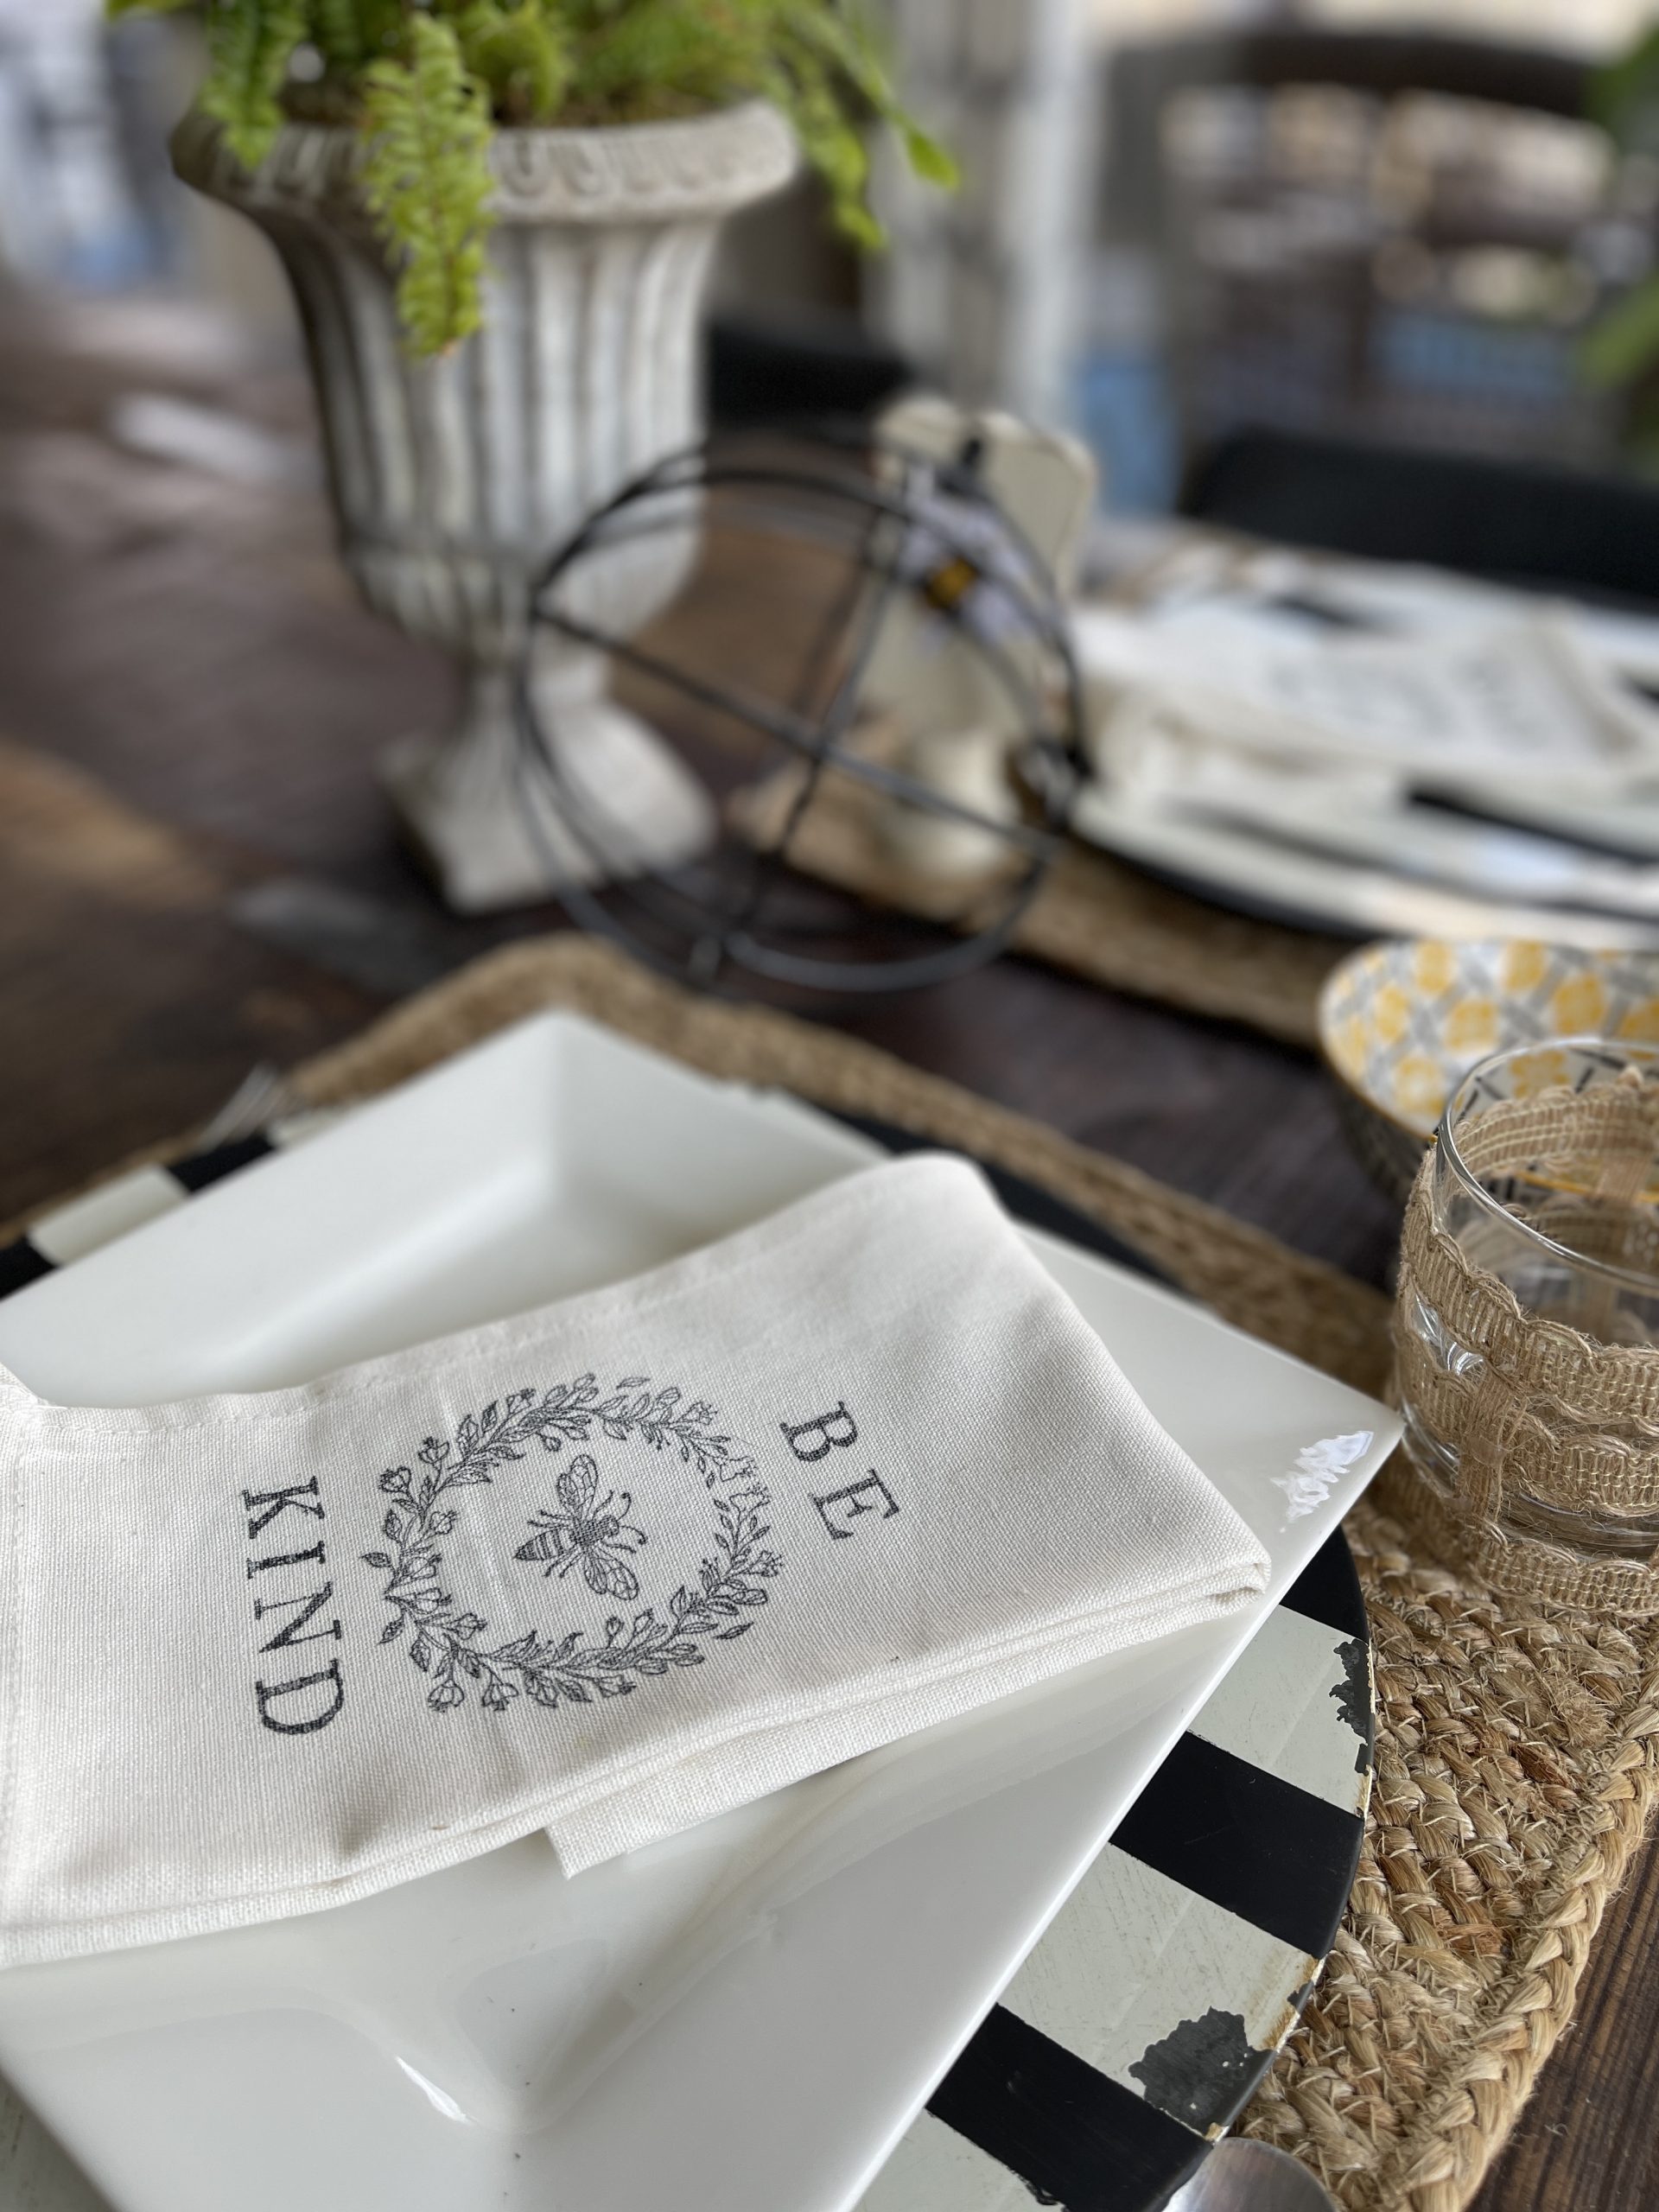
DIY SPRING NAPKIN
Customizing napkins was my initial goal with the stamps. They came out so stinking cute, I couldn’t stop there.
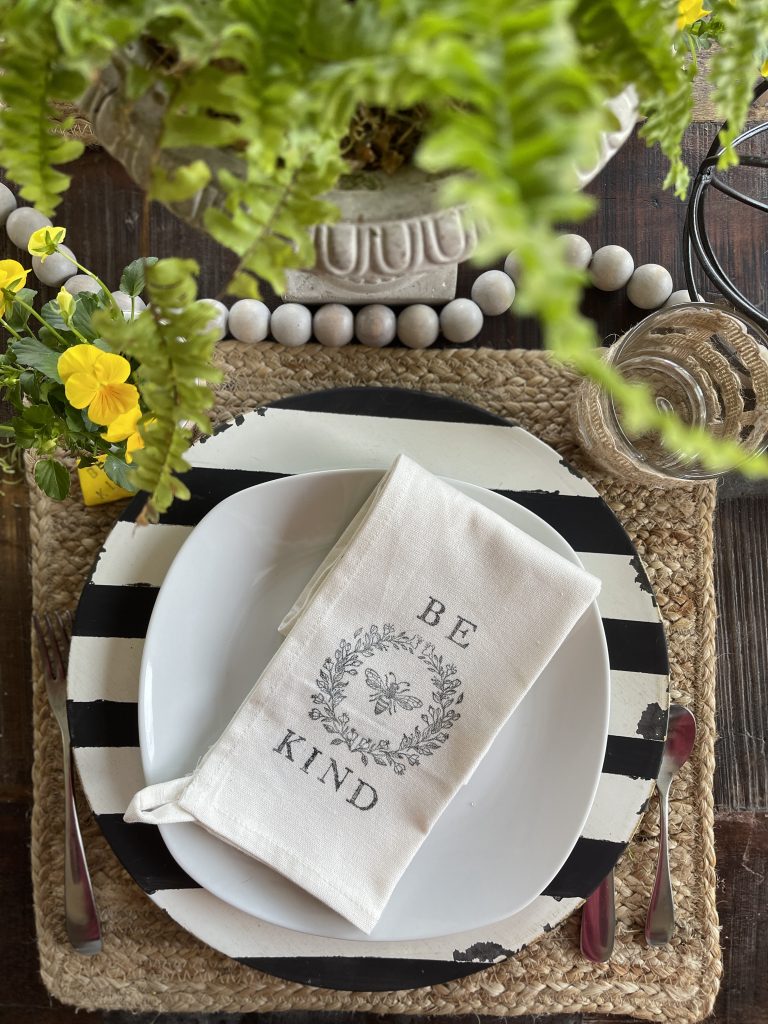
I loved how it turned out. I purchased these hand towels from Walmart and decided I’d use them for napkins because they weren’t huge. I picked up some permanent black ink and practiced on an old hand towel.
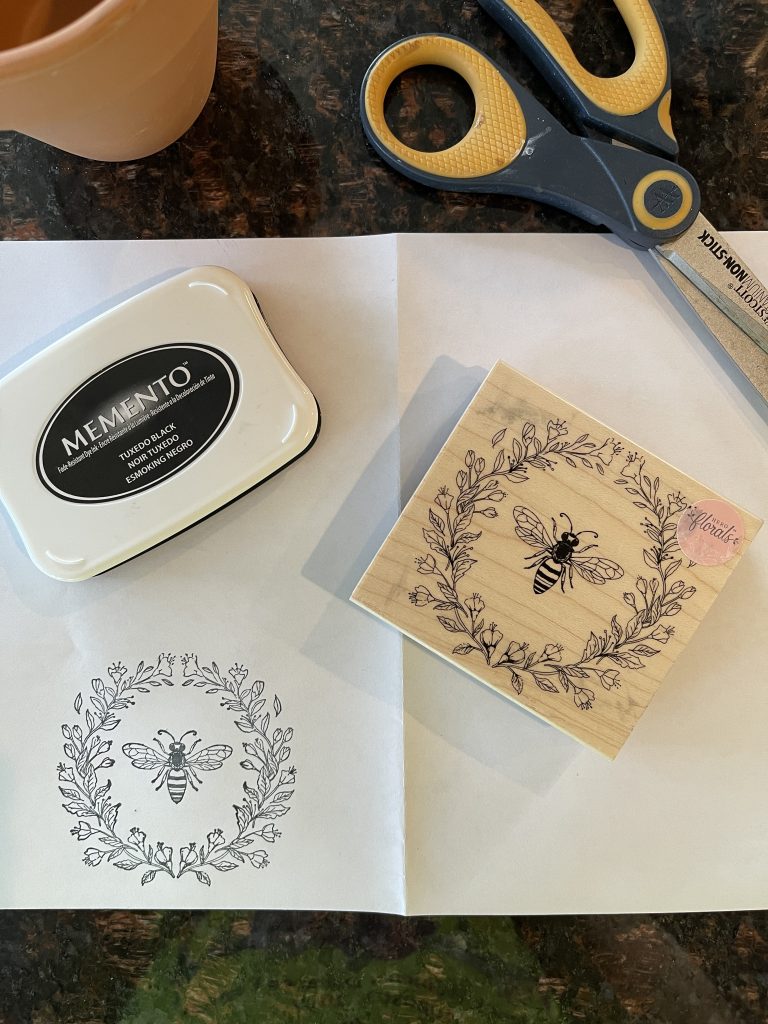
I used the letter stamps to add the saying. I will be getting some smaller too to decorate more napkins.
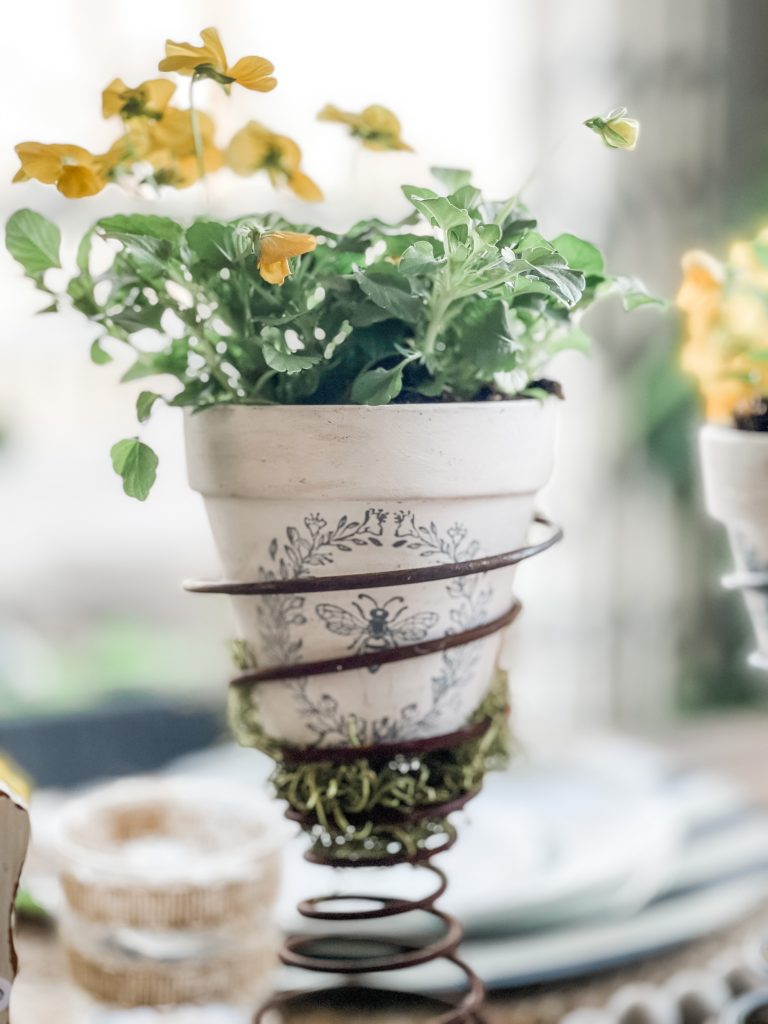
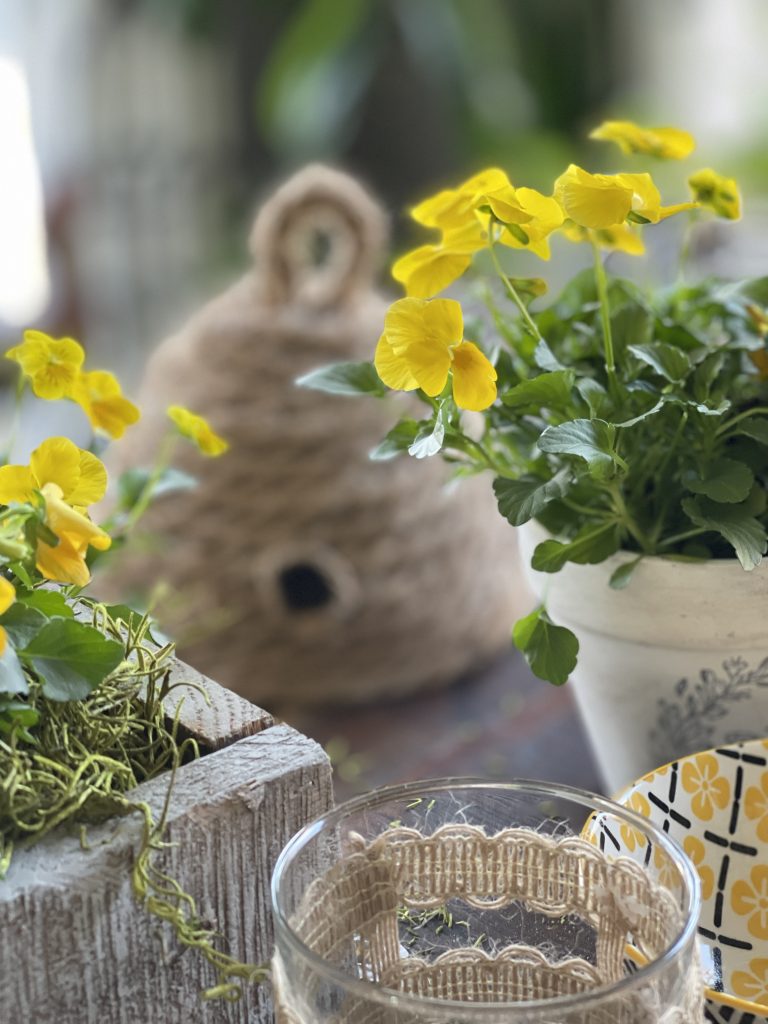
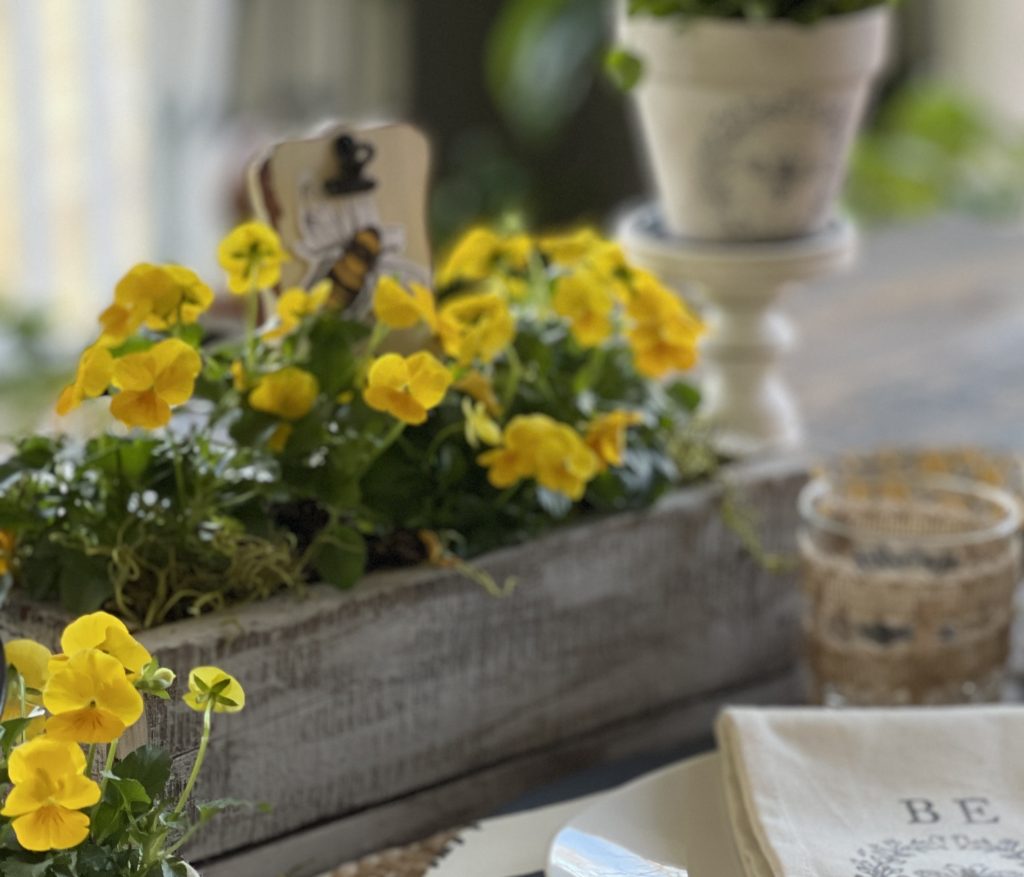
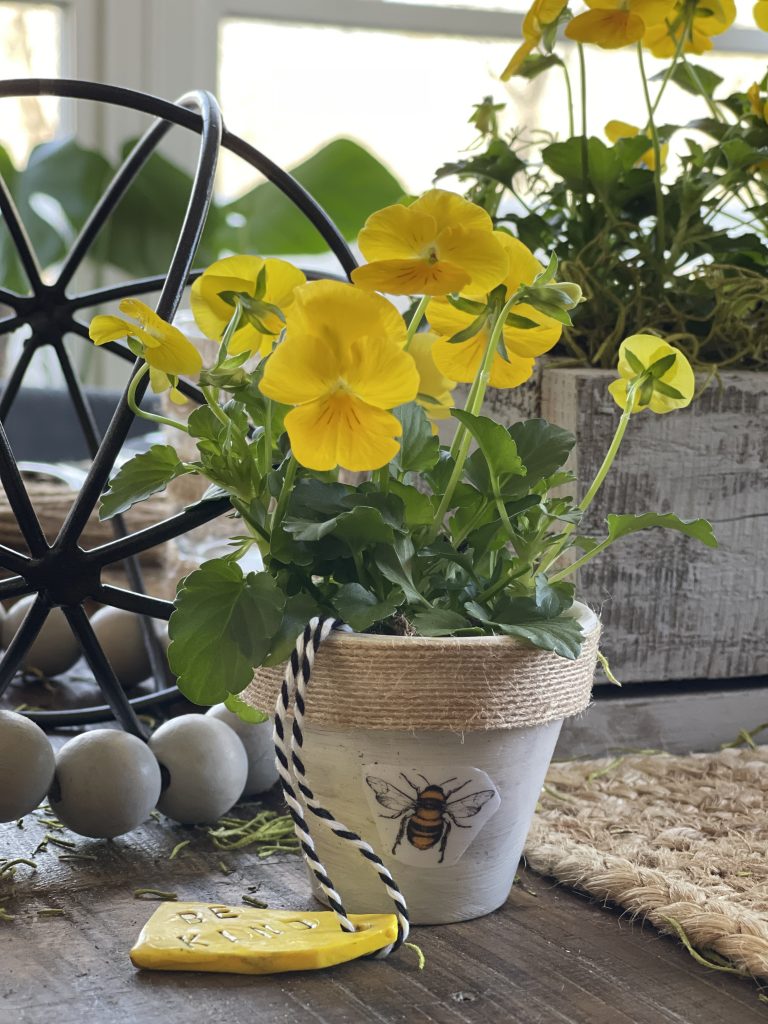
So I thought what else could I stamp? I decided to use little clay pots and stamp them and add colorful yellow pansies.
DIY SPRING “BEE” POT
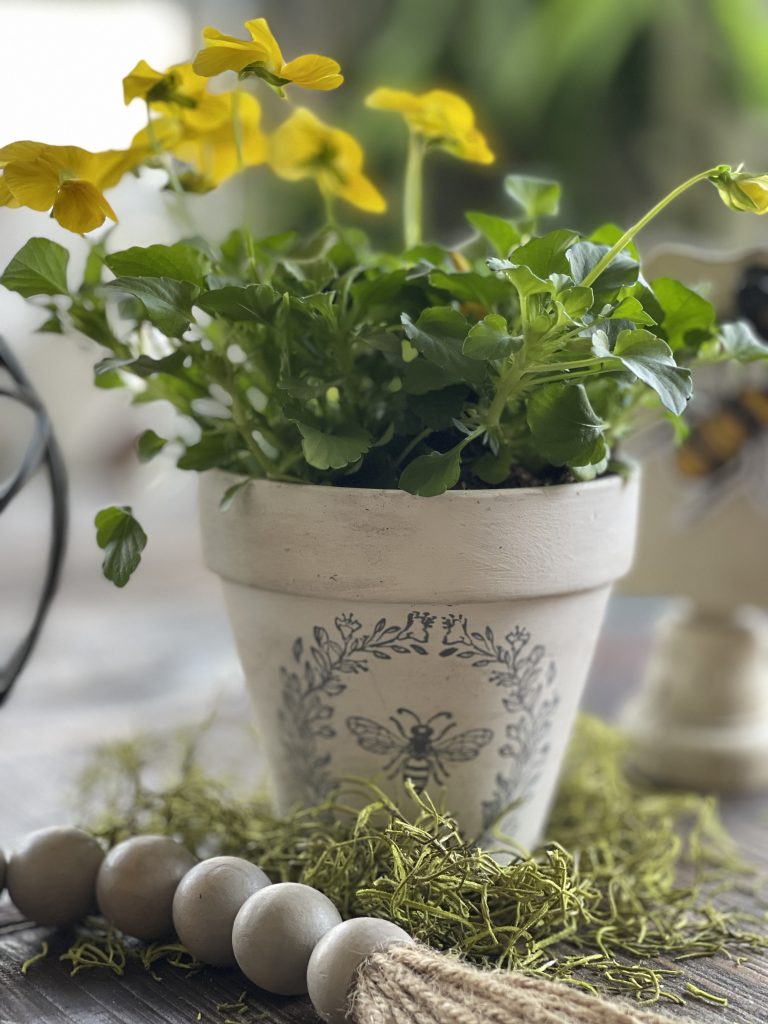
Fortunately the stamp fit onto the pot perfectly. First I painted it with Dixie Belle paint in “Fluff” and then rolled the stamp in ink and across the pot.
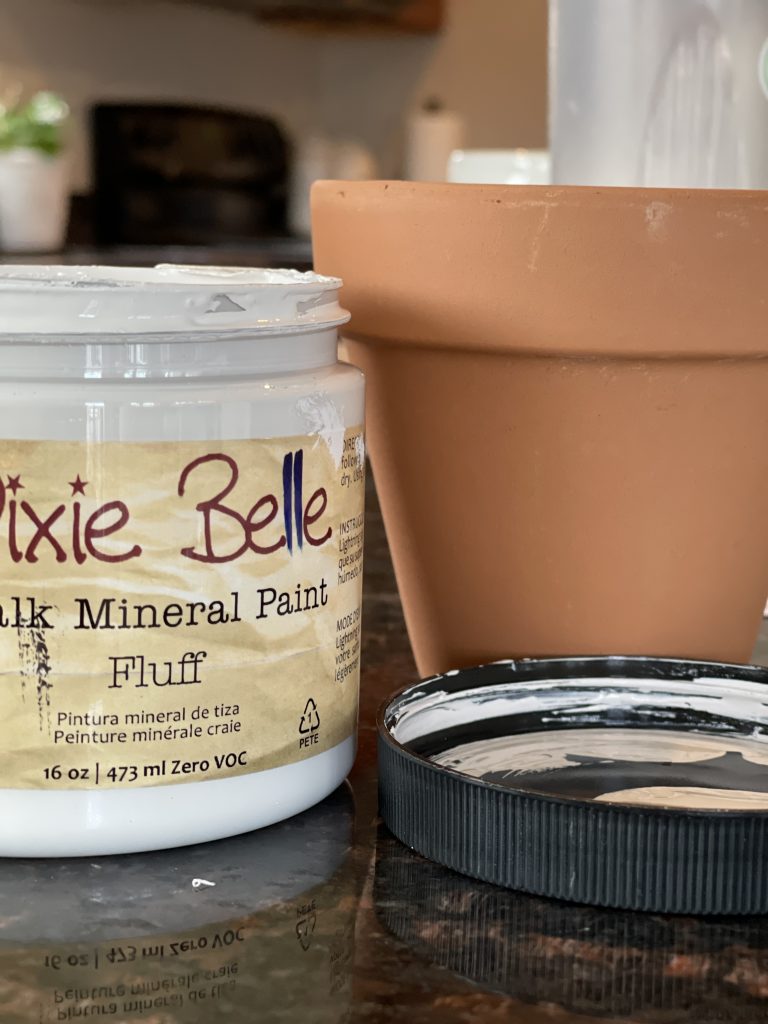

Next I added a little dirt from my pansies and brushed it on the pot and dusted off the excess to have it look aged.
I made two of them and perched one in a vintage bed spring and the other in a tuft of spanish moss.
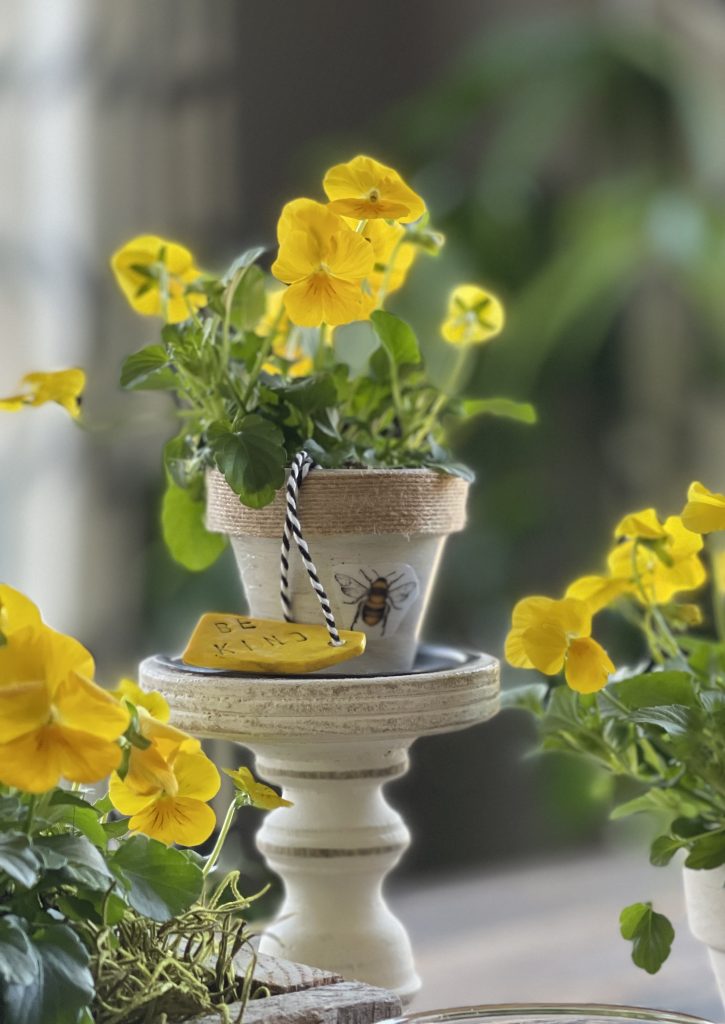
Two remaining clay pots I had were tiny but would be perfect at each place setting. I used Mod Podge and attached a bee to the front of the pot that I had painted.
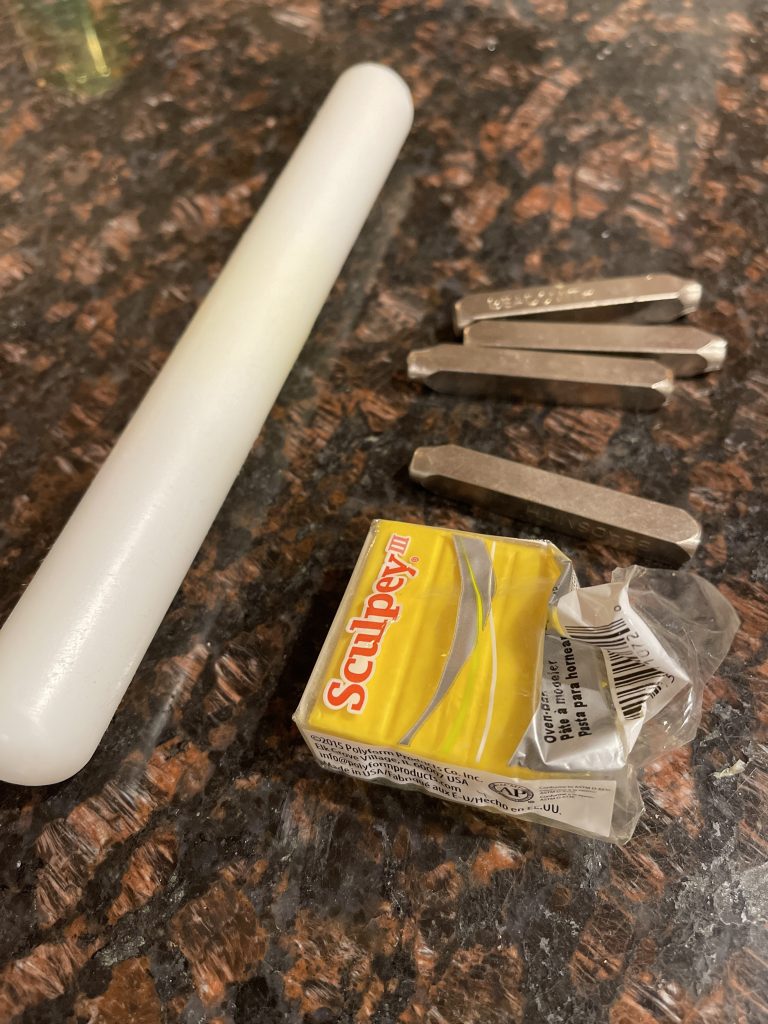
Next I glued a small piece of burlap ribbon on top and added a small Sculpey polymer clay tag with “be kind” on it.
There are a few more DIY’s in this tablescape, some were created before but I’ll show you them in this post.
One that I made and love is the redo of my off white chargers.
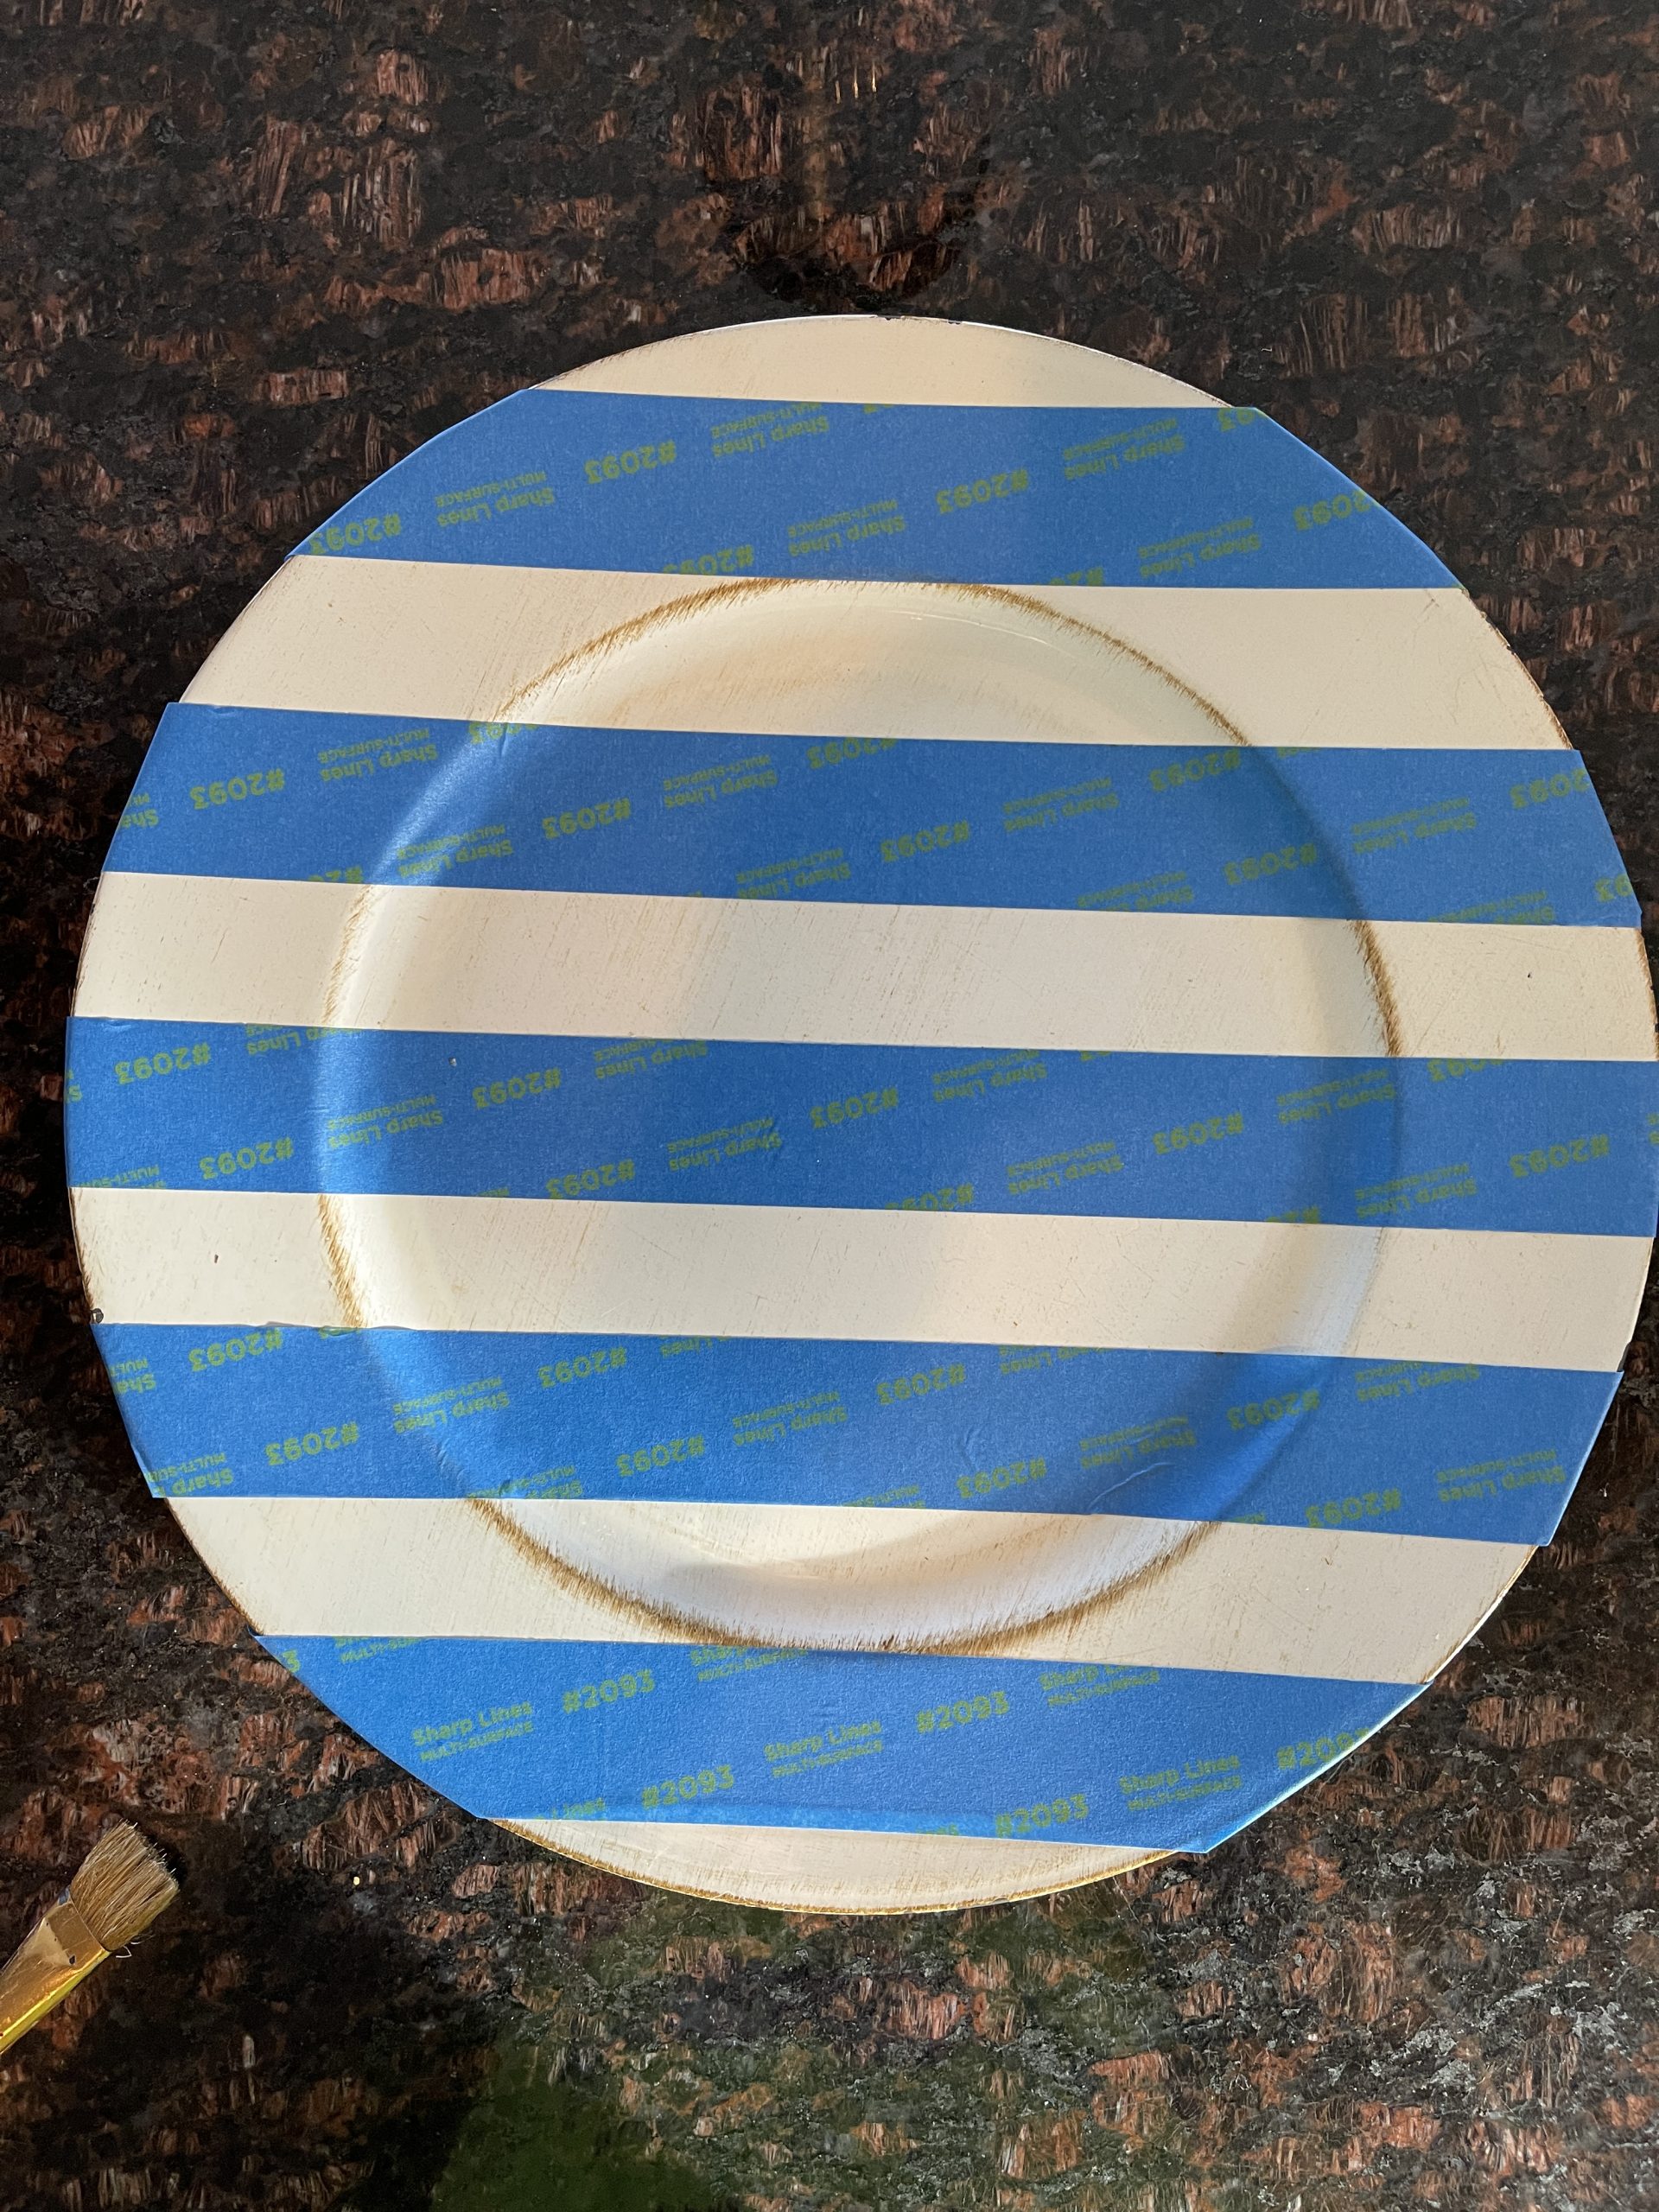
CHARGER MAKEOVER
These off white chargers were kind of boring for this tablescape. I have charger issues, I have lots of them, somehow I can justify them more than I can purchasing dishes.
I don’t have room to store – or a need for more dishes. My white ones do me just fine.
Chargers are another story. They do store easily in my window seat in the guest bedroom and I typically buy them on sale. These were $1.99 each. The Dollar Tree is another great place, now that I know how easily they can be painted.
I used painters tape to see how it would work. It took some of the off white color off and I didn’t hate it. Stripes were easy to add with the tape and I used my Dixie Belle Chalk Paint in Caviar and painted between the lines.
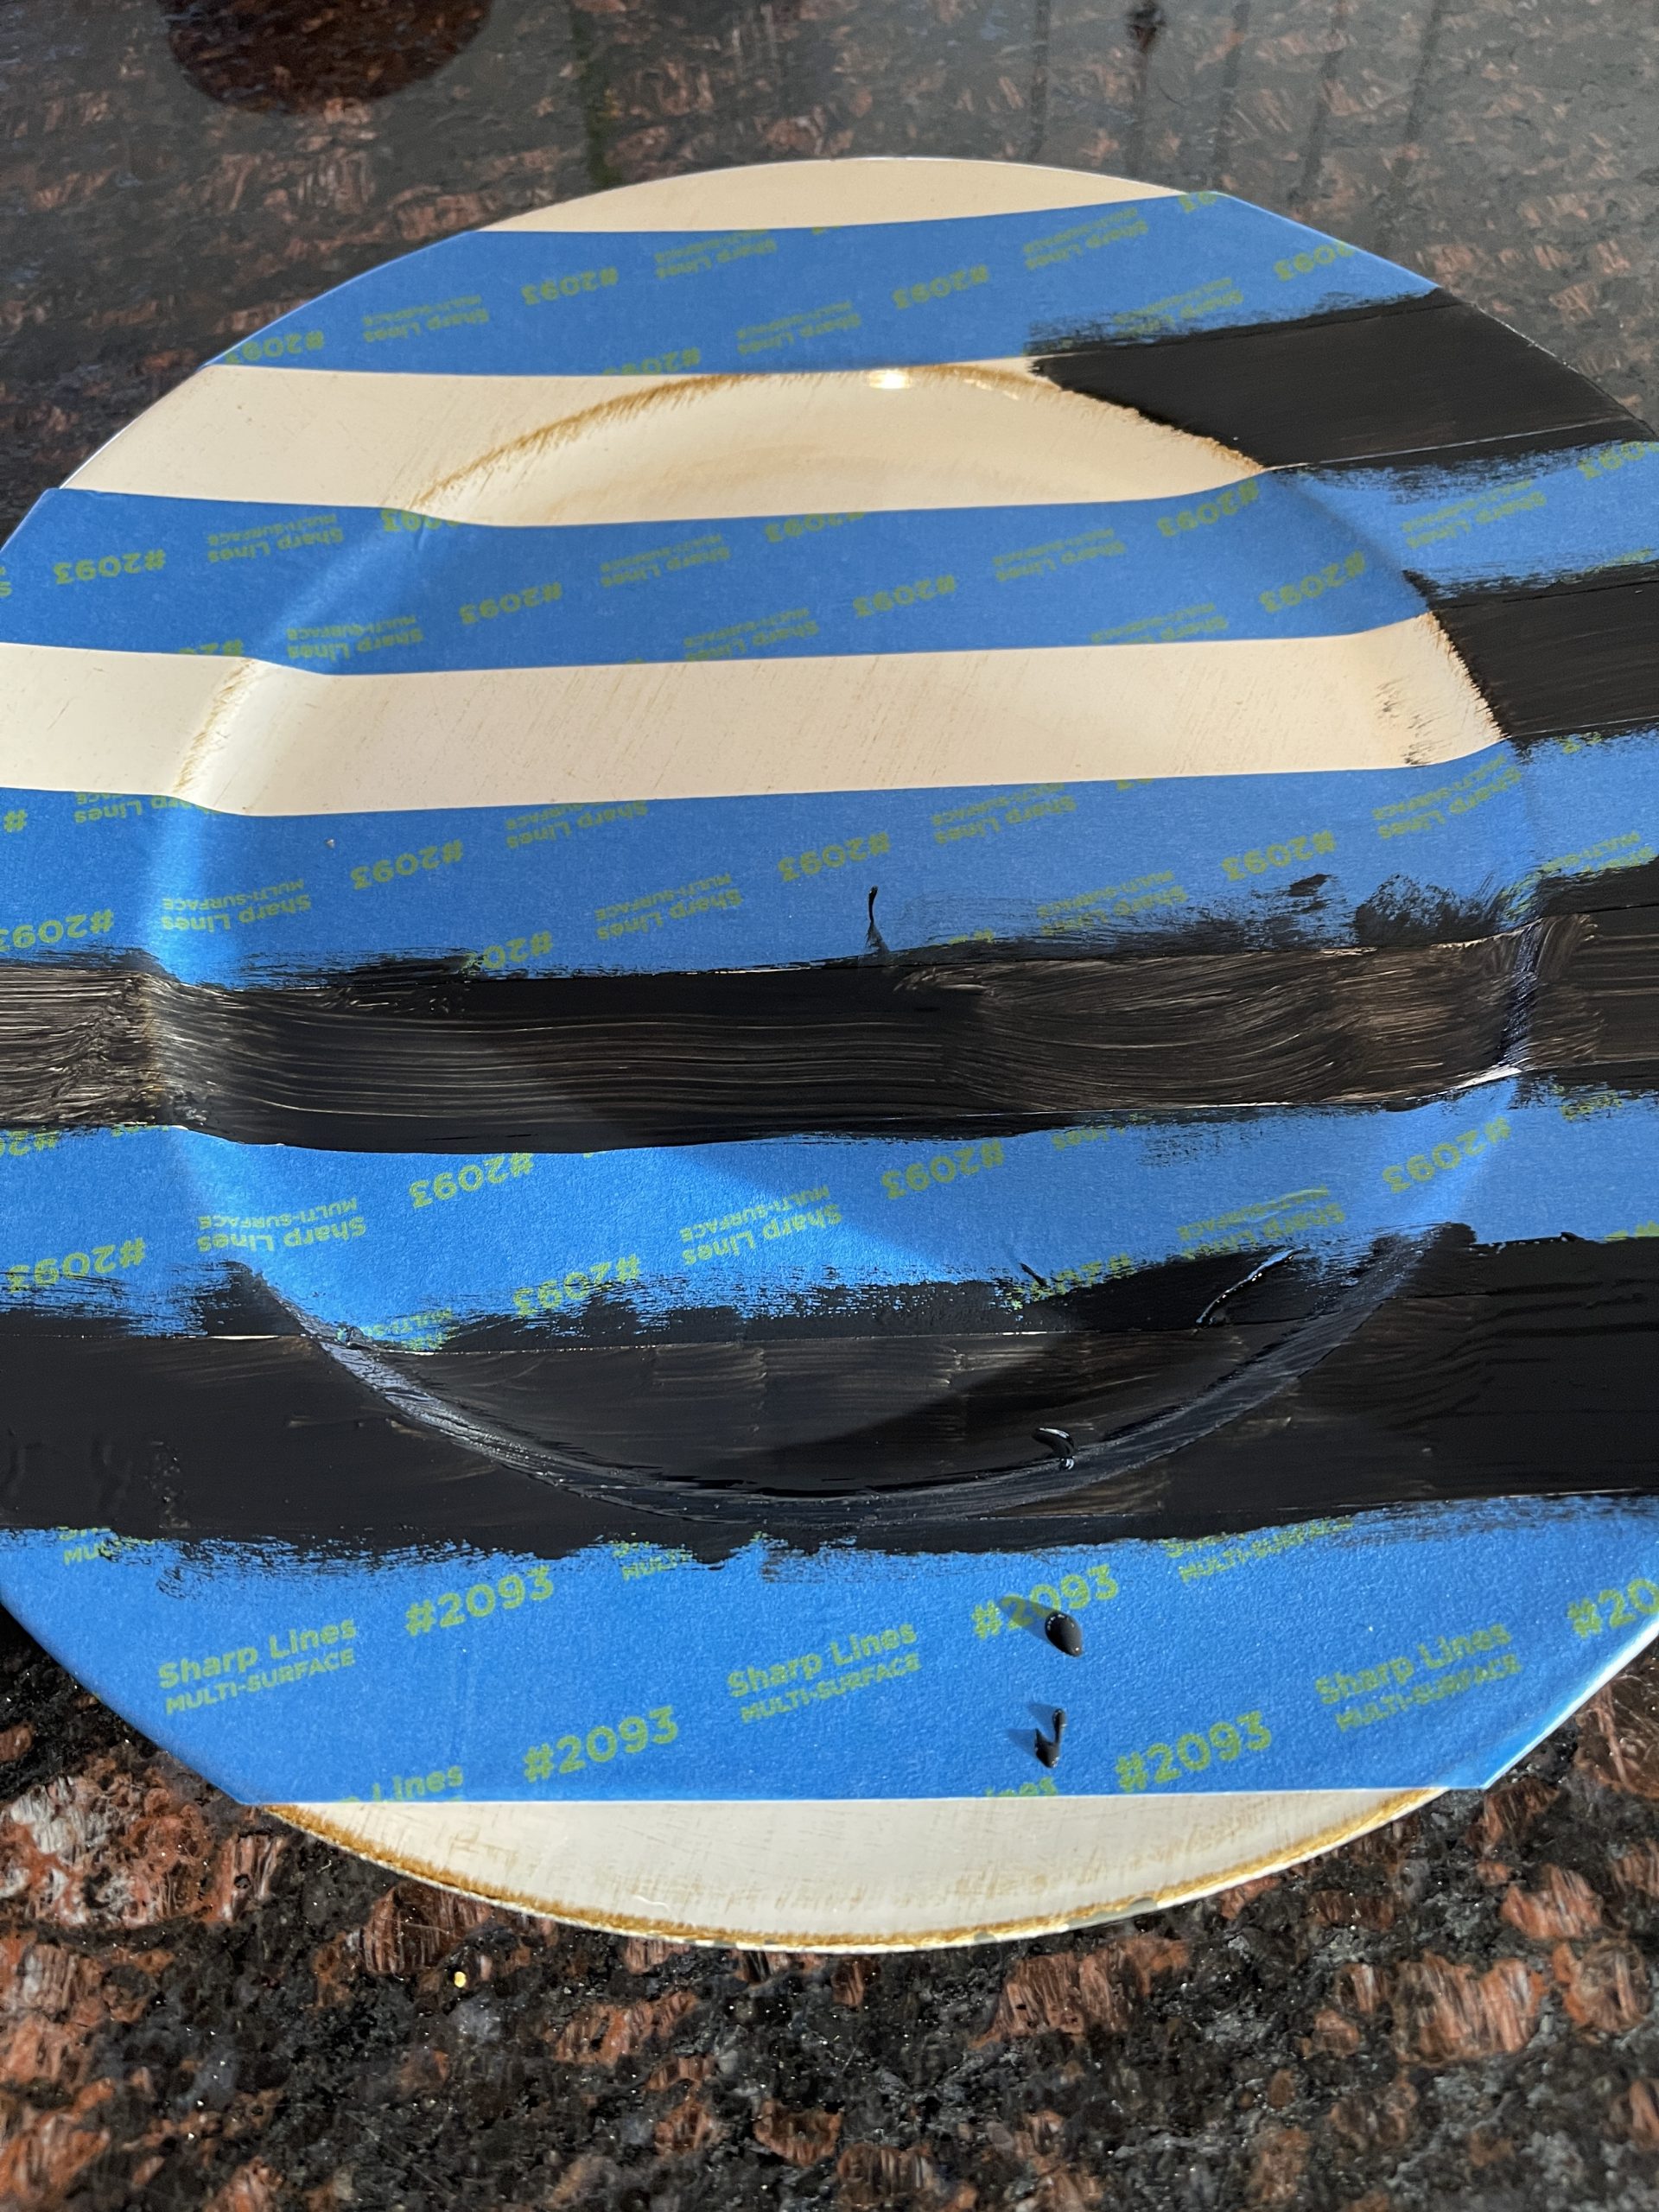
When I removed the tape, I had black stripes and more distressing. I am in love with the look! No longer bright and shiny.
MORE DIY’S
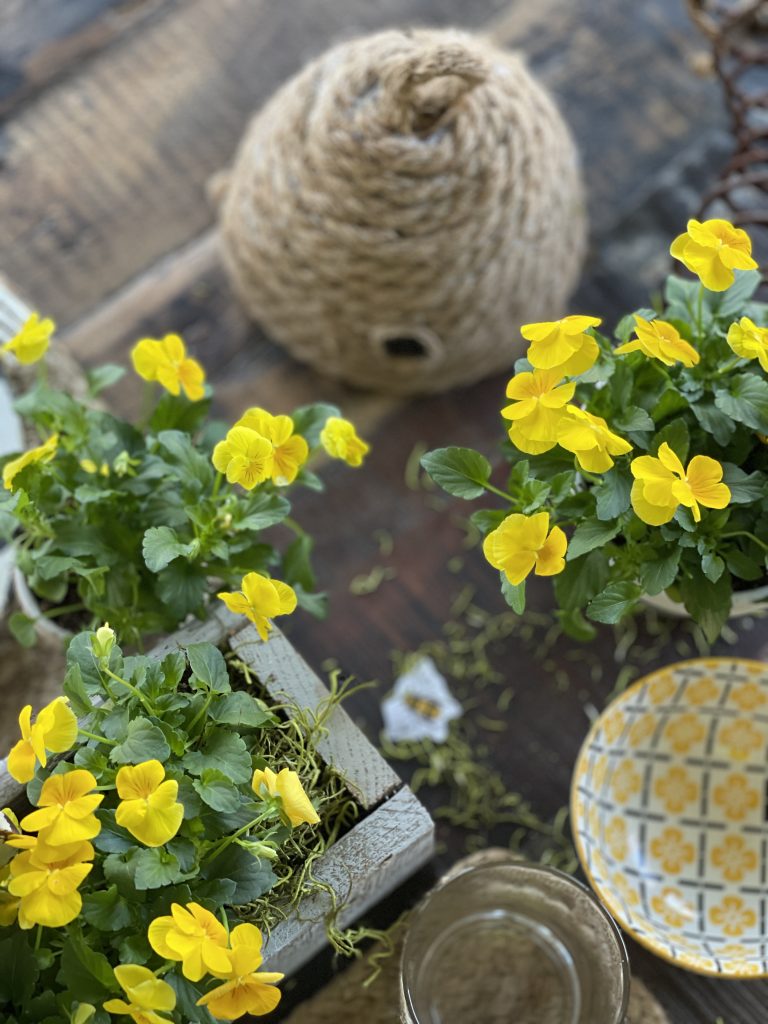
Two other DIY’s that I used in this tablescape are the wooden box holding the pansies and the bee skep made of twine. The twine bee skep is easy to make using a bowl as a mold and wrapping and gluing twine around and around until you have the shape you like.
Create a loop at the top and secure. Next draw or outline a circle with twine then fill it in to look like a hole.
The wooden box was made with scraps of wood. I created three of these a few years ago, this is the smallest of the three. With the table being set for two, it was the perfect size. Click here for another post with the box.
This is one of my favorite tablescapes. It can be used for so many get togethers. For this time of year the pansies were perfect, later you could use sunflowers, tulips, or any other variety of yellow flowers.
I love these placemats, I get so much use out of them, I have them in round and square. My style is definitely more casual so they get called in for duty often.
The yellow really pops with the tans and blacks. You can mix it up however you like.
A FEW MORE PICTURES OF THE SPRING TABLESCAPE
I hope you enjoyed this and got some inspiration for your own spring table. It’s so fun to create tablescapes with a theme and it doesn’t even have to be an event.

If you like what you are seeing at Saved From Salvage, sign up for the blog or send me and email and I’ll make sure you get posts right to your inbox.
Thanks so much for coming by.
XO, Regina
Let’s go shopping! Below are links to items you could get to make your own tablescape. These are affiliate links which means I would receive a small commission if you purchase from these links, at no additional cost to you. Thanks for supporting my small business.
Your tablescape is absolutely darling. I love it. I hope that you will share it on The Fabulous Friday Link Party this Friday. You can find it on my website. Hugs to you.
This is just so cute! You have inspired me to get out my stamps and make some napkins. I love the idea of changing up some chargers. I too have a lot of them and I never thought about painting stripes on some of them…brilliant! Please come link up to my party and share your idea. https://karinskottage.com/2022/03/bring-on-spring-linky-party.html
Karin
Karin – thanks so much for the kind words. I enjoy your link party and will certainly link up!
I’m totally in love with your chargers and this cool idea to use a stamp! My linen napkins will NEVER be the same again 🙂 I’m thrilled that you made this awesome post, and I really can’t wait to try this.
Aria – you are too sweet. Thanks so much for stopping by 🙂
It’s such a cohesive look Regina.. and I totally love your spring tablescape!
Thank you for sharing it at Create, Bake, Grow & Gather party this week. I’m delighted to be featuring your spring tablescape and projects at tonight’s party and pinning it too.
Hugs,
Kerryanne
Kerryanne – thanks so much! Have a great weekend!
Regina, I love your pretty tablescape and your lovely handmade touches like the stamped napkins and painted chargers. Thanks for sharing at Vintage Charm!
Awesome use of that stamp Regina – everything you created looks beautiful!
CONGRATS – you are one of our Featured Guests at Inspire Me Monday at Create With Joy #531!