ARE YOU LOOKING FOR EASY DIY EASTER DECORATIONS?
HOW CUTE AS A NAPKIN HOLDER
Remember my scrap wood hearts? Well I still had some wood left. It’s tongue and groove flooring and I figured I could use it up and create my own Easter decor.
You could use pine or any other scrap wood, I wanted to show you different ways you could use the eggs.
I got this egg cookie cutter and my plan was/is to make sugar cookies for Easter.
When it arrived I thought it was the perfect size to make wooden eggs.
Table of Contents
CREATING THE DIY WOODEN EGGS
I traced cookie cutter onto the wood and used my jigsaw to cut it out.
You just hold the piece against a metal tab and it does all the work for you. I love this sander.
DECORATING THE WOODEN EGGS
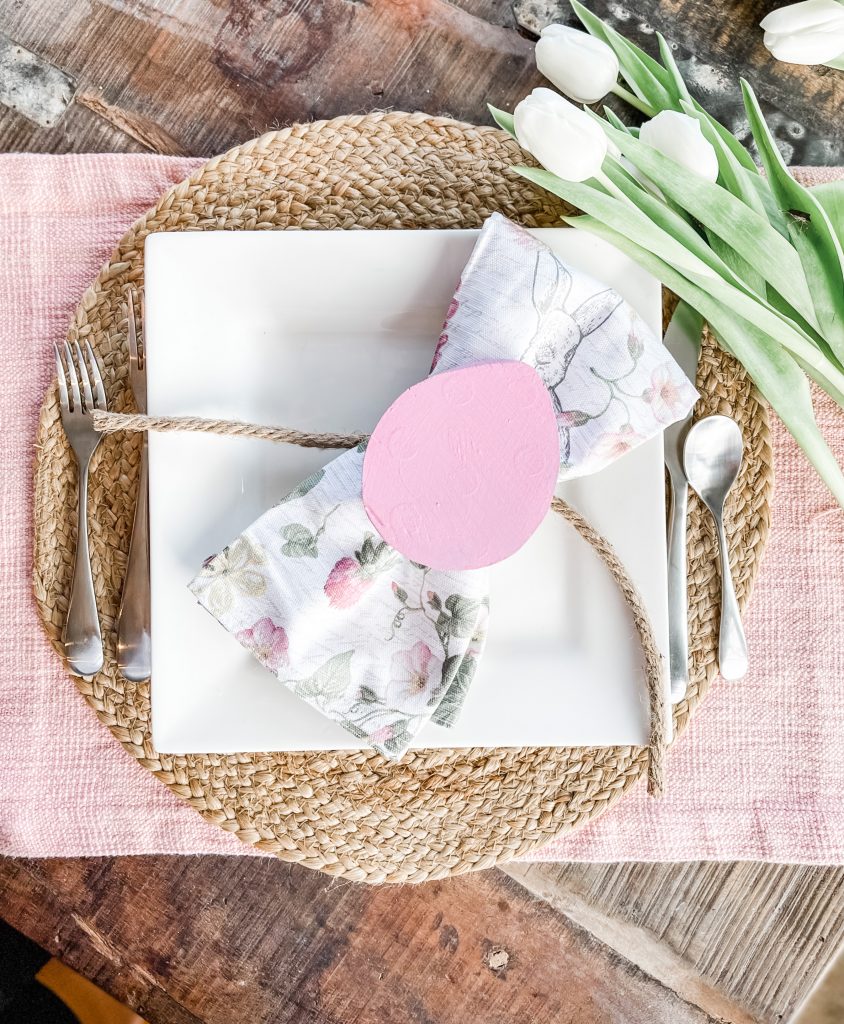
I love neutrals and my table is going to be soft pinks and greys. Shocking I know.
I picked up this tablecloth from Target and I love it.
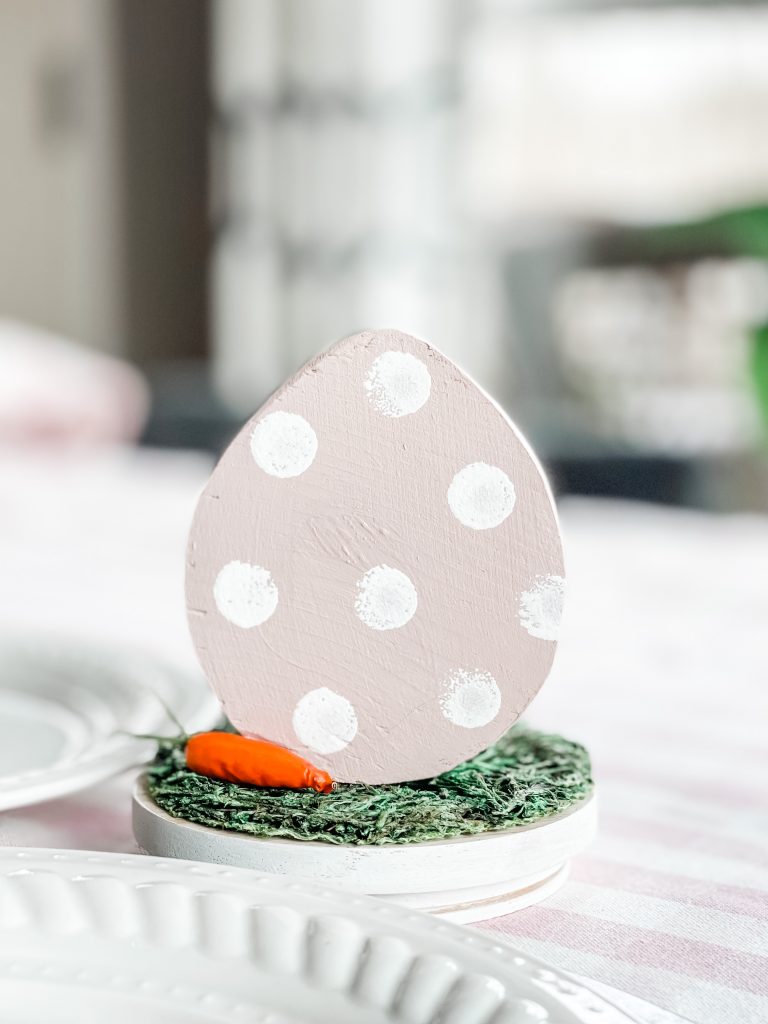
The first decor I made was a candle holder.
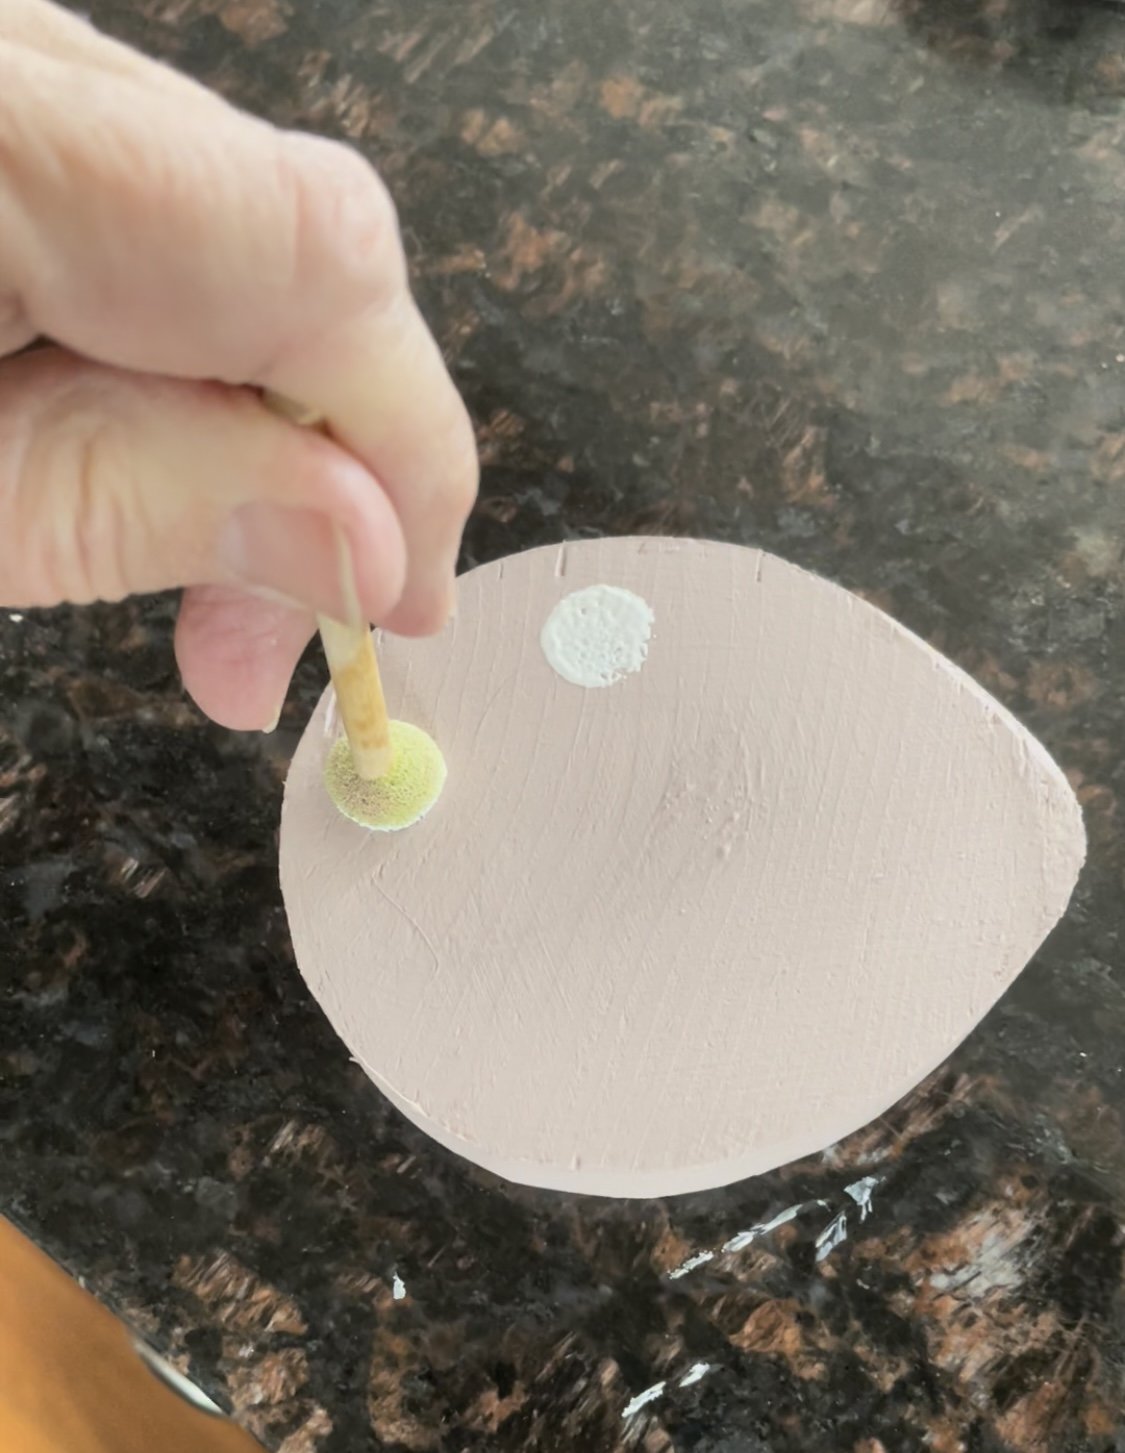
I painted the egg a soft pink and added polka dots.
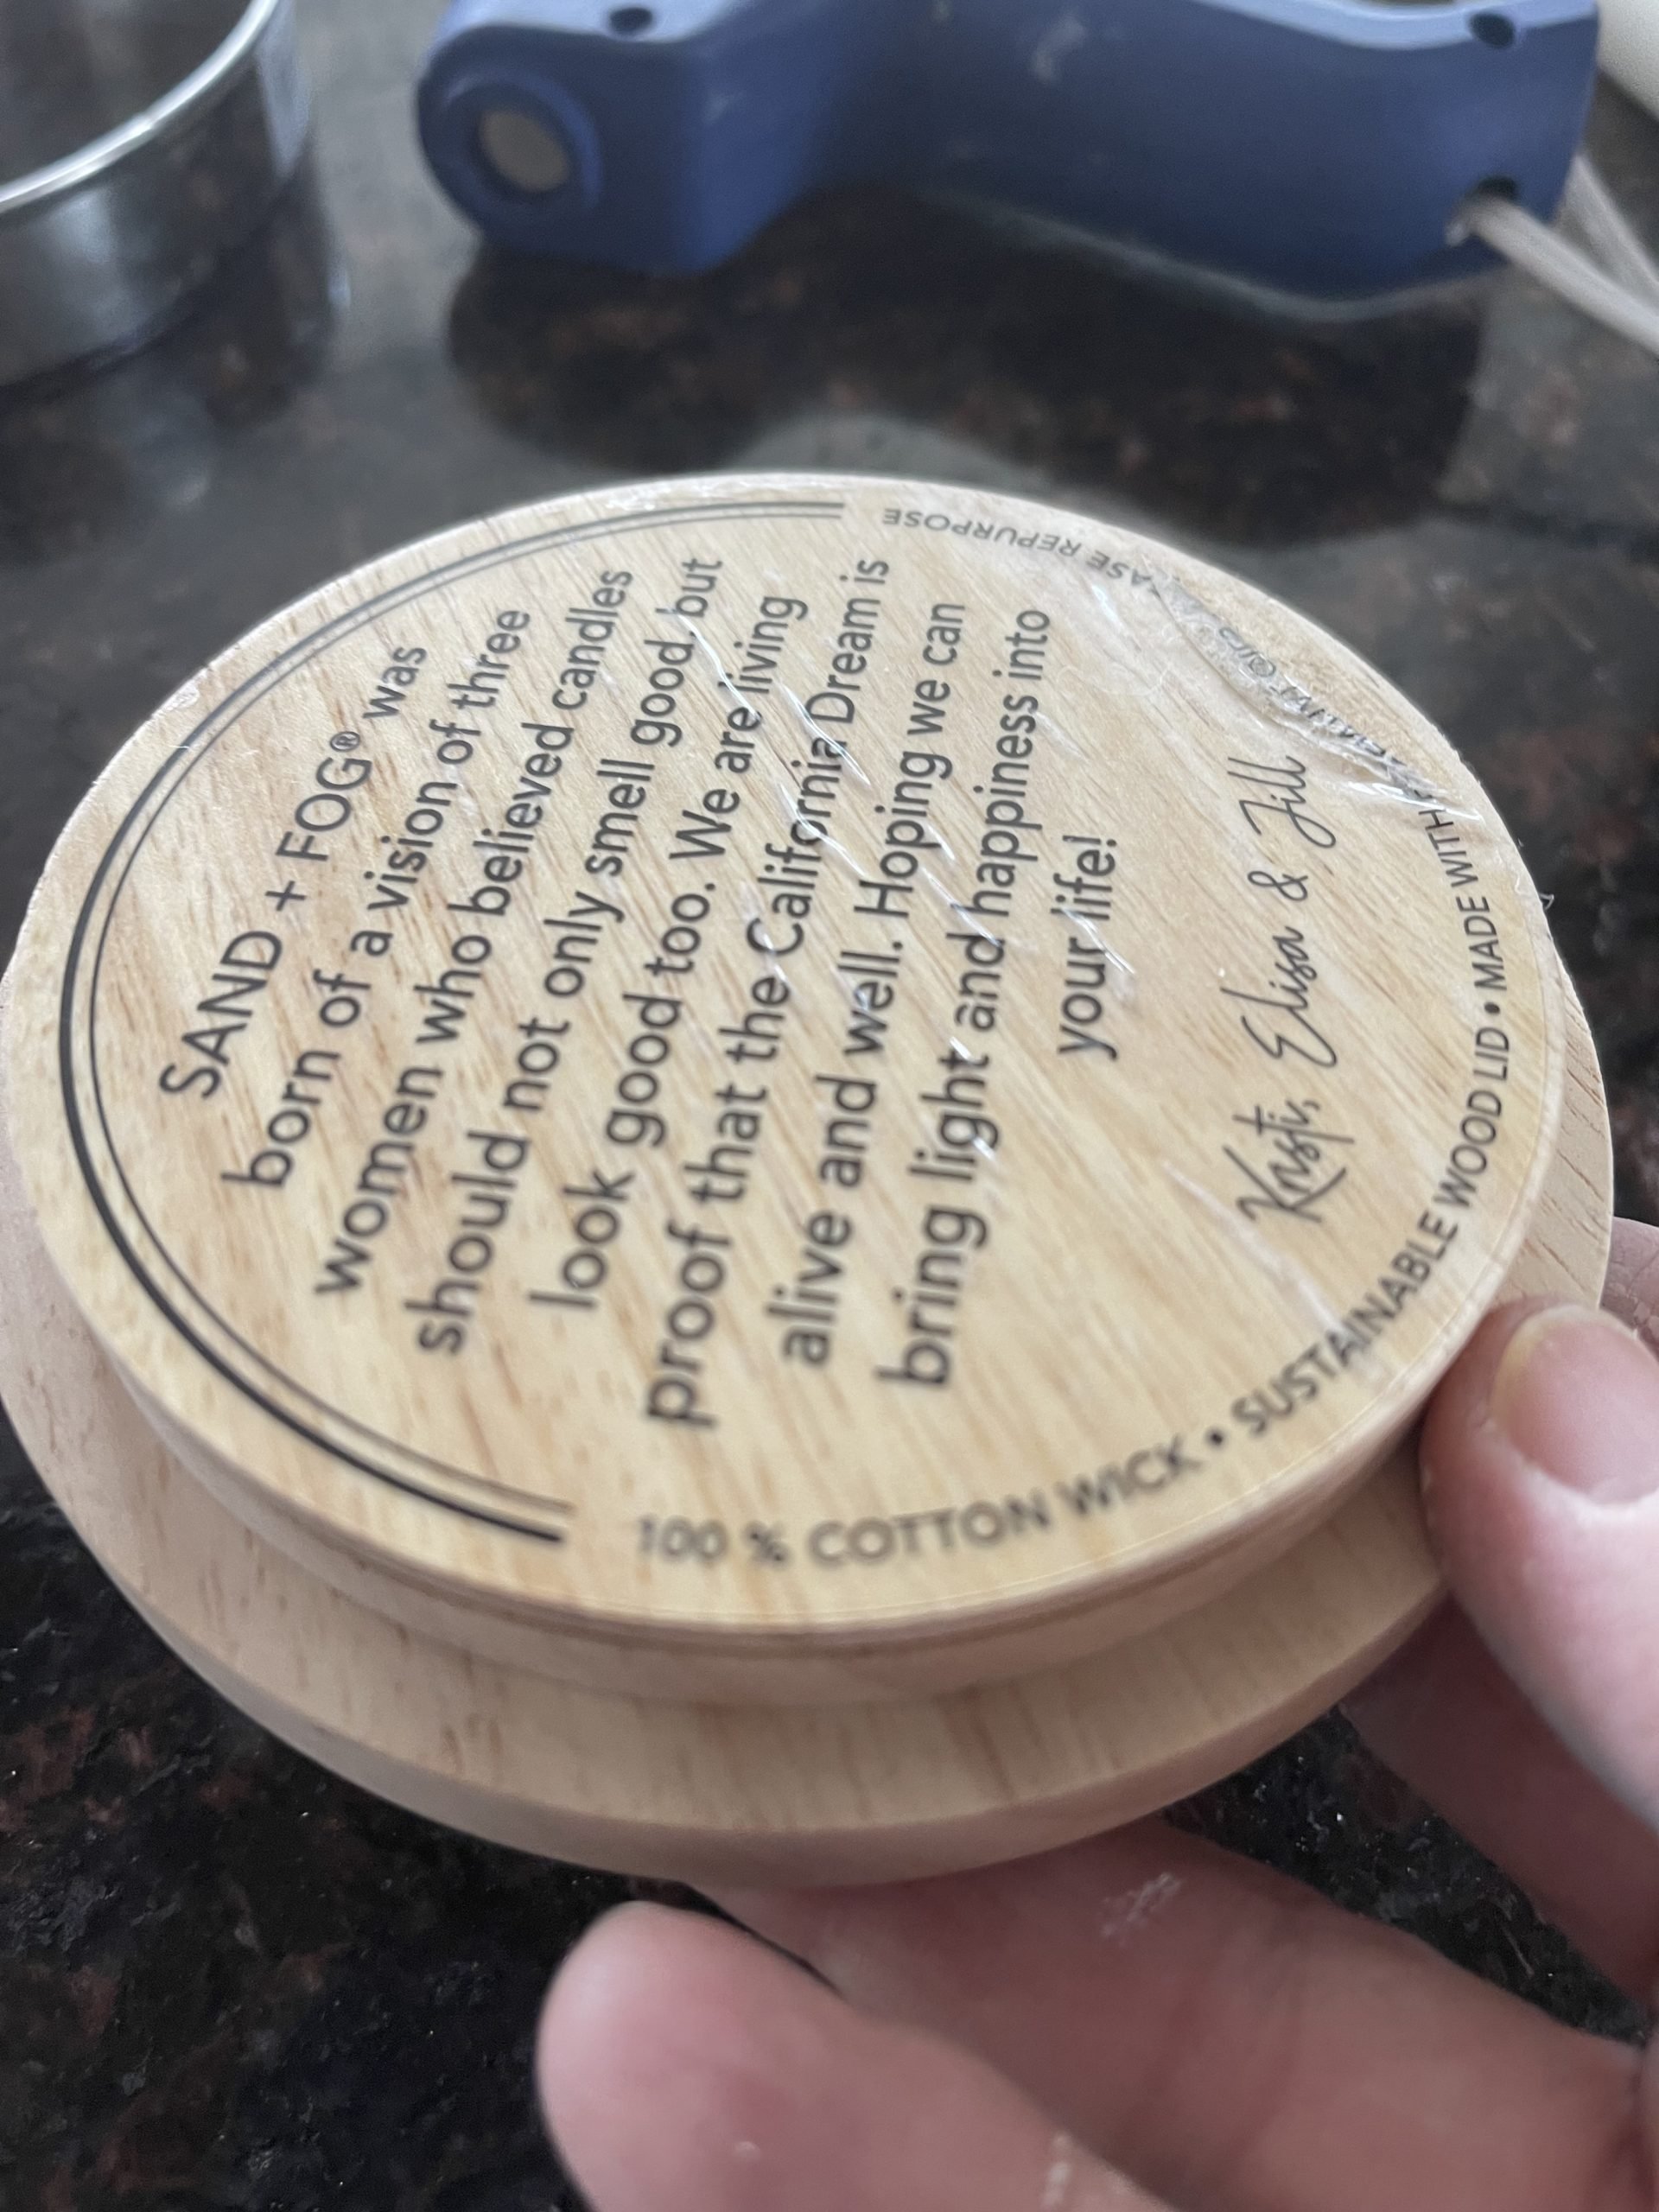
Next I upcycled a lid from a Sand and Fog candle by painting it for a base.
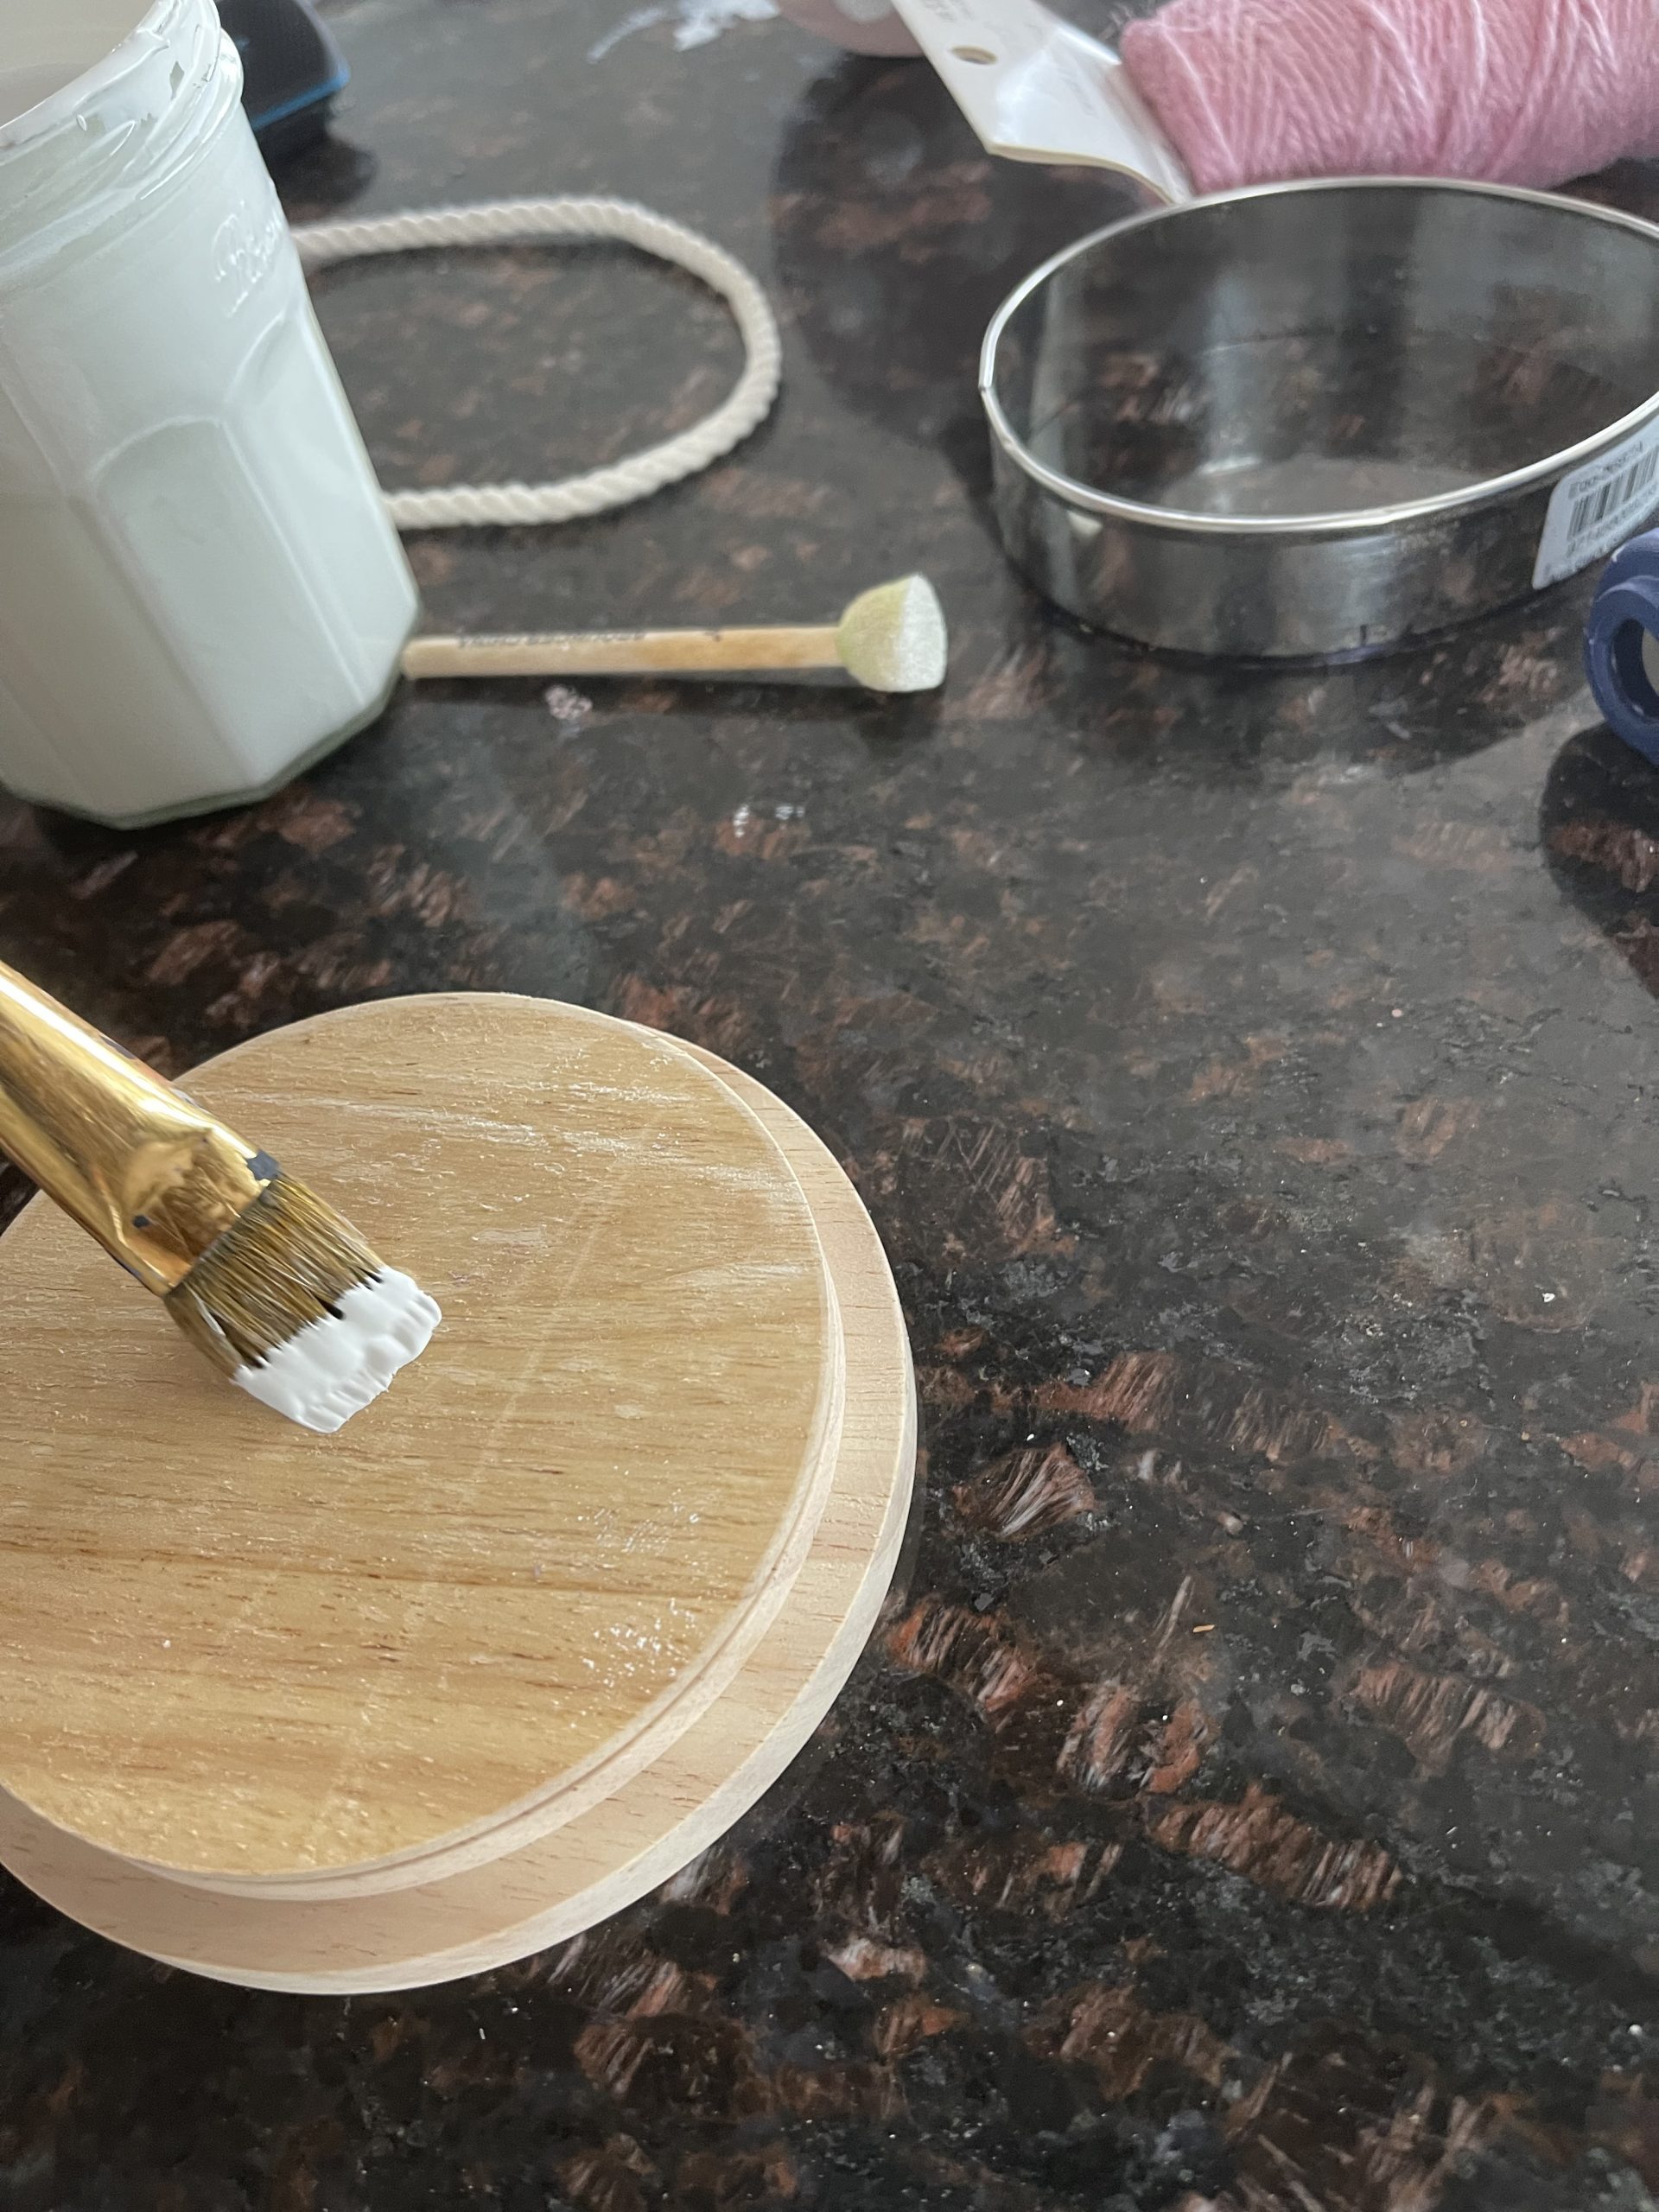
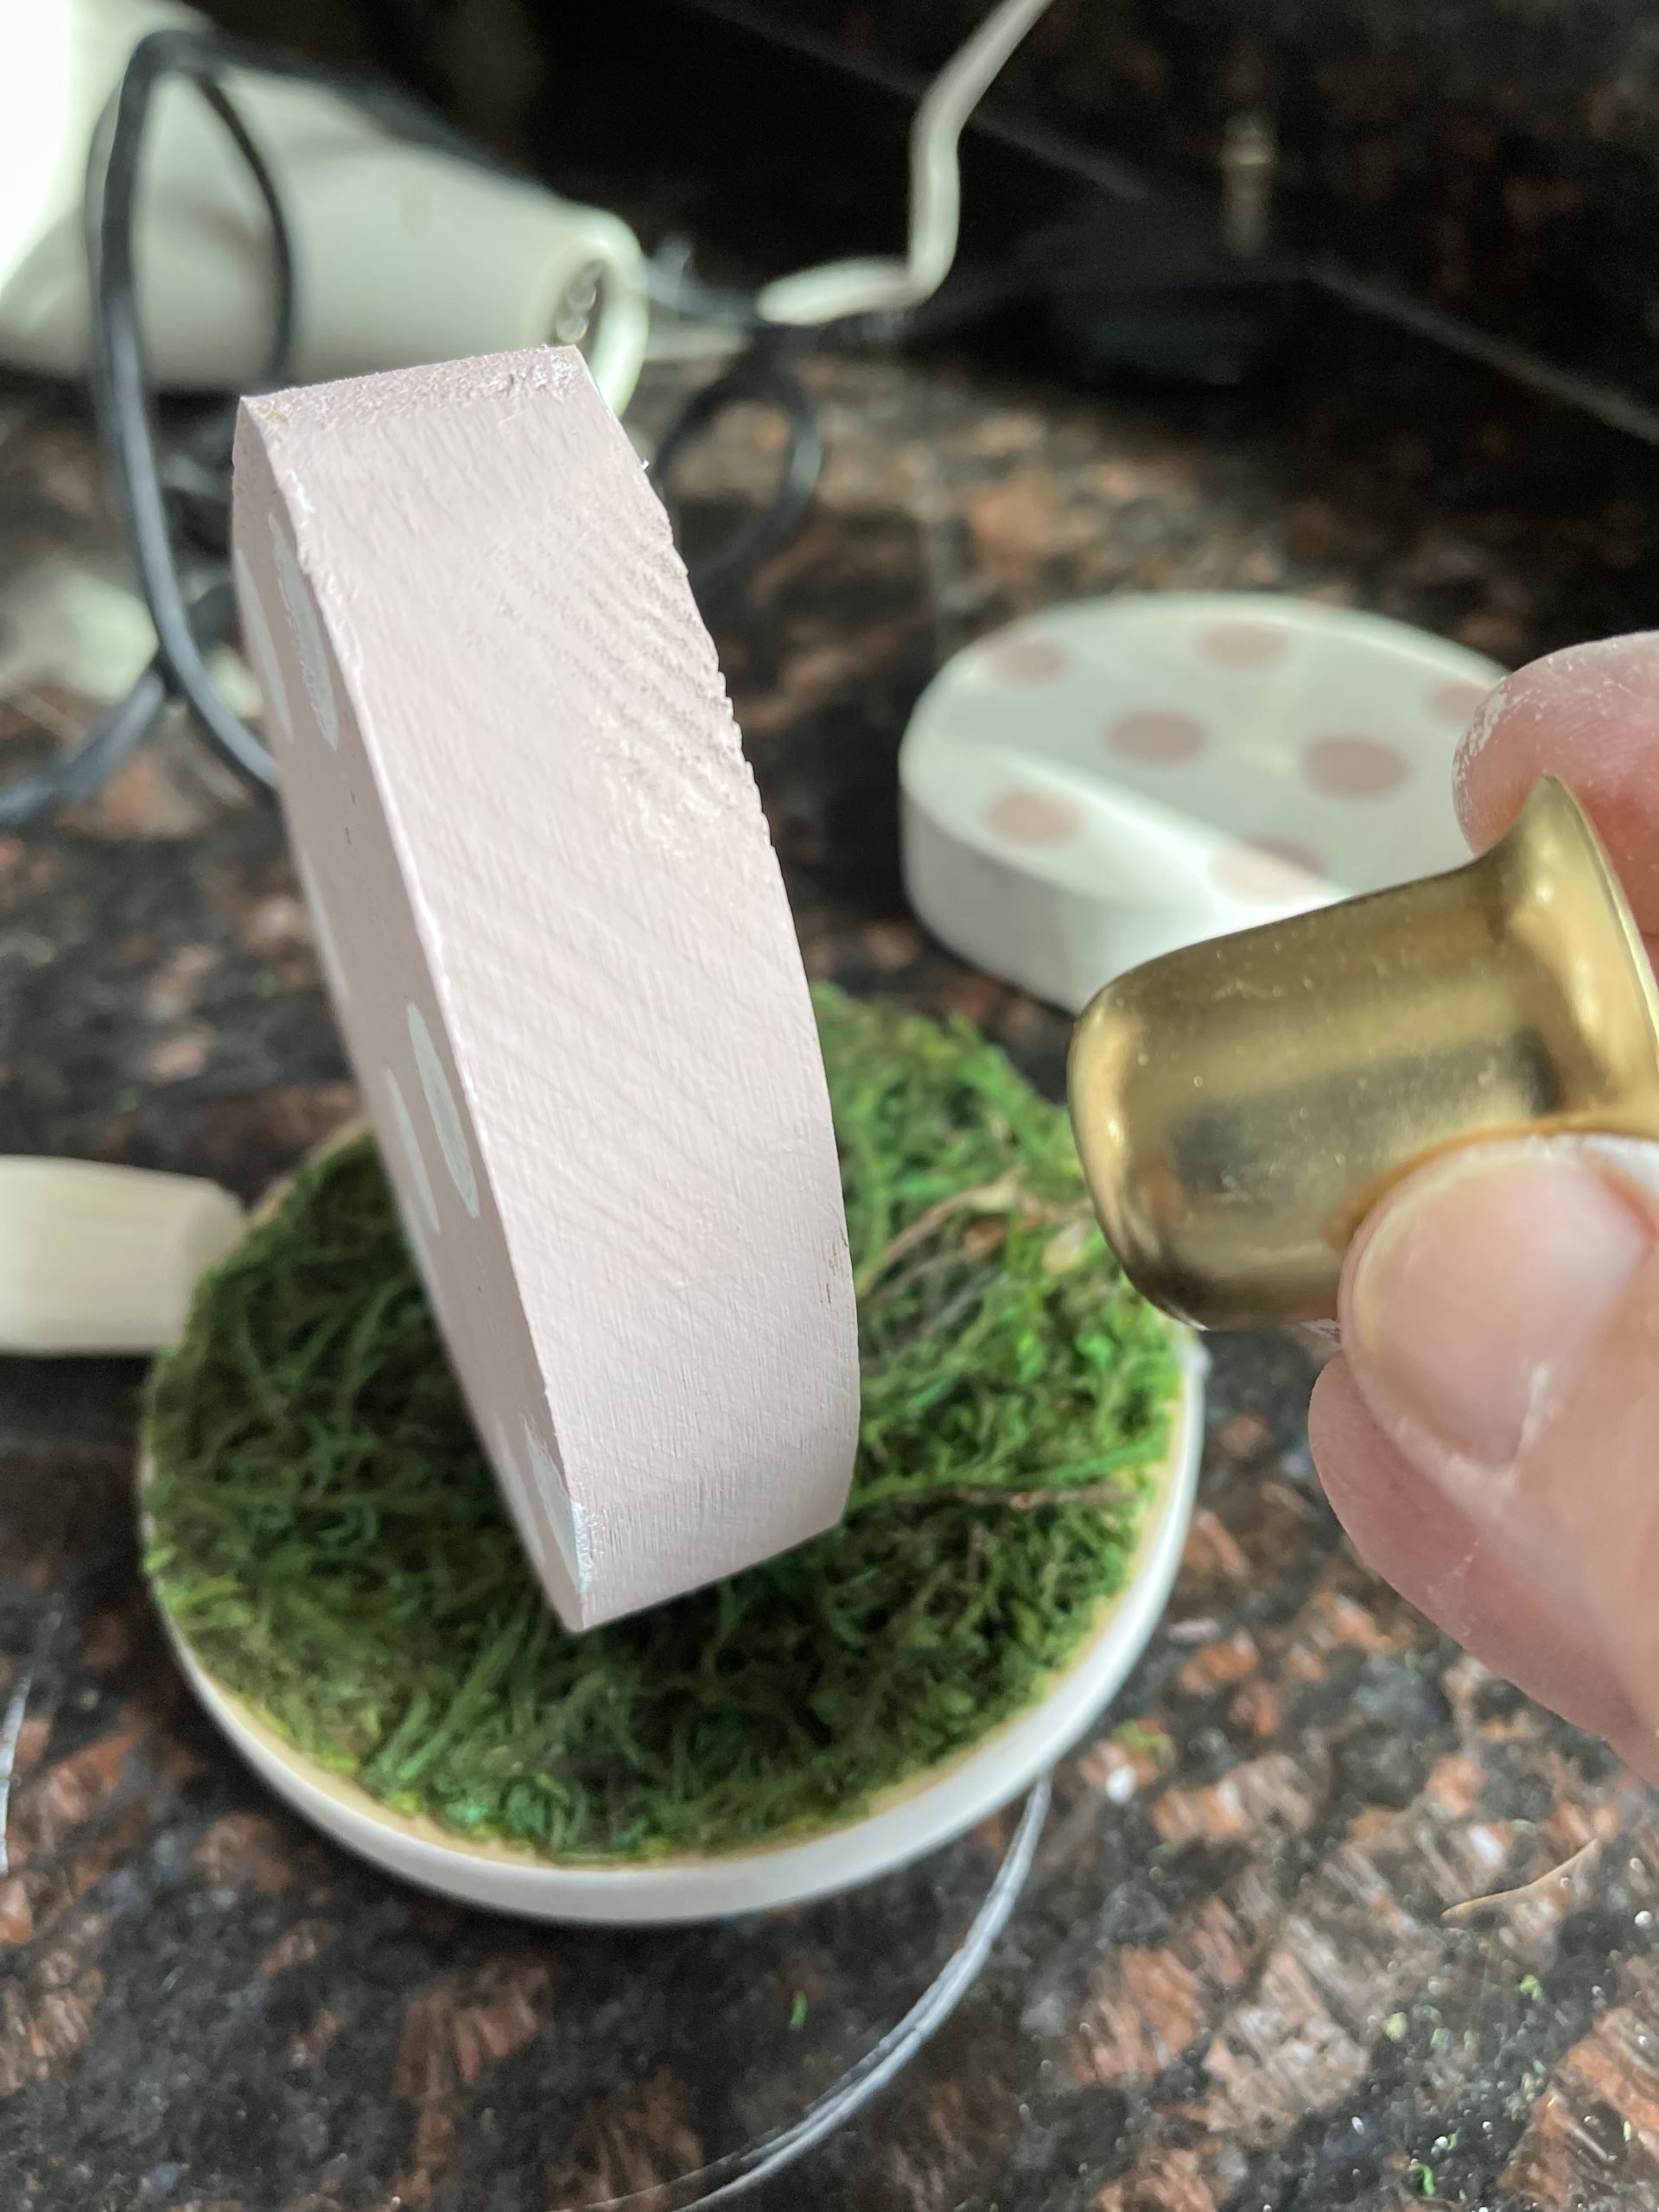
I cut up a sheet of moss and glued that to the top, then added the egg.
Next I added a candle holder behind the egg. Then I added a little carrot.
A cute little table top piece. Imagine all the colors or combinations you could make to match your own table setting.
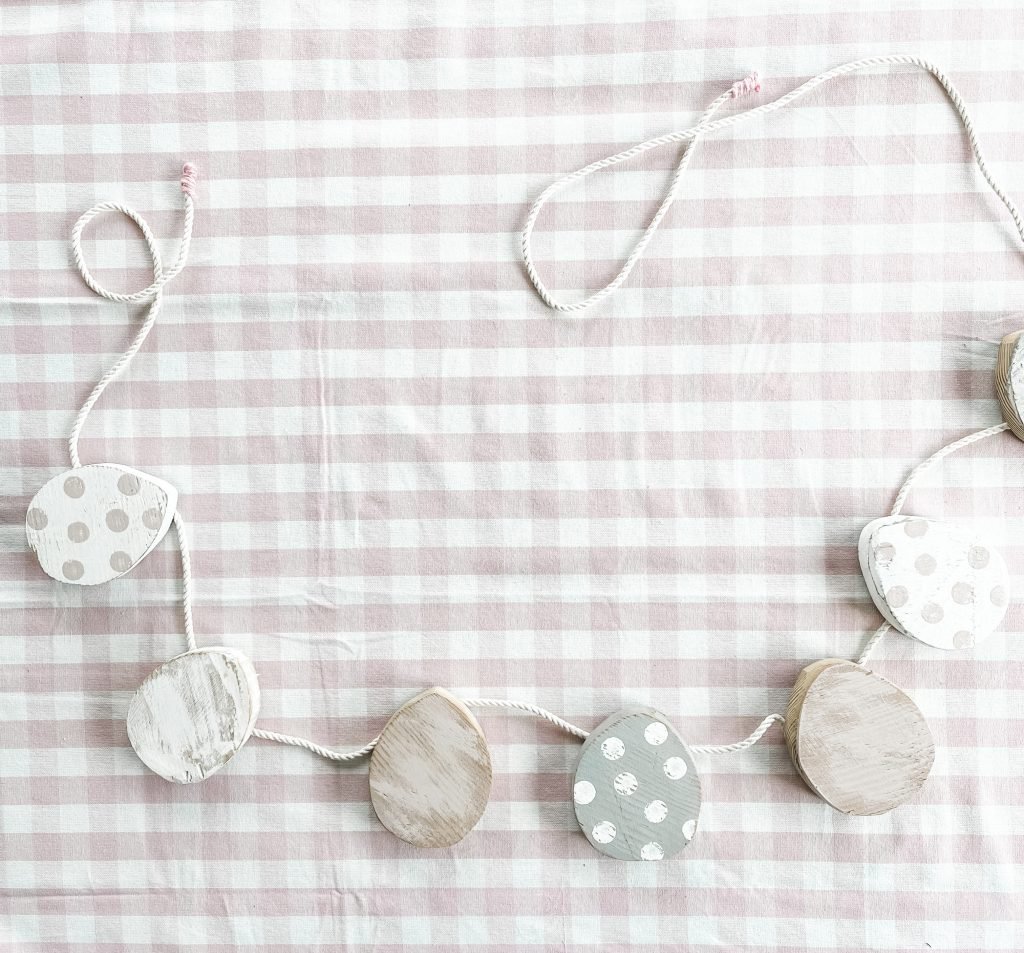
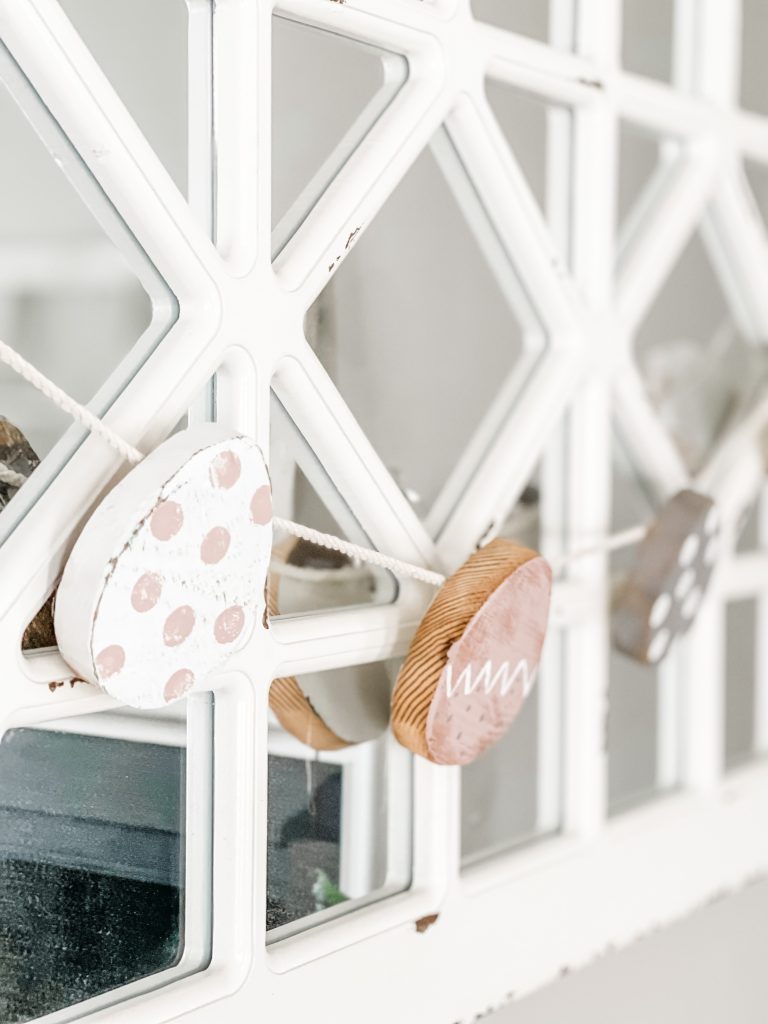
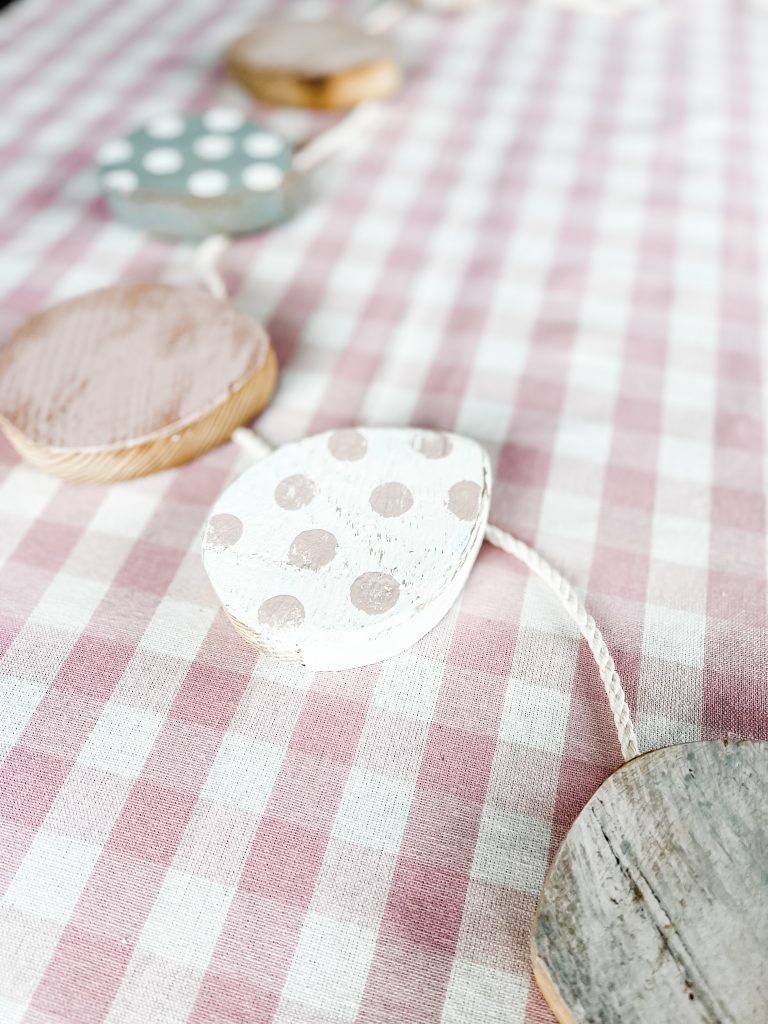
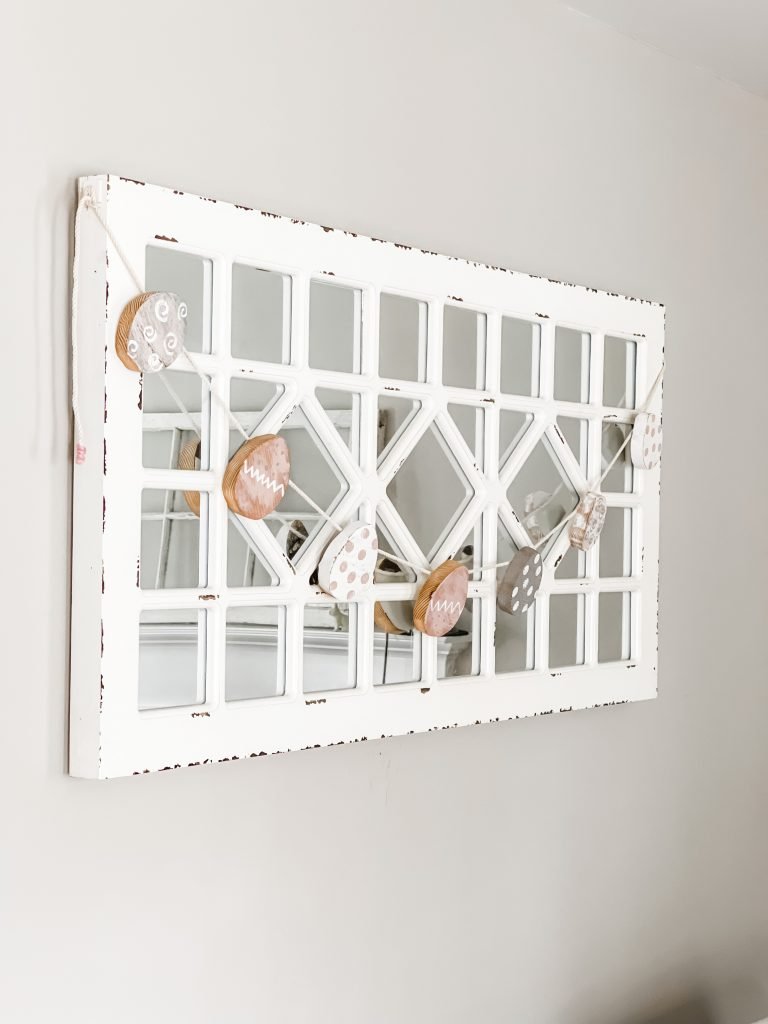
EASTER GARLAND
My next project with the eggs was to make a garland. For these I painted the eggs and sanded them a bit to give them a worn look. Stapled them onto rope and I was done! I love to use garlands for decor but I like them to match my own home.
You could paint these bright colors if you are a person who loves lots of color.
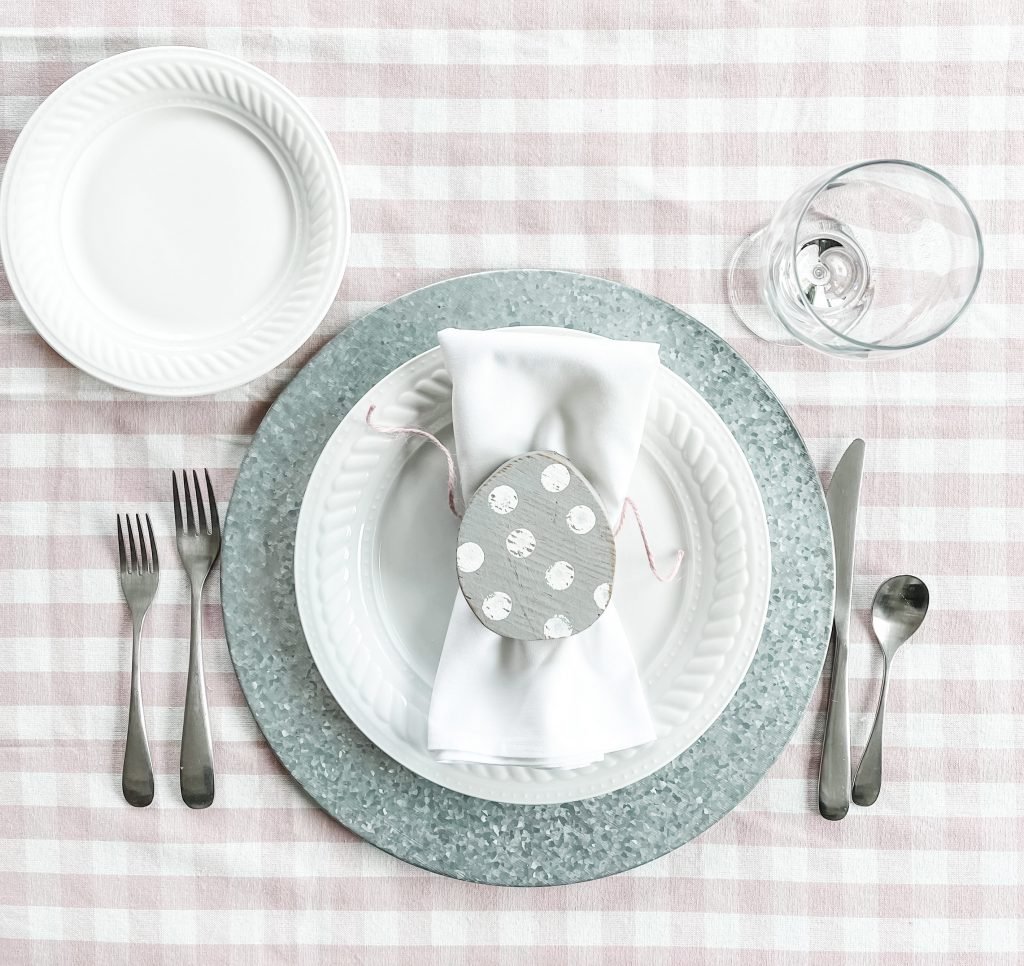
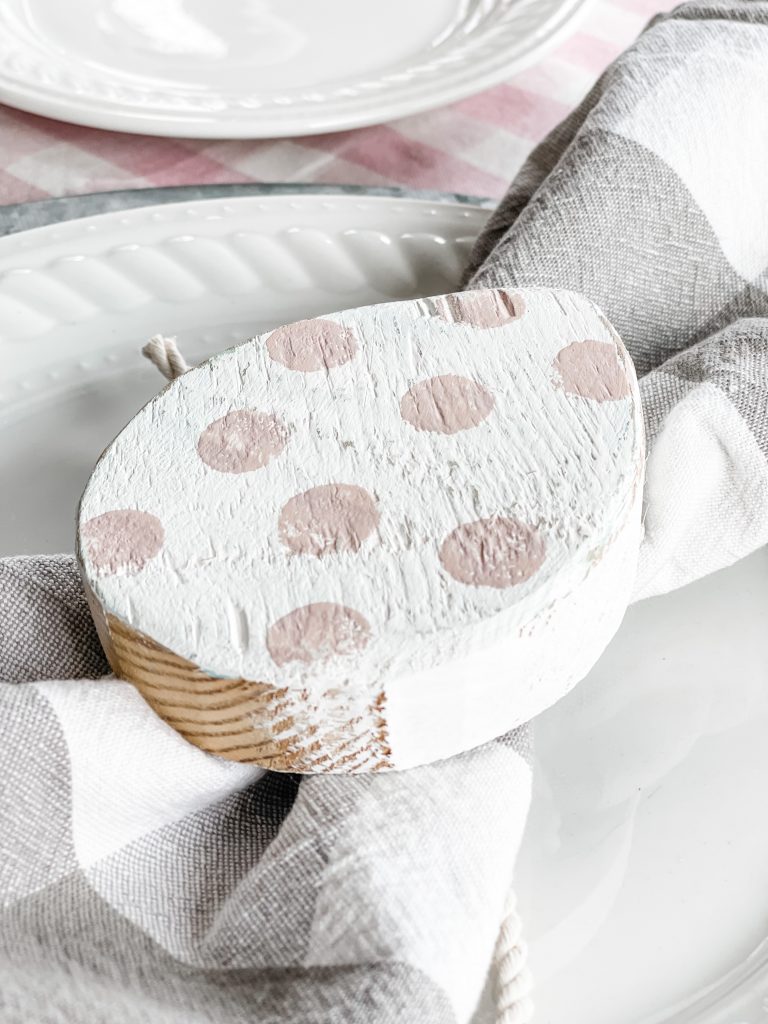
EASY DIY WOODEN EGG NAPKIN RING/HOLDER
My last idea was to use the eggs to hold napkins on the table.
This was so easy to do. I glued a piece of string to the back, folded the napkin and tied the string around so the egg was on top.
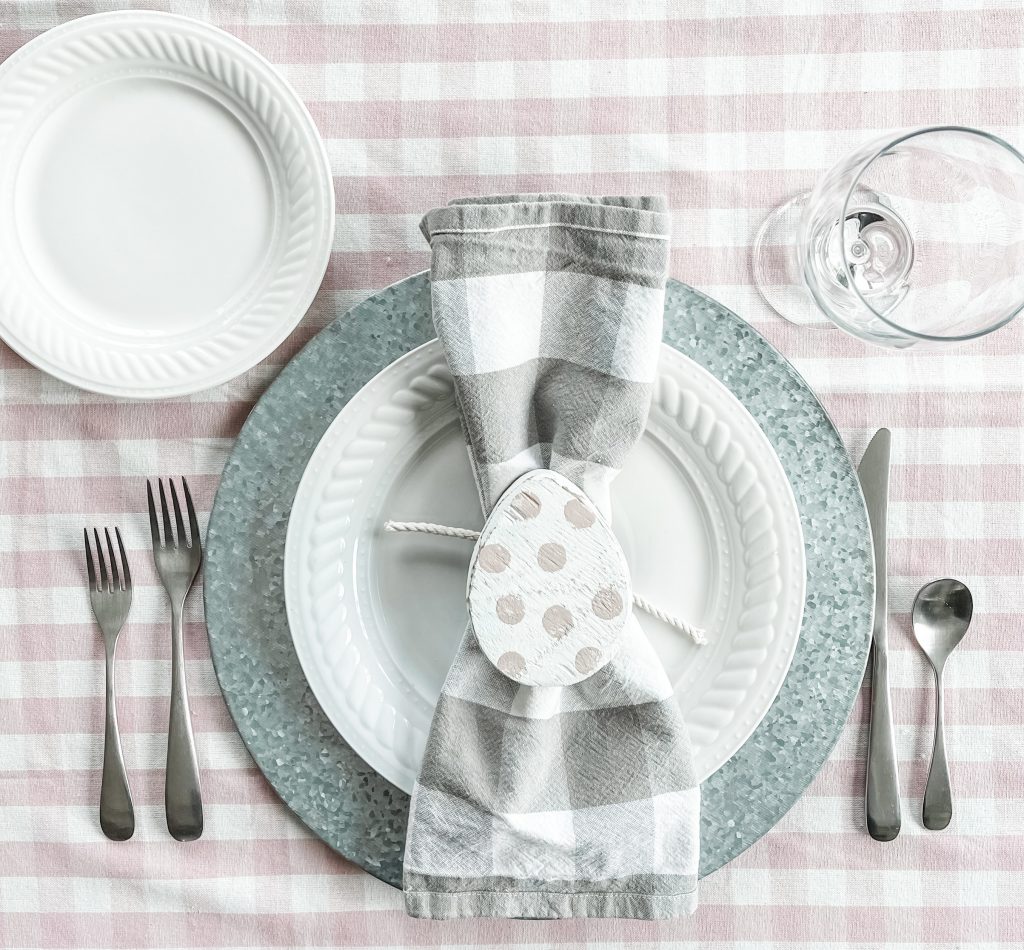
An idea to personalize this could include writing a name on the bottom and using as a placecard/napkin holder.
Here is a sample of other ways you could decorate your eggs if you are not a neutral lover like me!
I painted these to match these beautiful napkins I found at HomeGoods.

MORE EASTER EGG INSPIRATION
Easter is one of my favorite holidays to decorate for. Especially tablescapes. I love bunnies and decorate year round with them. Here is a link to a post with several tablescape ideas for Easter. This post is a must see, it’s got a coastal feel tablescape, one where I use a vintage quilt as a tablecloth and more!
Thanks so much for stopping by. Today I’m part of a Blog Hop that features several other bloggers all sharing information about Easter Eggs. Make sure to check them out
Easter Egg Blog Tour
More Amazing Easter Egg Inspiration
Click the links below the images to go straight to their posts. ENJOY!
Chalking Up Success // My Uncommon Slice of Suburbia // Bluesky at Home

The Everyday Farmhouse // Saved from Salvage // Zucchini Sisters // Cottage on Bunker Hill

This Dear Casa // A Life Unfolding // A Life of Balance
I’m sharing some things I’m loving for spring and Easter.
Thanks so much for stopping by. I’m off to the Poconos with family for a winter weekend getaway.
Enjoy your weekend, XO, Regina
THIS POST CONTAINS AFFILIATE LINKS. IF YOU PURCHASE FROM THESE LINKS, I RECEIVE A SMALL COMMISSION AT NO ADDITIONAL COST TO YOU. THANK YOU FOR SUPPORTING MY SMALL BUSINESS.
Great idea! You could do so many things with these cute little wooden eggs! I love the colors you chose and how you used them!
Oh, how cute! I need some creativity in my life right now!
All these ideas are pretty.
Pinned
These came out great! I save all my wooden candle lids too…they make great risers inside my pots for my houseplants too.
How cute. I love the softness of this.
Regina, what a cute idea. I’m impressed by anyone who knows how to use a jigsaw. I love that you got three different projects out of one idea and one piece of wood. Can’t even choose which one I like best. They are all darling.
Regina, your wooden eggs are adorable! I love the garland and napkin rings. This inspires me to learn how to use a jigsaw. I need to face my fear of power tools lol! Thanks for sharing. Pinned 🙂
OOh, I love these eggs! The garland is sooo cute. Thanks for sharing, and enjoy your weekend!
These turned out great Regina! I love how creative you are in reusing scraps of wood. We have a large scrap wood pile. I need to start going through it and using it up. Thanks for joining the hop.
You are so creative Regina! I just love everything that your doing! Thank you so much for sharing to Fabulous Friday Link Party!
Regina, I love every idea! I love that you up cycled the lid of the candle to use as a base for your egg. Happy Sunday
All of your ideas are so cute. Love the paint colors you chose too.
Your toothbrush idea is brilliant! The eggs look great paired with the fern.
I love the garland…that is so pretty!! Great ideas and super creative! Thanks for sharing!
Very pretty table. I just like the burlap and twine mixed in with the wooden eggs.
Thanks for sharing at the Sunday Sunshine Blog Hop
Laurie
Love these Regina! You have the best ideas! Pinning😊 Feel free to share this post over on Tuesday Turn About link party this week!
The wooden eggs turned out so cute! I love how you styled them in different ways! So creative! Donna
LOVE your ideas for these adorable wooden eggs. The soft colors and polkadots are so cute!
Thanks for stopping by. Appreciate it!