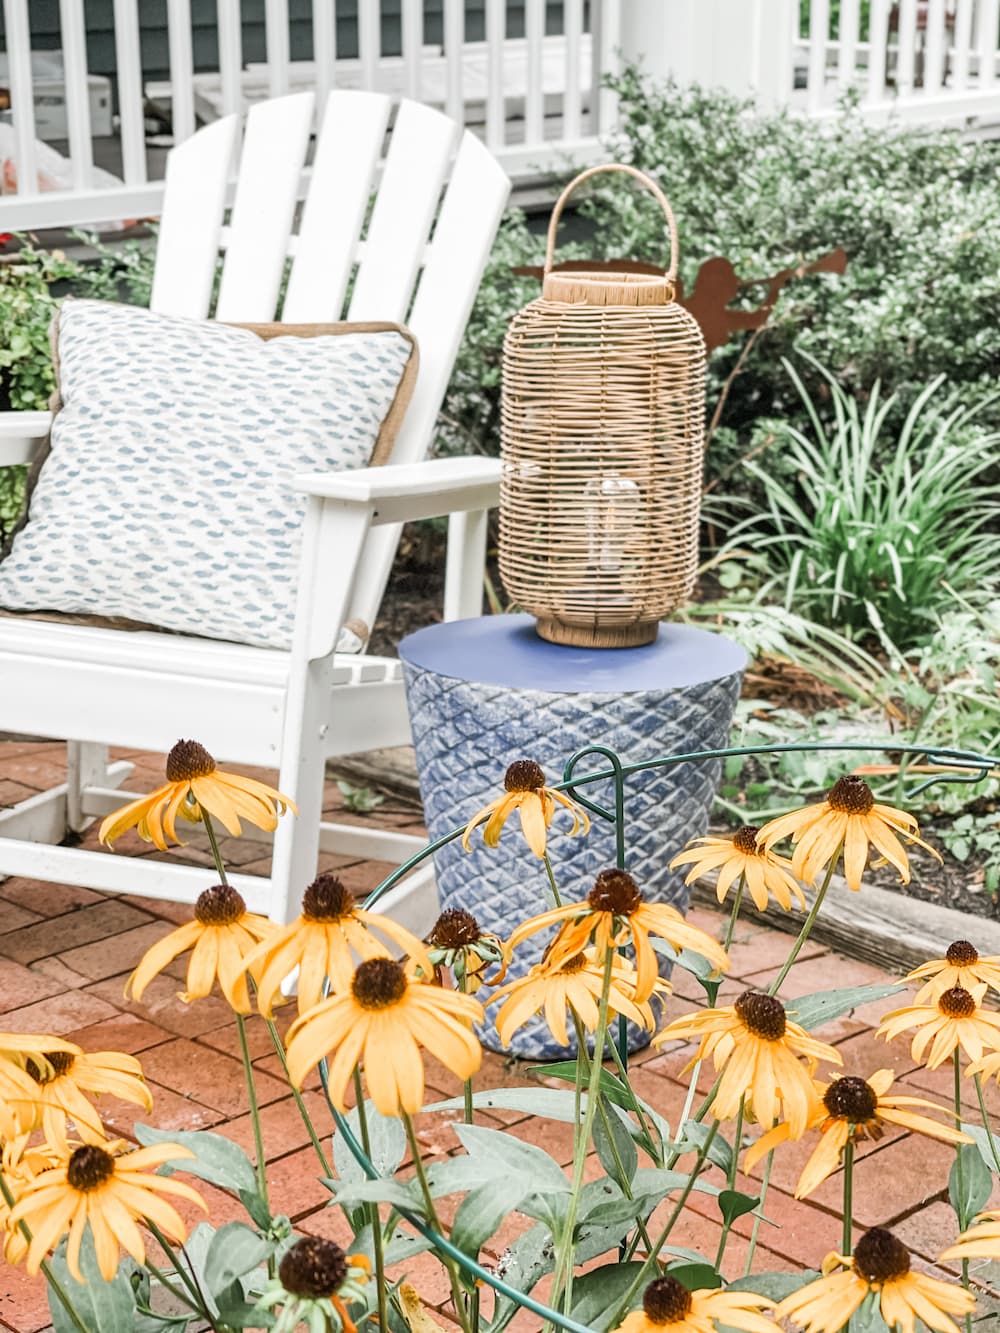
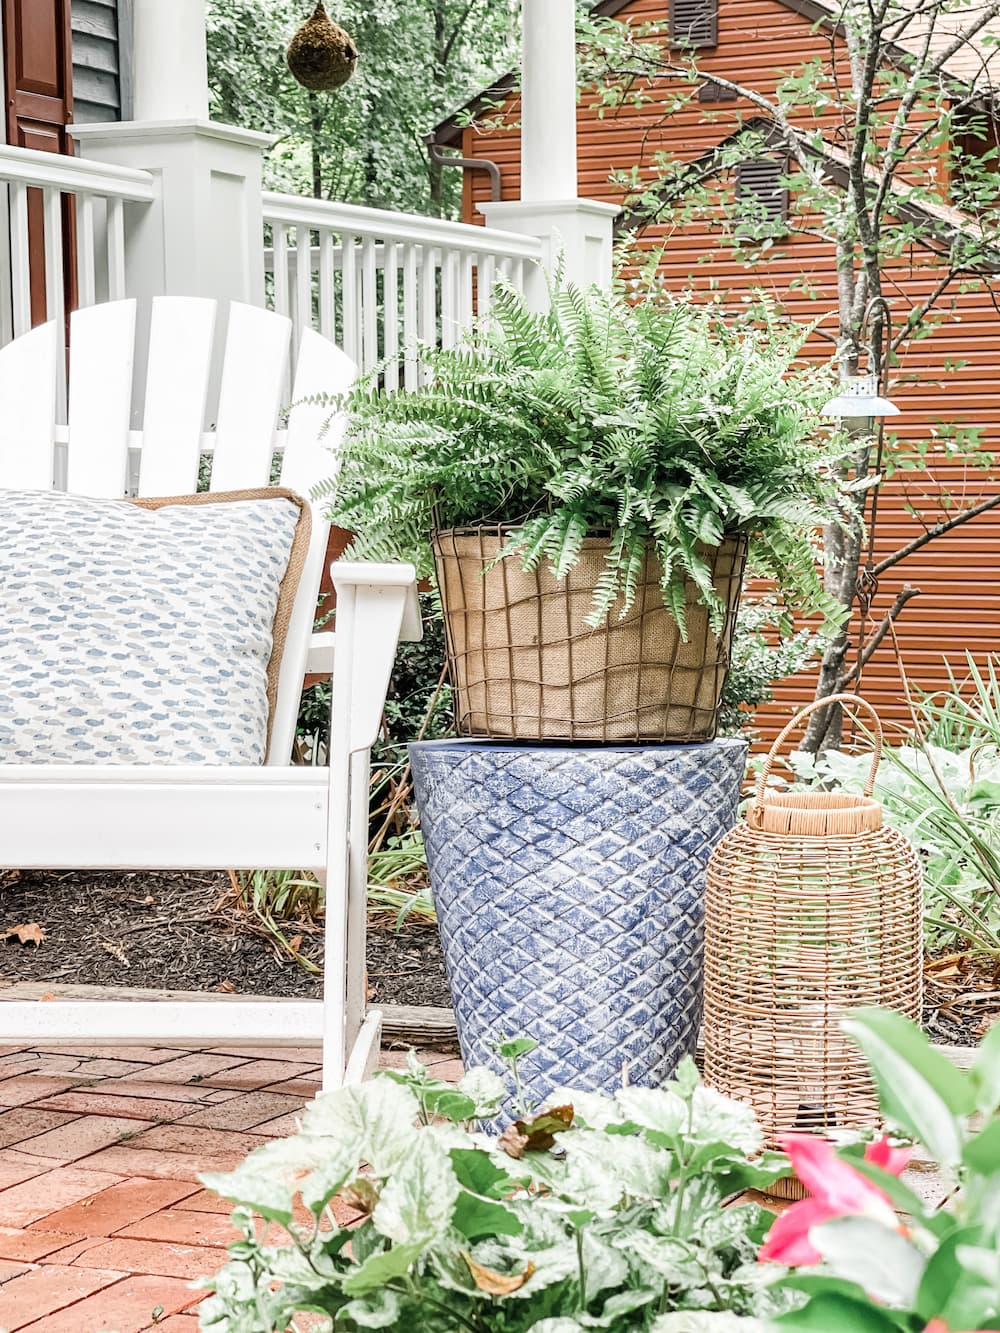
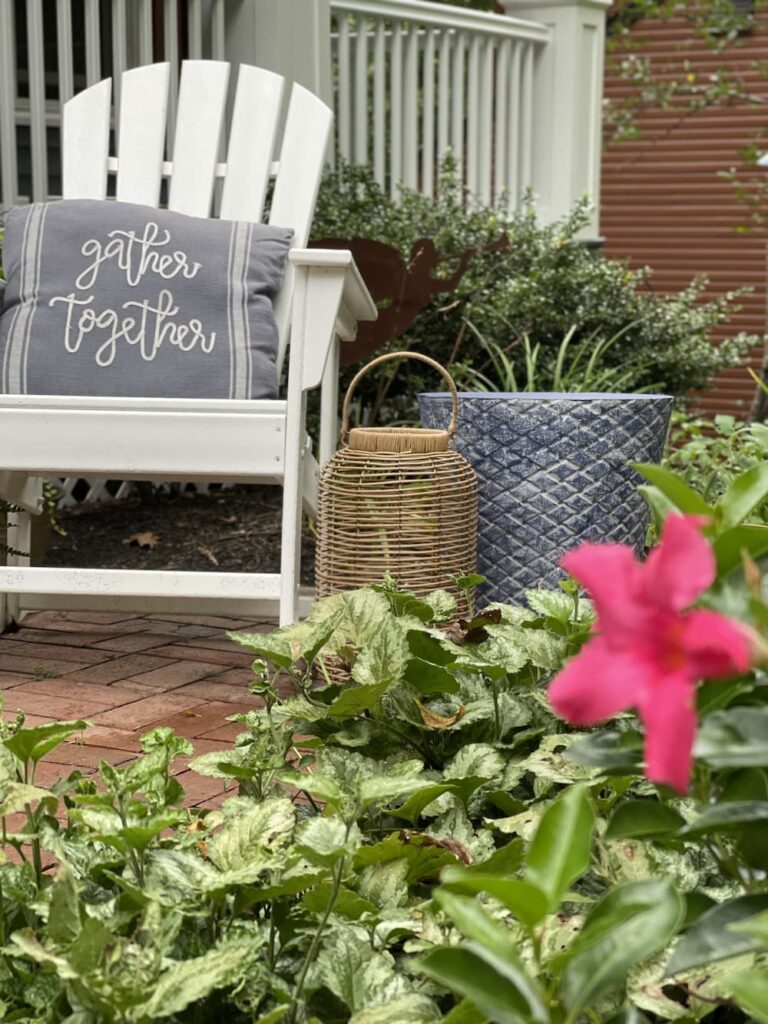
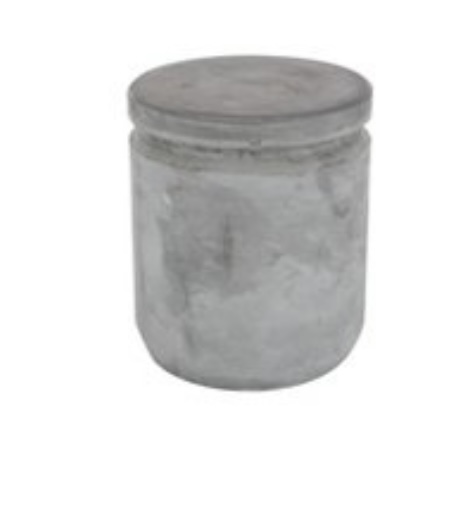
Looking for a versatile piece for indoor or out? This concrete side table is easy to make and can double as a seating option.
I’m Regina and welcome to Saved From Salvage. I have to admit, I have a thing for concrete, I don’t know why but I love working with it.
I have made concrete leaves, bowls, stools, planters and I’m sure I’m forgetting some.
This is to show you that you shouldn’t be intimidated by working with it. It’s really just a matter of mixing water and concrete. I’m sharing how I made this side table/stool today.
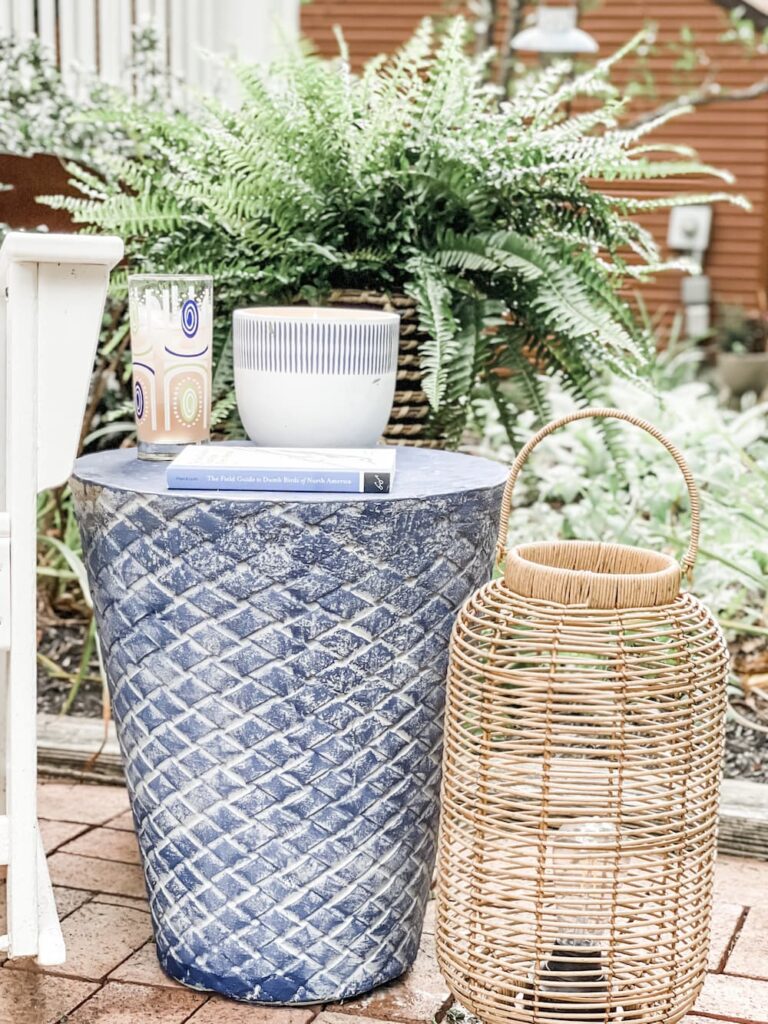
Table of Contents
CONCRETE TABLE INSPIRATION
This summer my soccer team traveled to Chattanooga, TN. to play. We rented a home on Signal Mountain with amazing views of the Tennessee River and city.
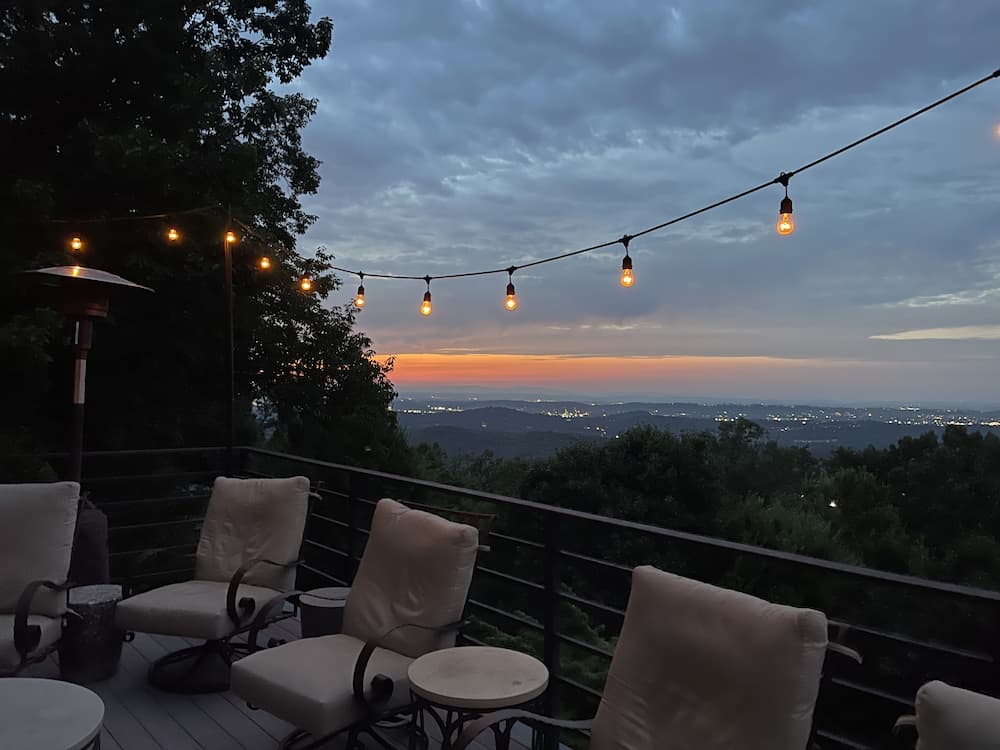
On the beautiful outdoor area, in addition to chairs and a coffee table, there were several of these concrete stool, side tables.


SCENES FROM THE MOUNTAIN
We used them as both depending on the number of us on the patio.
We all loved them. Especially the blue and white, I was wondering how they did it and I made up my mind there, that I would try to recreate one.
Of course I didn’t take a close up picture but I remembered them. The shape and colors.
CONCRETE TABLE MOLD
I have made a concrete stool before, a knock off from Terrain. You can see that here.
For that one I used a concrete footer form.
But the one in TN tapered at the bottom.
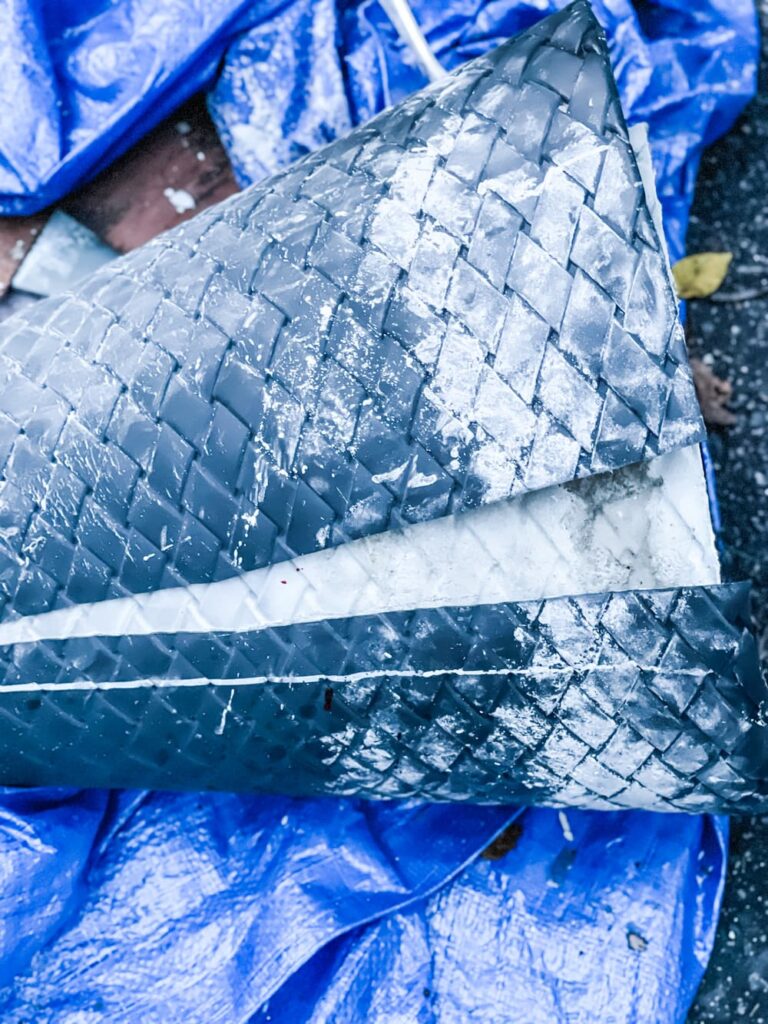
Then, I spotted a plastic planter at Sierra on clearance and had to have it. The size and pattern were perfect.
STEPS TO MAKING A CONCRETE TABLE
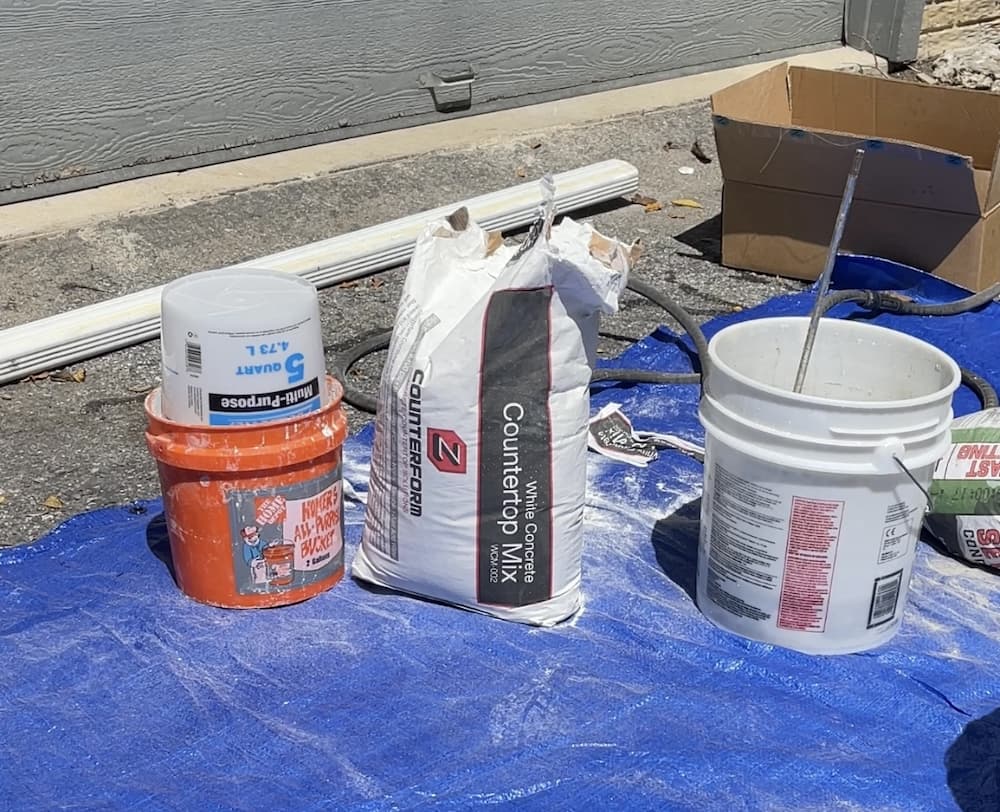
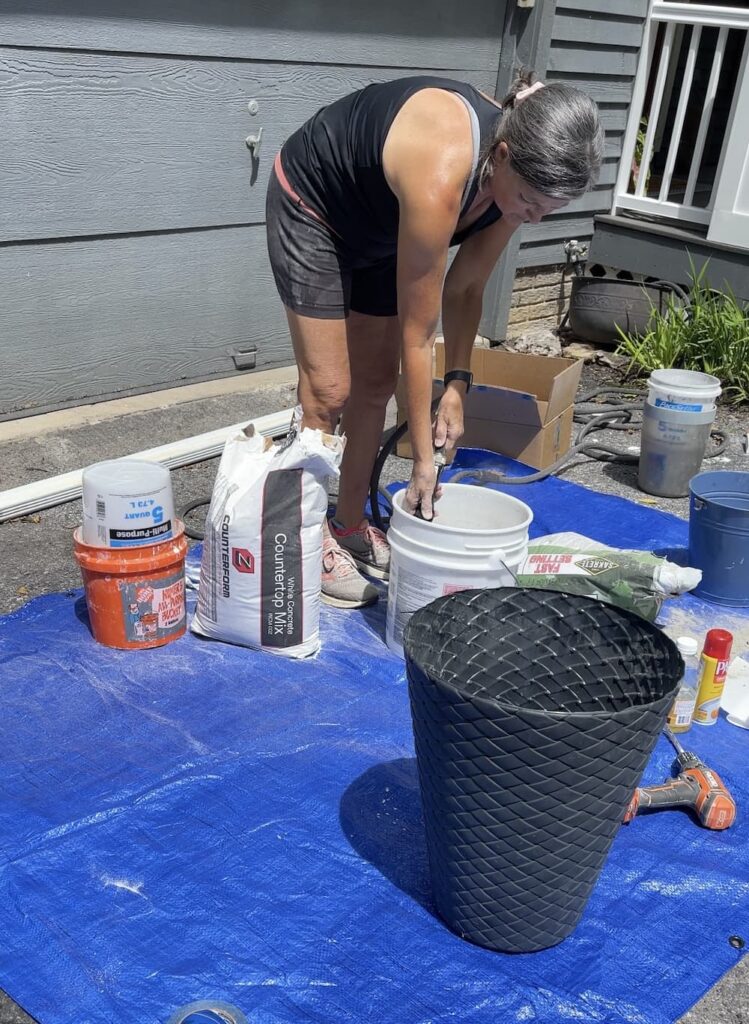
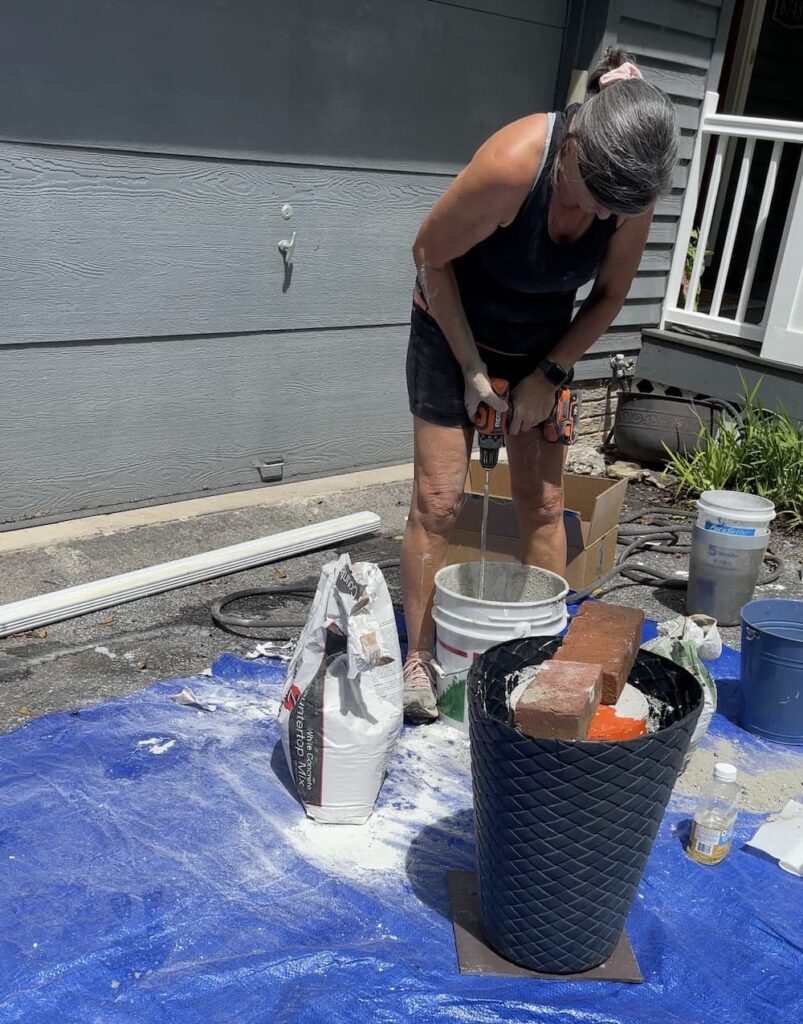
Now that I had my mold (planter), I gathered my supplies and put a tarp down in the driveway.
Unfortunately I do not have a picture of what I looked like when I was done.
Pigpen from Peanuts has nothing on me when I’m creating with concrete.
STEP ONE (GATHER SUPPLIES)
5 gallon bucket to mix the concrete and water. I had the hose to add the water.
Mold (Planter), cooking spray and a drill with the mixing end for the concrete.
2 gallon bucket and a 5 quart plastic container that I used to take up space and reduce the weight.
STEP TWO
I mixed my concrete in the 5 gallon bucket with the drill, adding water until I had a thick cake batter consistency.
That’s done with the mixer attachment.
STEP THREE
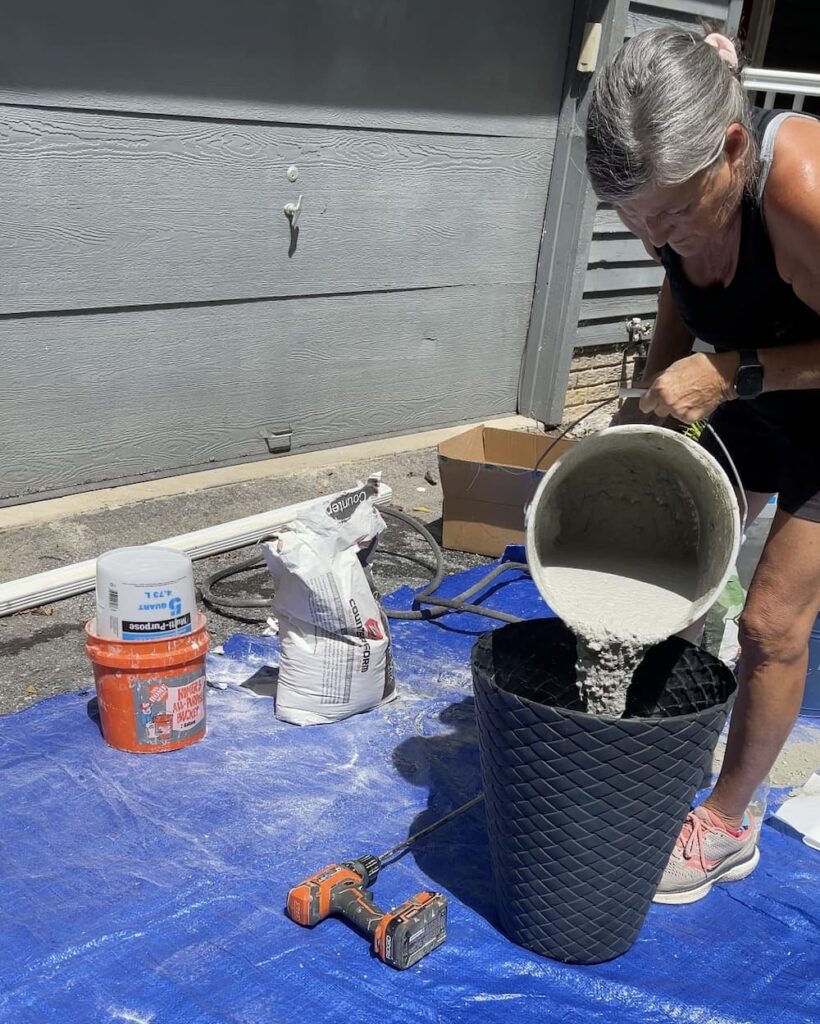
I poured some of the concrete into the bottom of the sprayed mold/planter. I wanted that to set up a few minutes before I added more.
STEP FOUR
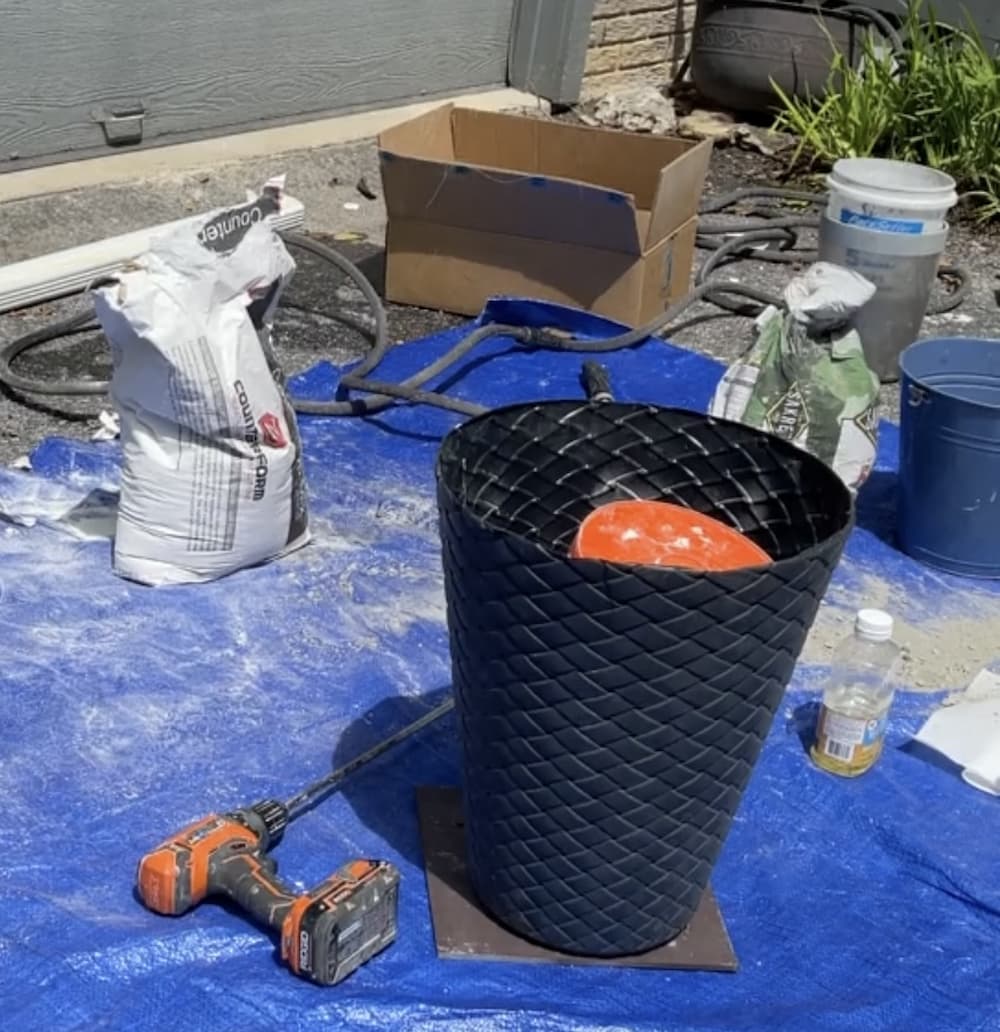
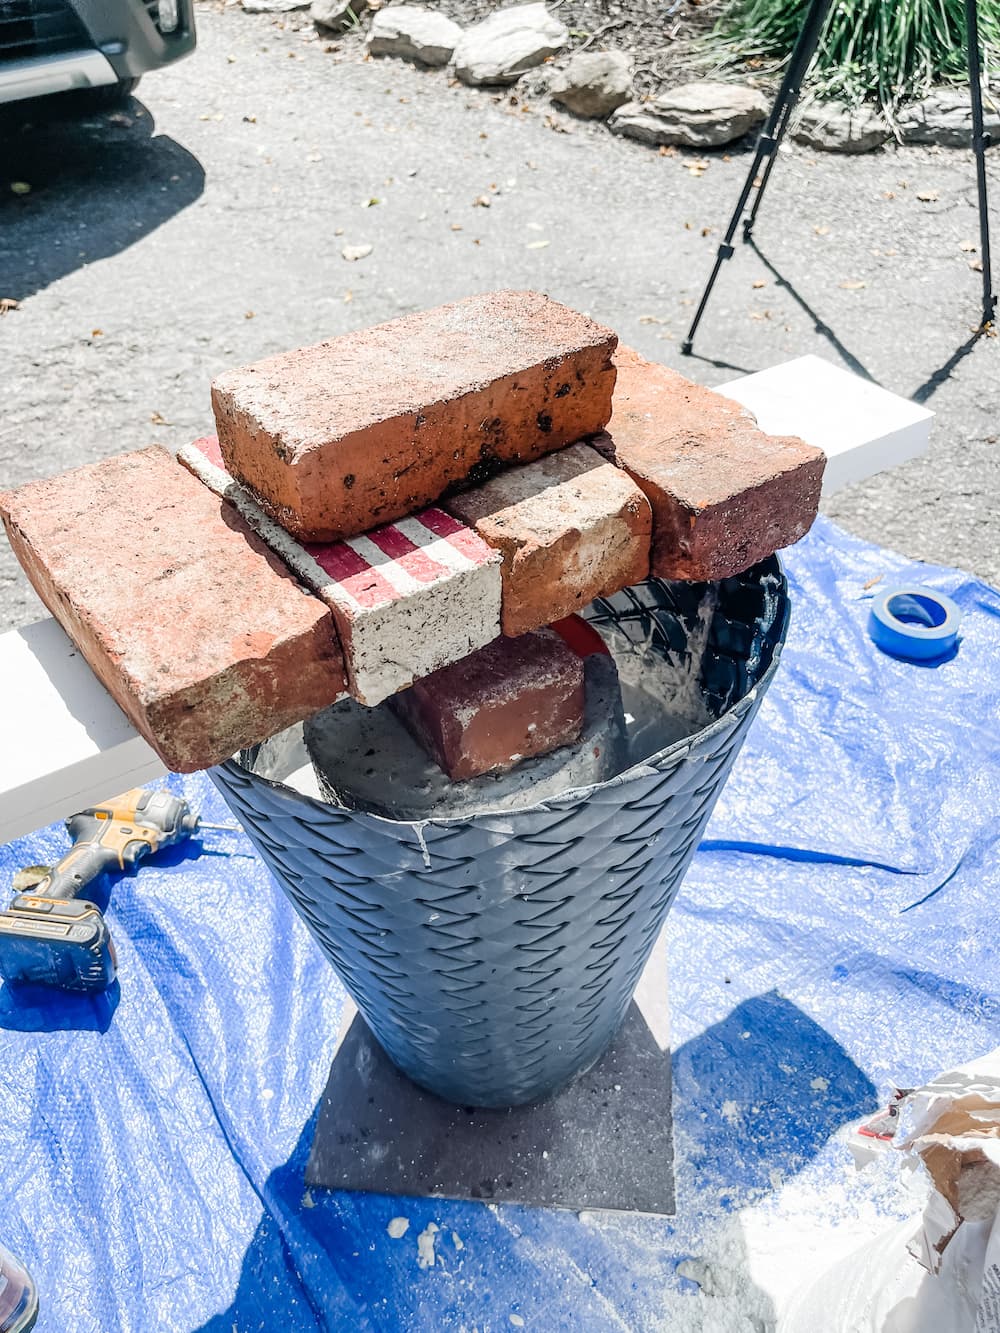
Next I added my plastic containers to take up space.
Unfortunately they kept floating to the top. So I drilled a tiny hold in the bucket to let air out. Not big enough for any concrete to get in though.
Then I had to lay bricks on top of the smaller bucket and then place a board and more bricks to hold it down.
Then I poured in more concrete and let it set up a bit.
ADDING THE EMPTY BUCKET TO TAKE UP SPACE AND HOLDING THEM DOWN WITH BRICKS
STEP FIVE
Before adding more, I stirred the concrete lightly so the new would mix with well with what I had already poured.
I then filled it to the top and let it sit.
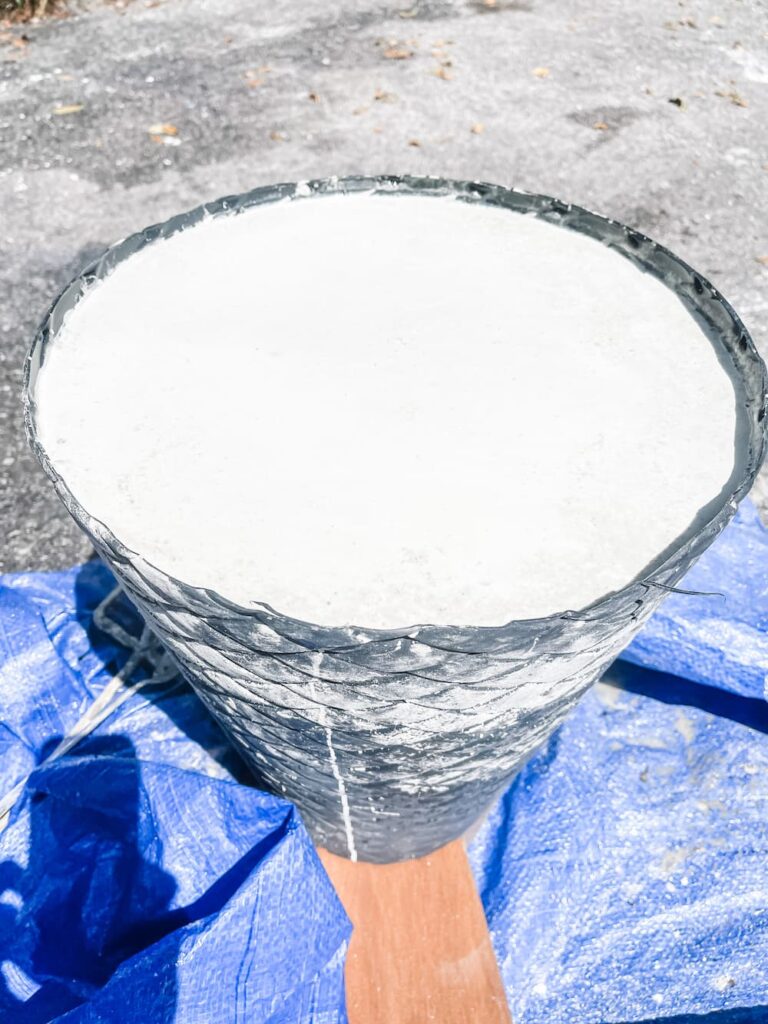
STEP SIX
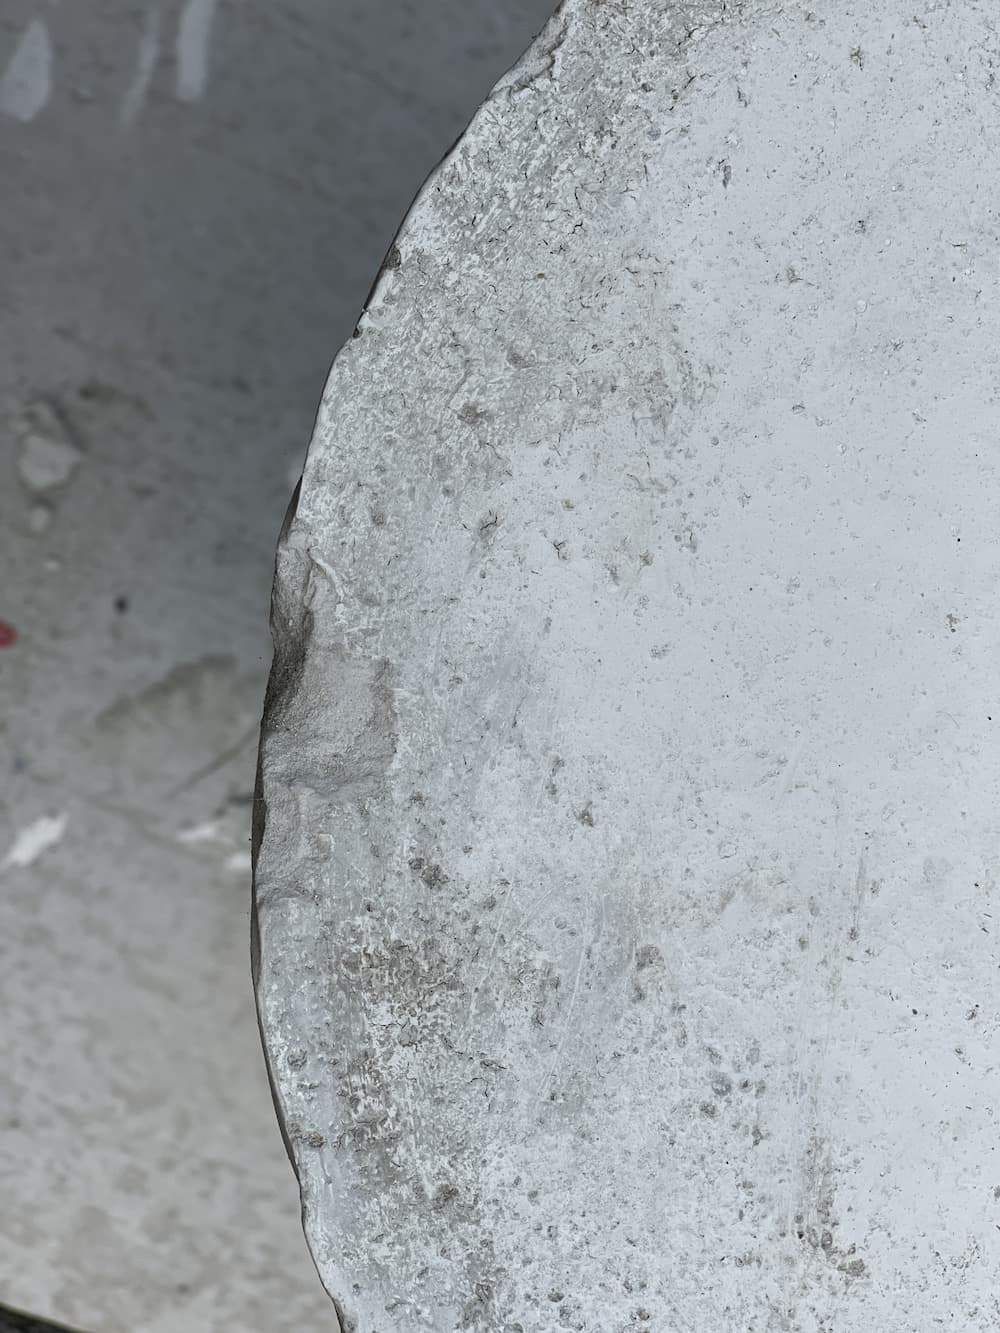
After 4 hours, I was able to take a knife down the side of the planter and it released perfectly.
STEP SEVEN
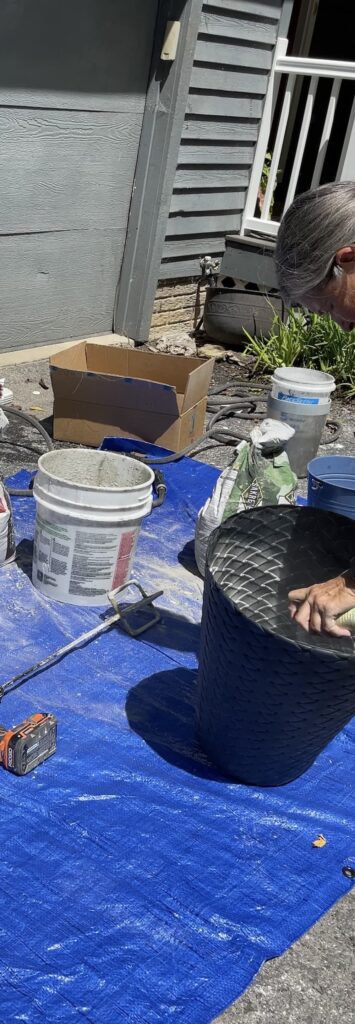
Now it’s time to begin to paint.
I was so excited to try the new Terra Clay Paint from Dixie Belle. The colors are stunning. Soon you’ll see some fun Halloween wreaths I made with a color Marigold.
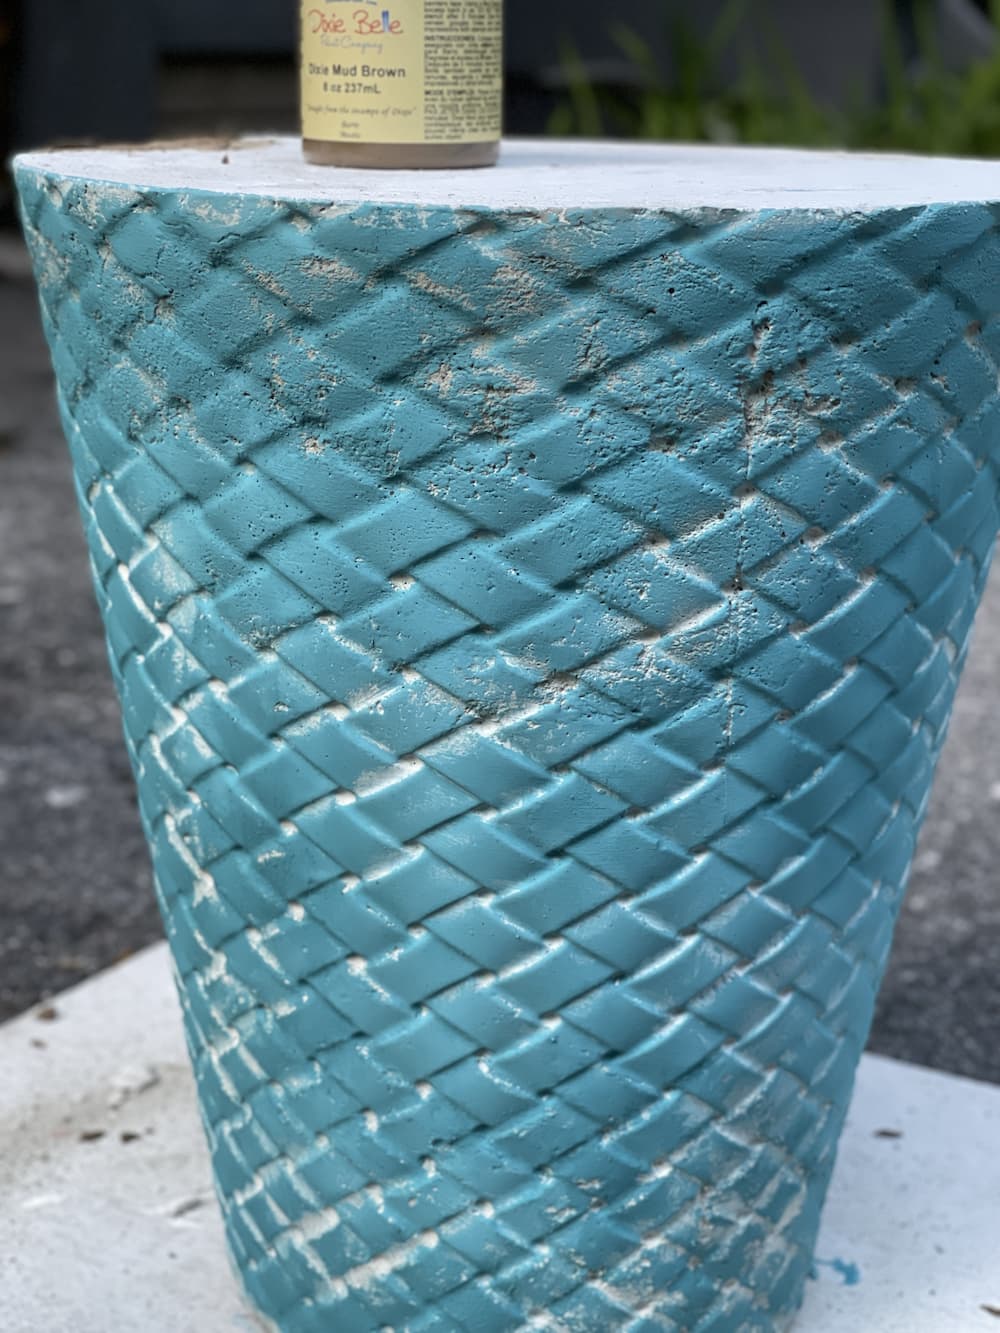
To mimic what I had seen in TN., I wanted a layered look, so I added 3 colors of paint.
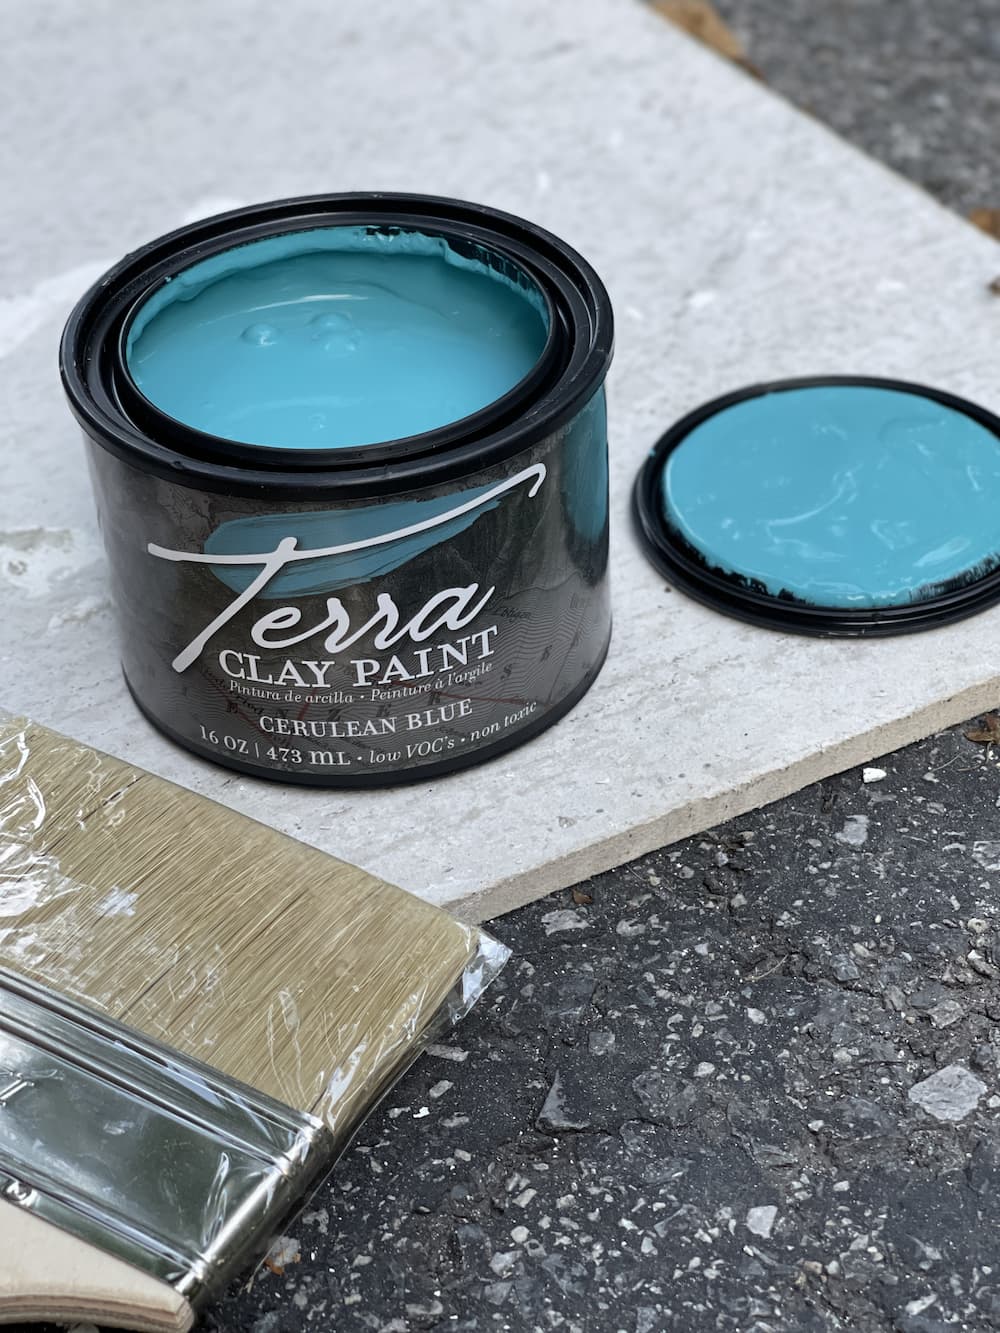
The paint went on so smoothly.
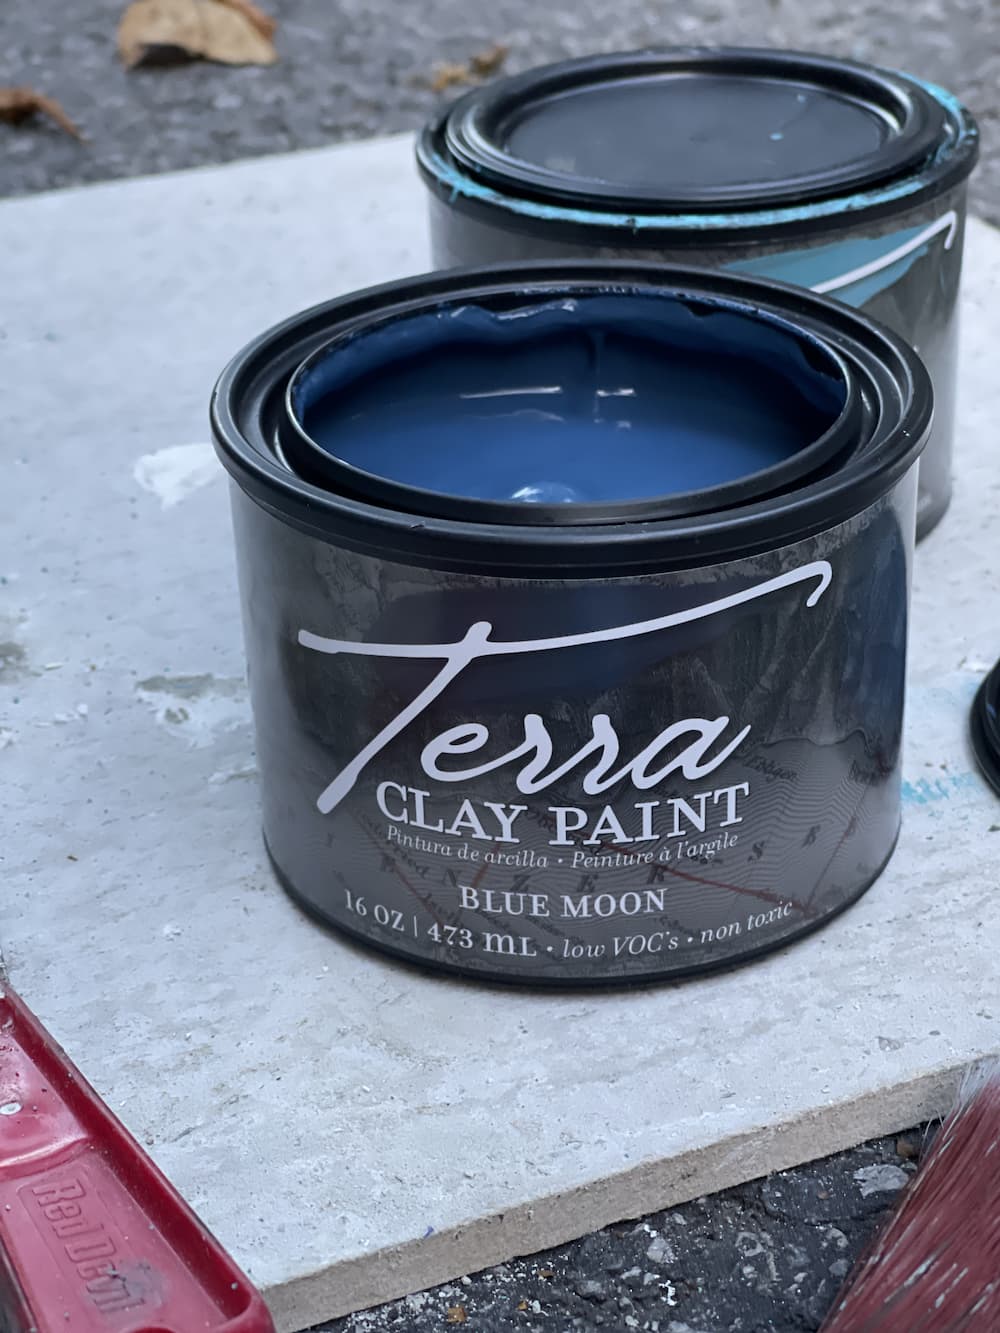
I used Dixie Belle Terra Clay Paint in Cerulean Blue for the base. Next I added a layer of Dixie Belle Terra Clay Paint in Blue Moon all over.
Because concrete is a porous material, the paint dried really quickly. Next I added a layer of Silk Mineral Paint in Baja Gray.
The grey went into all the nooks and crannies of the basket weave, that was intentional to cover that part.
The last color I decided to add, was another layer of Blue Moon Dixie Belle Terra Clay Paint.
I brushed that on lightly and didn’t get in the nooks and crannies, because that’s the part I wanted to sand,
Next I sanded down the sides to show some of the gray through and gave it a weathered intentional look of gray and blue.
I did the same to the top then sanded back some of the blue there as well.
STEP EIGHT
The last step is to seal the stool / table. I have not done that yet but it is living out front right now and is fine. For it to be more durable outside, I would recommend coating it with a sealer.

LESSONS LEARNED
Next time I would add even more inside to keep the weight down.
It can be moved but when it was first set up and I moved it, it fell over and dinged up the edge.
Patience isn’t my strong suit, so maybe just actually waiting overnight to let it set then removing from the mold would be best.
Next I took some Dixie Belle Mud and added it to the dinged up edge, sanded it, added more, sanded again and it was good as new.

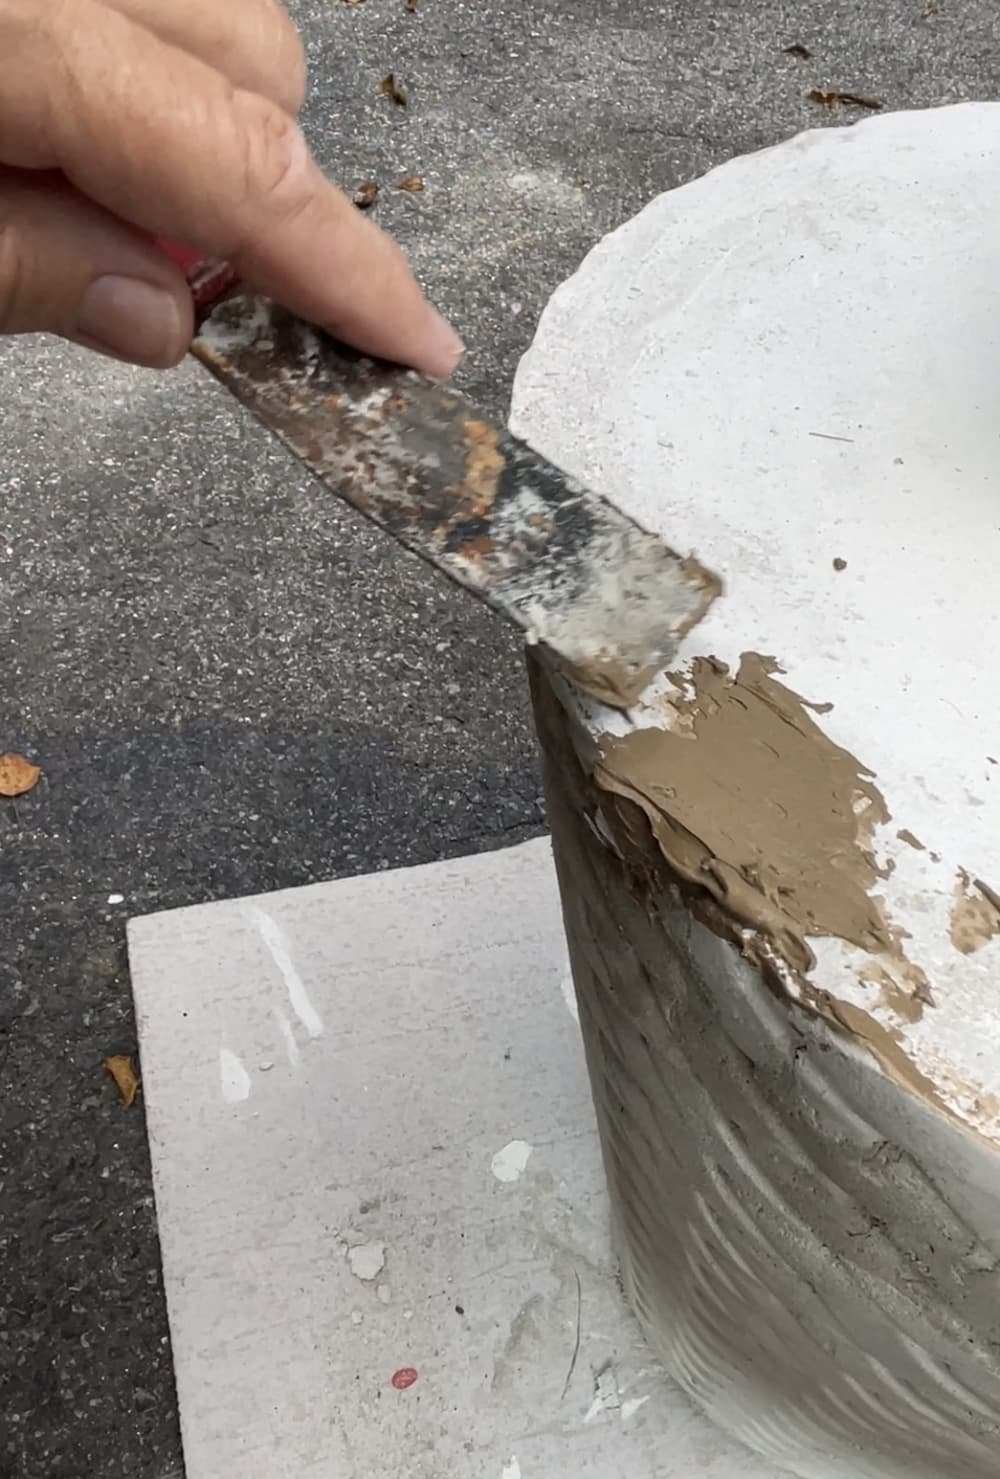
Fortunately, that wasn’t a problem since I was painting it.
SUPPLY LIST
3 Gallon Bucket
Planter (I found mine at Ollies for $14)
Cooking Spray
Hose / Water
Tarp
Dixie Belle Terra Clay Paint in Cerulean Blue
Dixie Belle Terra Clay Paint in Blue Moon
Dixie Belle Silk Mineral Paint in Baja Gray
I wish that the store had more of those planters. But of course I can’t find them.
I did get another planter that is plain from the store and although not quite as tall, it has a lovely shape and I figure I could always use my basket weave stencil if I wanted to recreate the exact look.
I hope you enjoyed watching me create this stool / side table. Aside from being super sturdy, they can be painted any color at all to match you decor.
Thanks so much for stopping by Saved From Salvage. Make sure you subscribe to the blog to get updates in your inbox.
SHOP THIS LOOK
I’ve included links throughout in case you wanted to recreate this stool at home.
If you are interested in the look but not the work, check out these.
I love this project, Regina! It looks like a high-end patio side table. Great job!
Awe – thanks so much Erin. Thanks for coming by.
I have got to try this project! It is so gorgeous and looks like something I could handle. Amazing tutorial…you break it down so well. Thanks, Regina!
Thanks so much Missy! Have a great week
I love this so much! Makes the perfect table.
Meagan – thanks so much for the kind words and coming by!
Your side table turned out great! Come share every week at the #HomeMattersParty Thursday 9pm (est) through Monday. Hope to see you there!
Allyson – thanks so much! I’ll be there!
Regina, this is just fantastic! Your table is beautiful! I’m featuring it in my weekend roundup Saturday. Thank you so much for sharing this!
Kim – thanks so much!
This does look very expensive and classy! I think that it being pretty heavy is a good thing generally (except when you want to move it of course!) at least it is sturdy. Thanks for sharing with us at Handmade Monday.
Hi! Loved this and can’t wait to try.
You use concrete counter mix? Does it make a difference which type concrete you use?
And couldn’t you take the original basket weave planter that is cut and put it in the new planter before pouring concrete in? I think you would bet the basket weave parterre you like.
I think your project turned out great! It’s definitely something I’d like on my own patio. Thanks for sharing with us at Creatively Crafty #ccbg 🙂
Thanks Lydia!
Your concrete side table turned out great! LOVE the basket texture and color. I’m sharing this post at All About Home Party Monday evening. Thanks so much for coming by and joining in. Have a great week, Regina!
Thanks so much Debra!
I’m featuring you this week when the next To Grandma’s house we go link party starts – thanks for sharing with us!
Woohoo! Thanks so much.
I pinned this idea for next summer when we get out new deck built and I need to add more seating and tables. Such a great idea. Thanks for sharing it. This post will be a feature this week on the link part. #HomeMattersParty
Donna – thanks so much!
Just beautiful! Thanks for sharing on Crafty Creators!
If you want to duplicate you can save the original planter and duct tape it together after duct taping the seam as well. The duct tape will hold the shape. You can do this over and over.
Amazingly creative! Oh, and I saw the pic of you mixing the cement…didn’t see Pigpen, but a woman with some really great muscles!