Are you looking for a creative wreath?
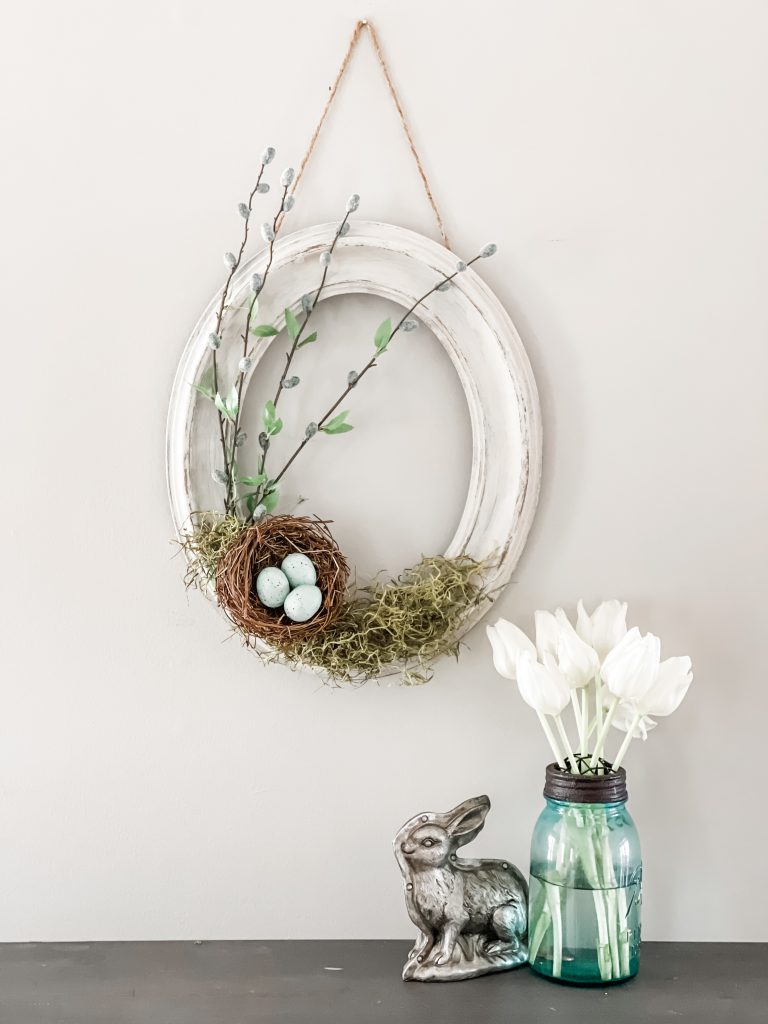
I’m sharing a DIY wreath for spring using a vintage oval picture frame.
It may be February but I’m ready for spring and I needed something fresh for my front door.
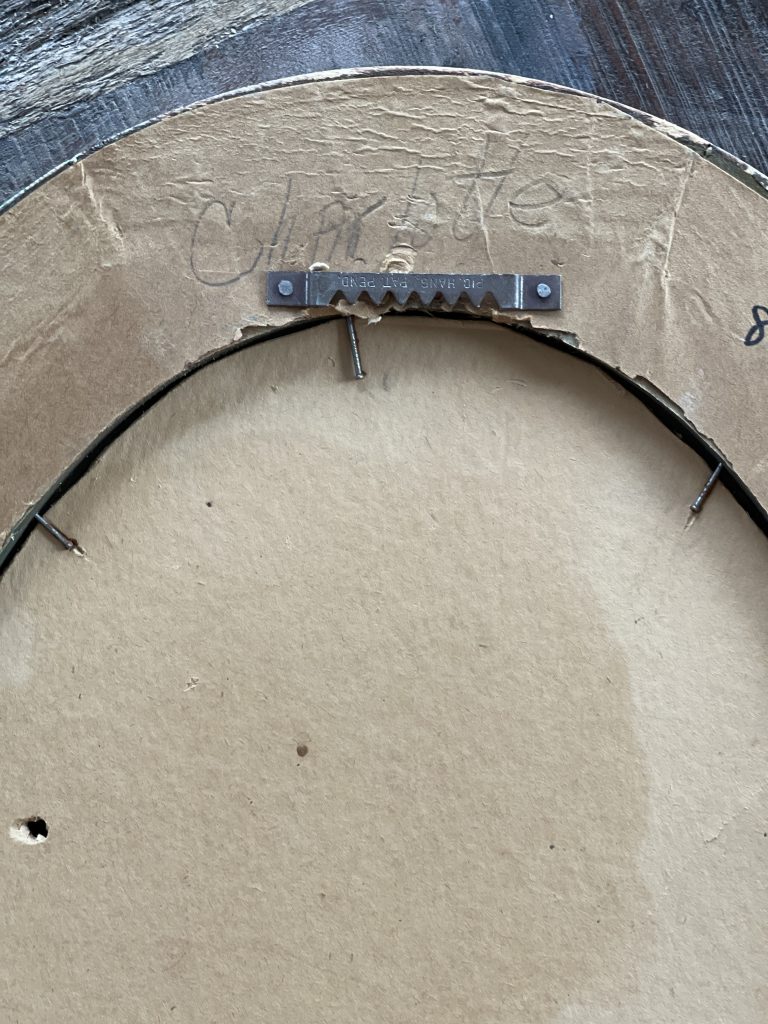
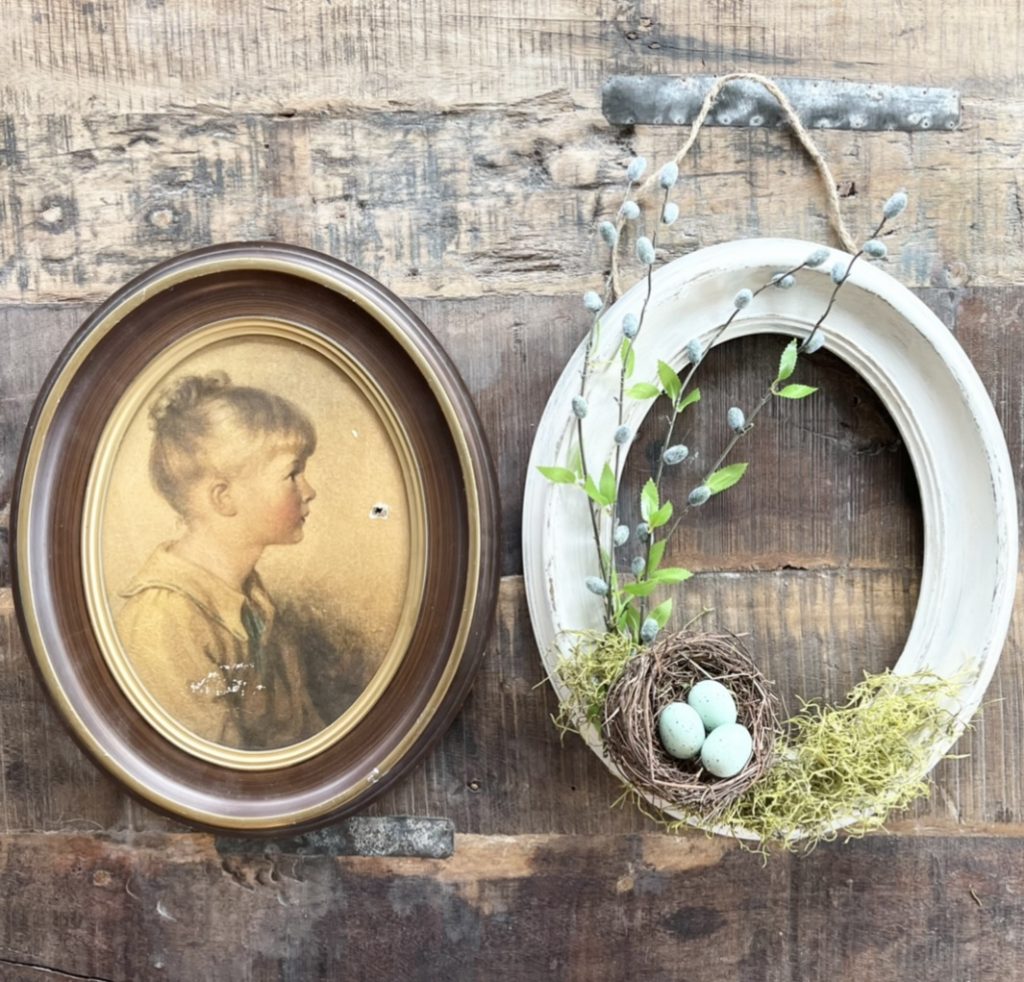
I’ve had these vintage wooden frames for years. I found them at a thrift store and they held portraits of children.
The names are still on the back written in pencil. One was Peter and the other Charlotte. If they had last names I could have done research on them.
I have one intact still, minus a few holes.
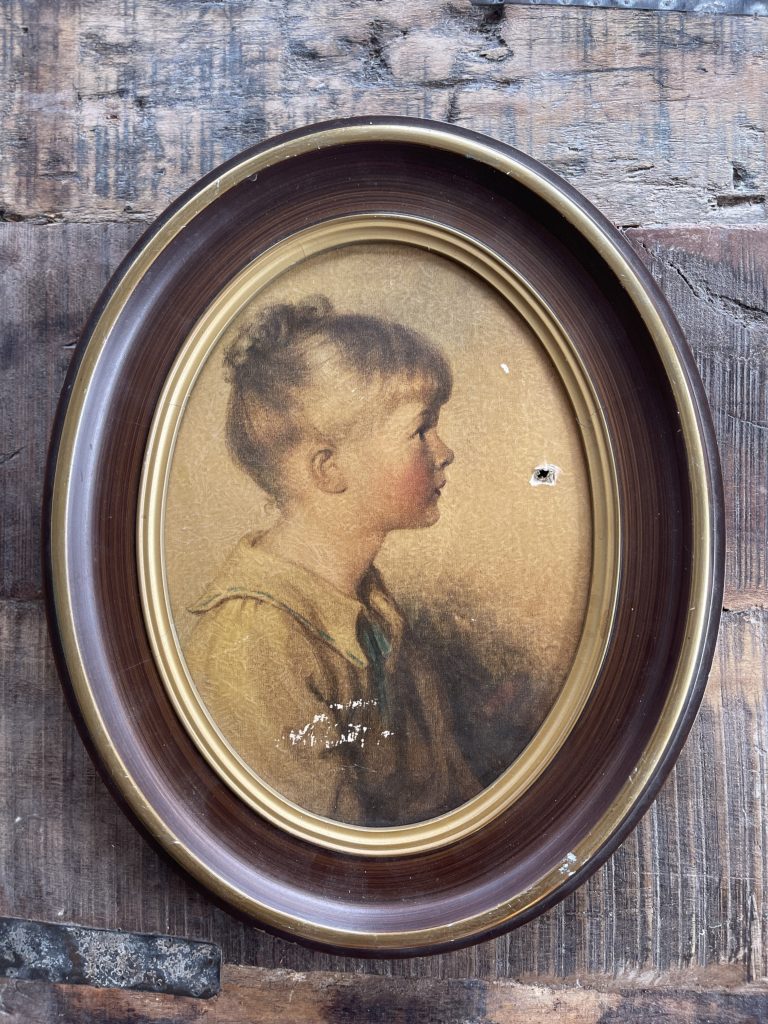
I loved everything about them, especially the price but they didn’t fit into my decor so they’ve been in a box in the attic.
The shape is lovely so I thought I’d create a spring wreath with it.
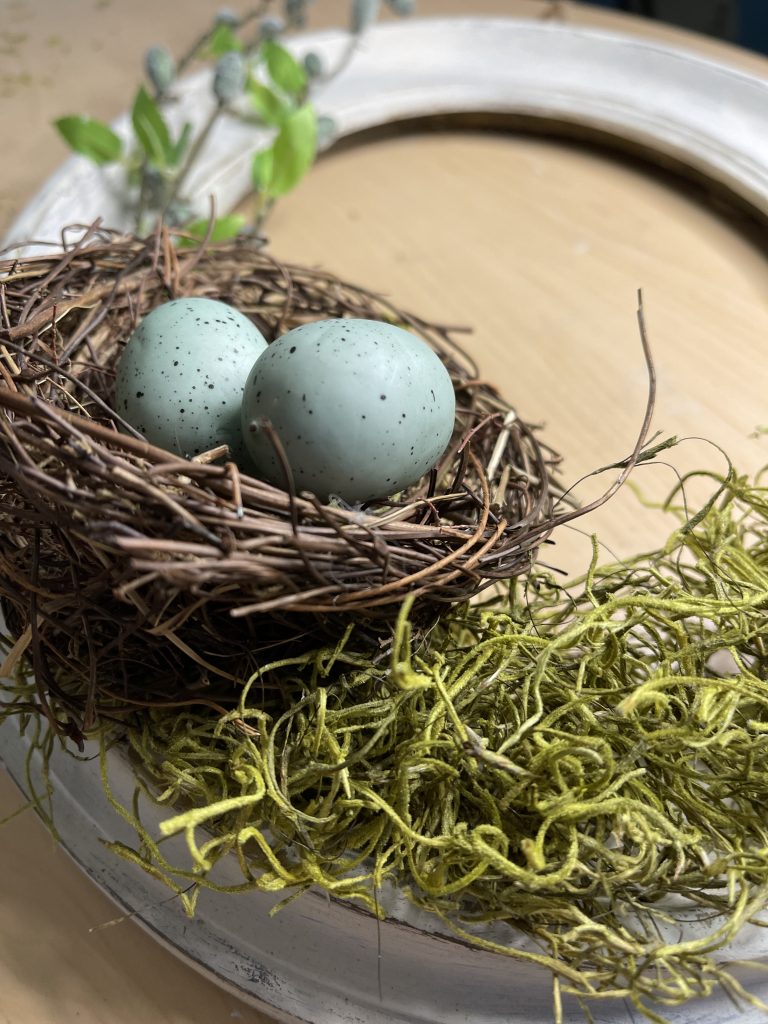
Moss, birds nests and buds are the things I wanted to incorporate into my wreath.
Not a huge fan of faux flowers but sometimes you just have to go with the flow.
I found these adorable buds at JoAnn’s on sale for less than $5.
I already had a small birds nest that would be perfect.
Table of Contents
MAKING THE WREATH
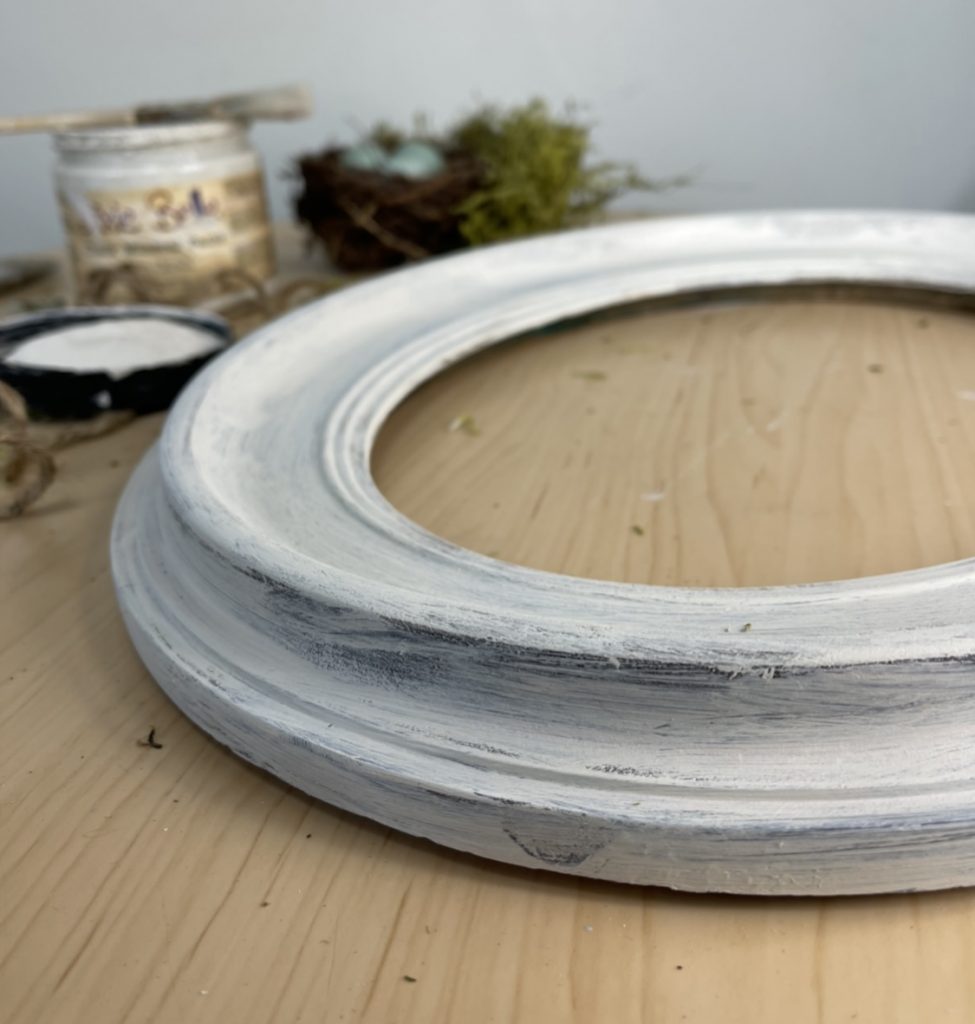
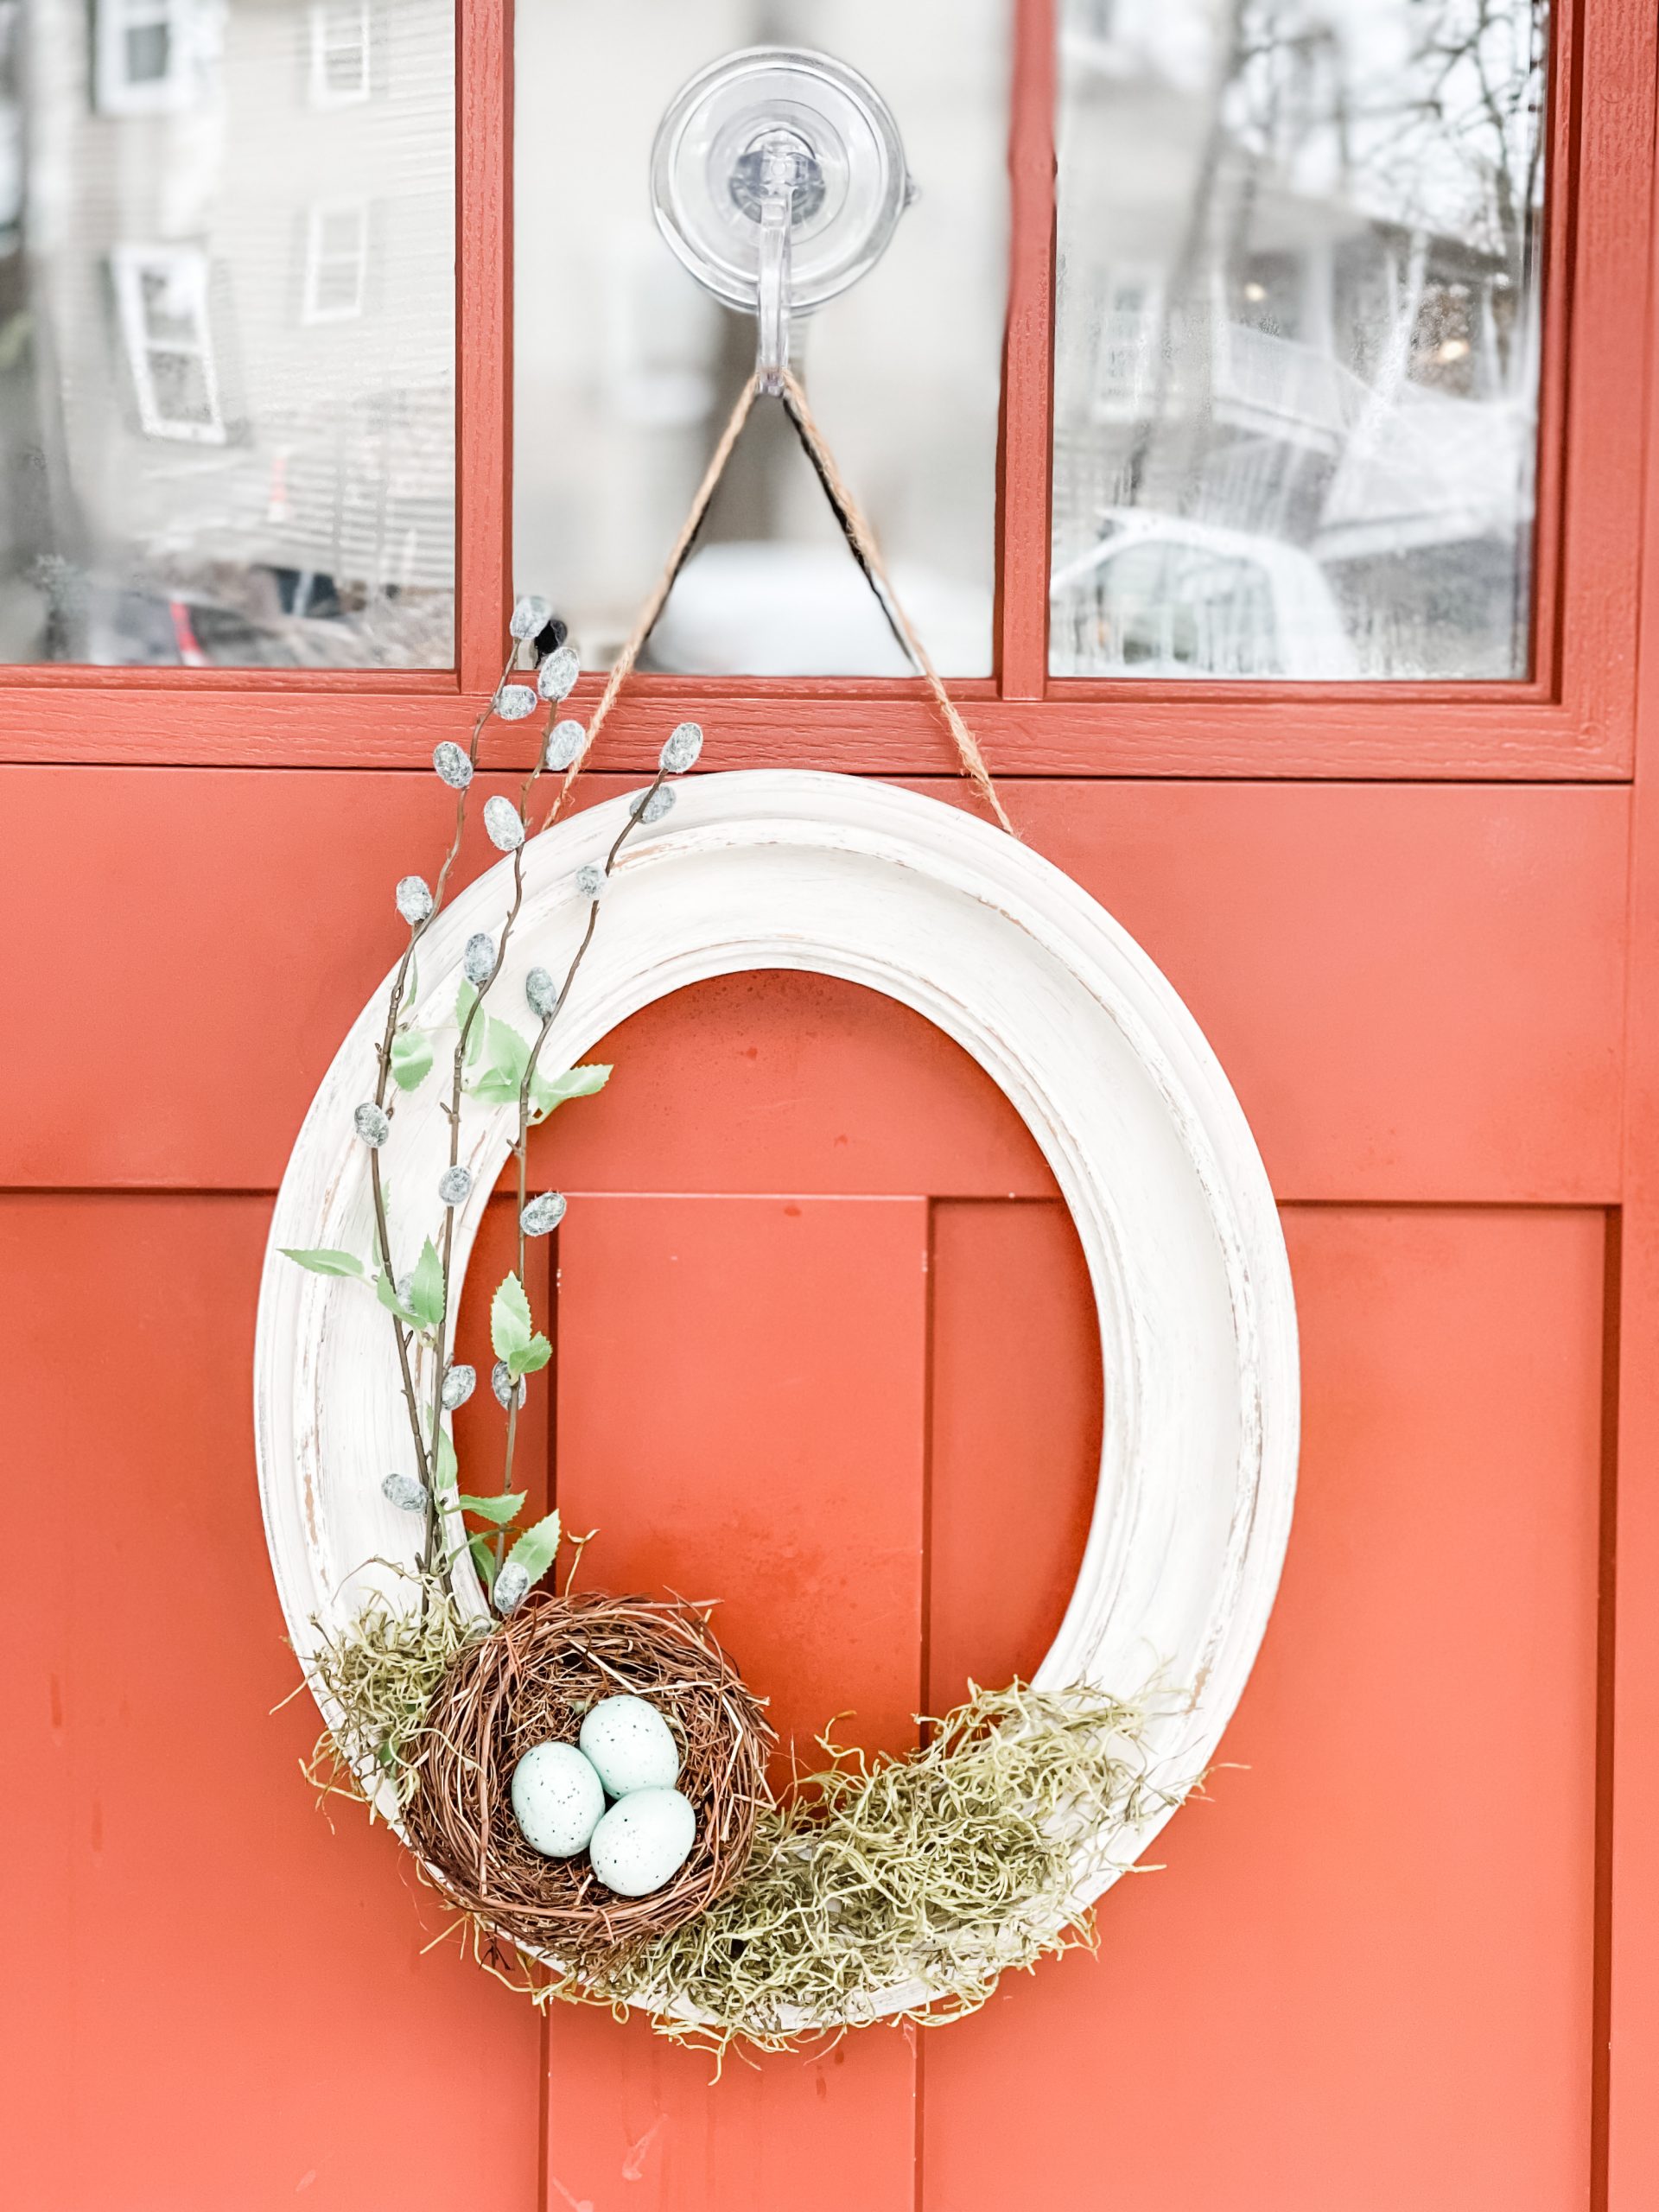
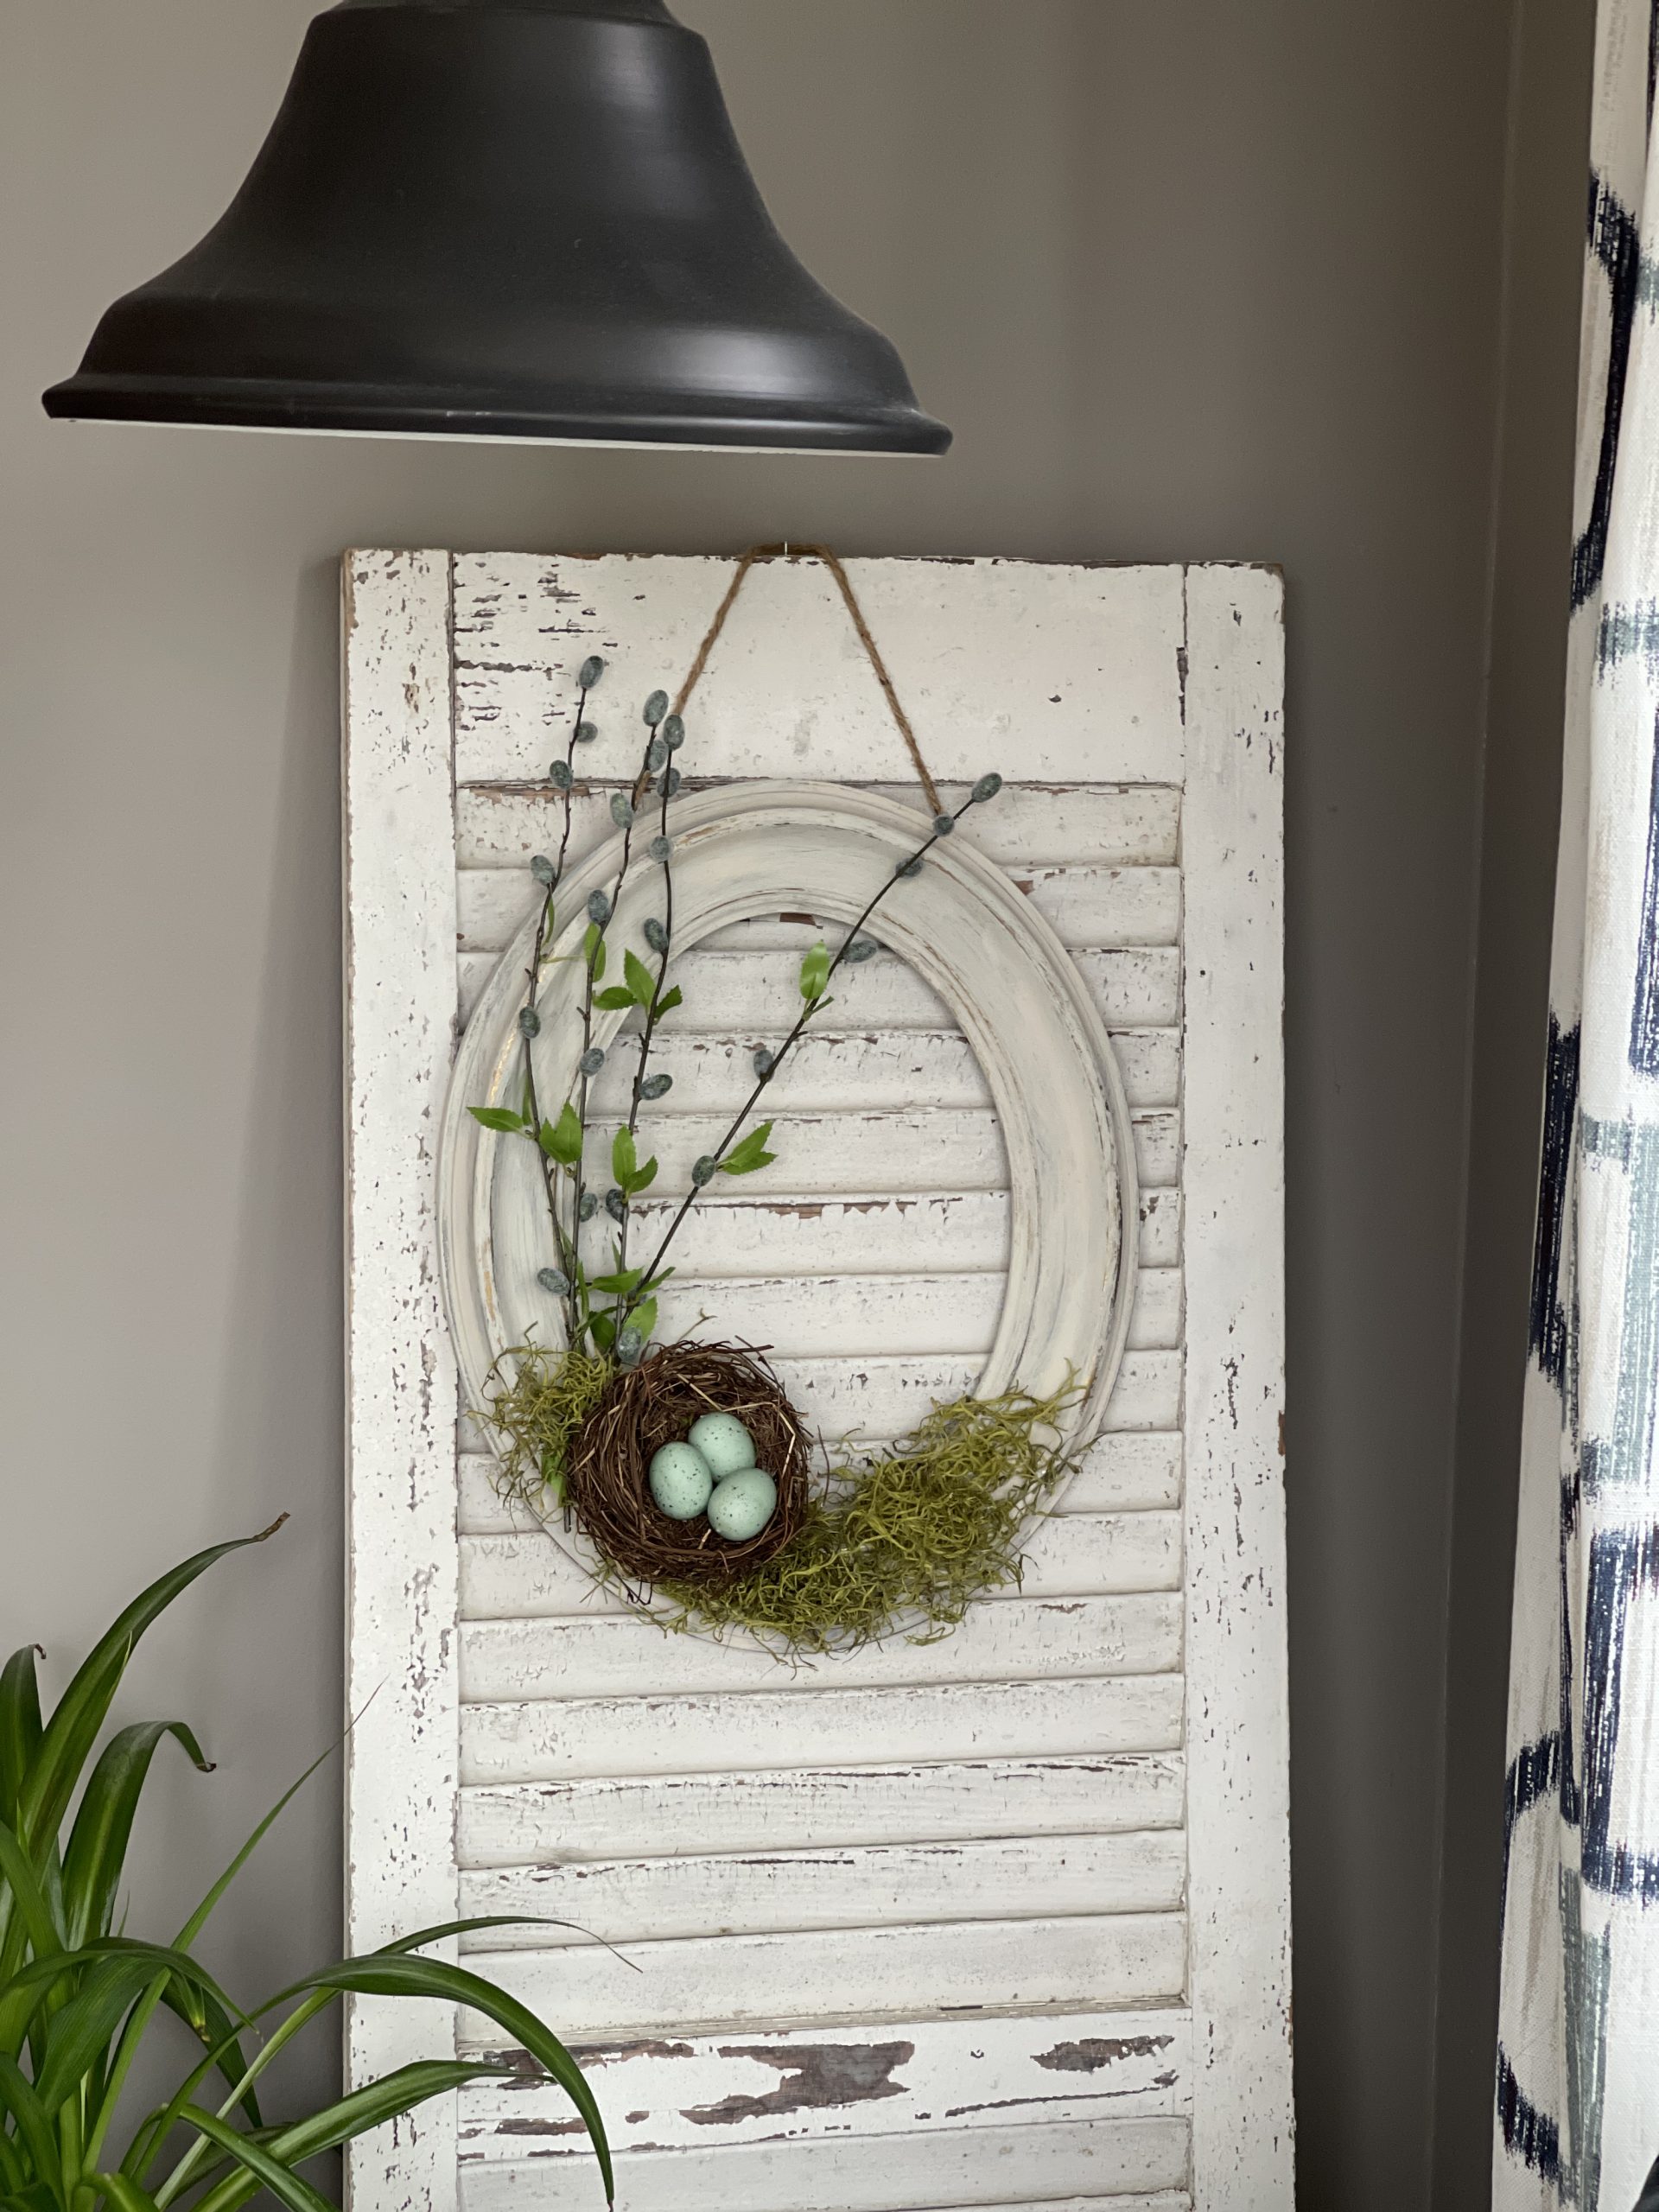
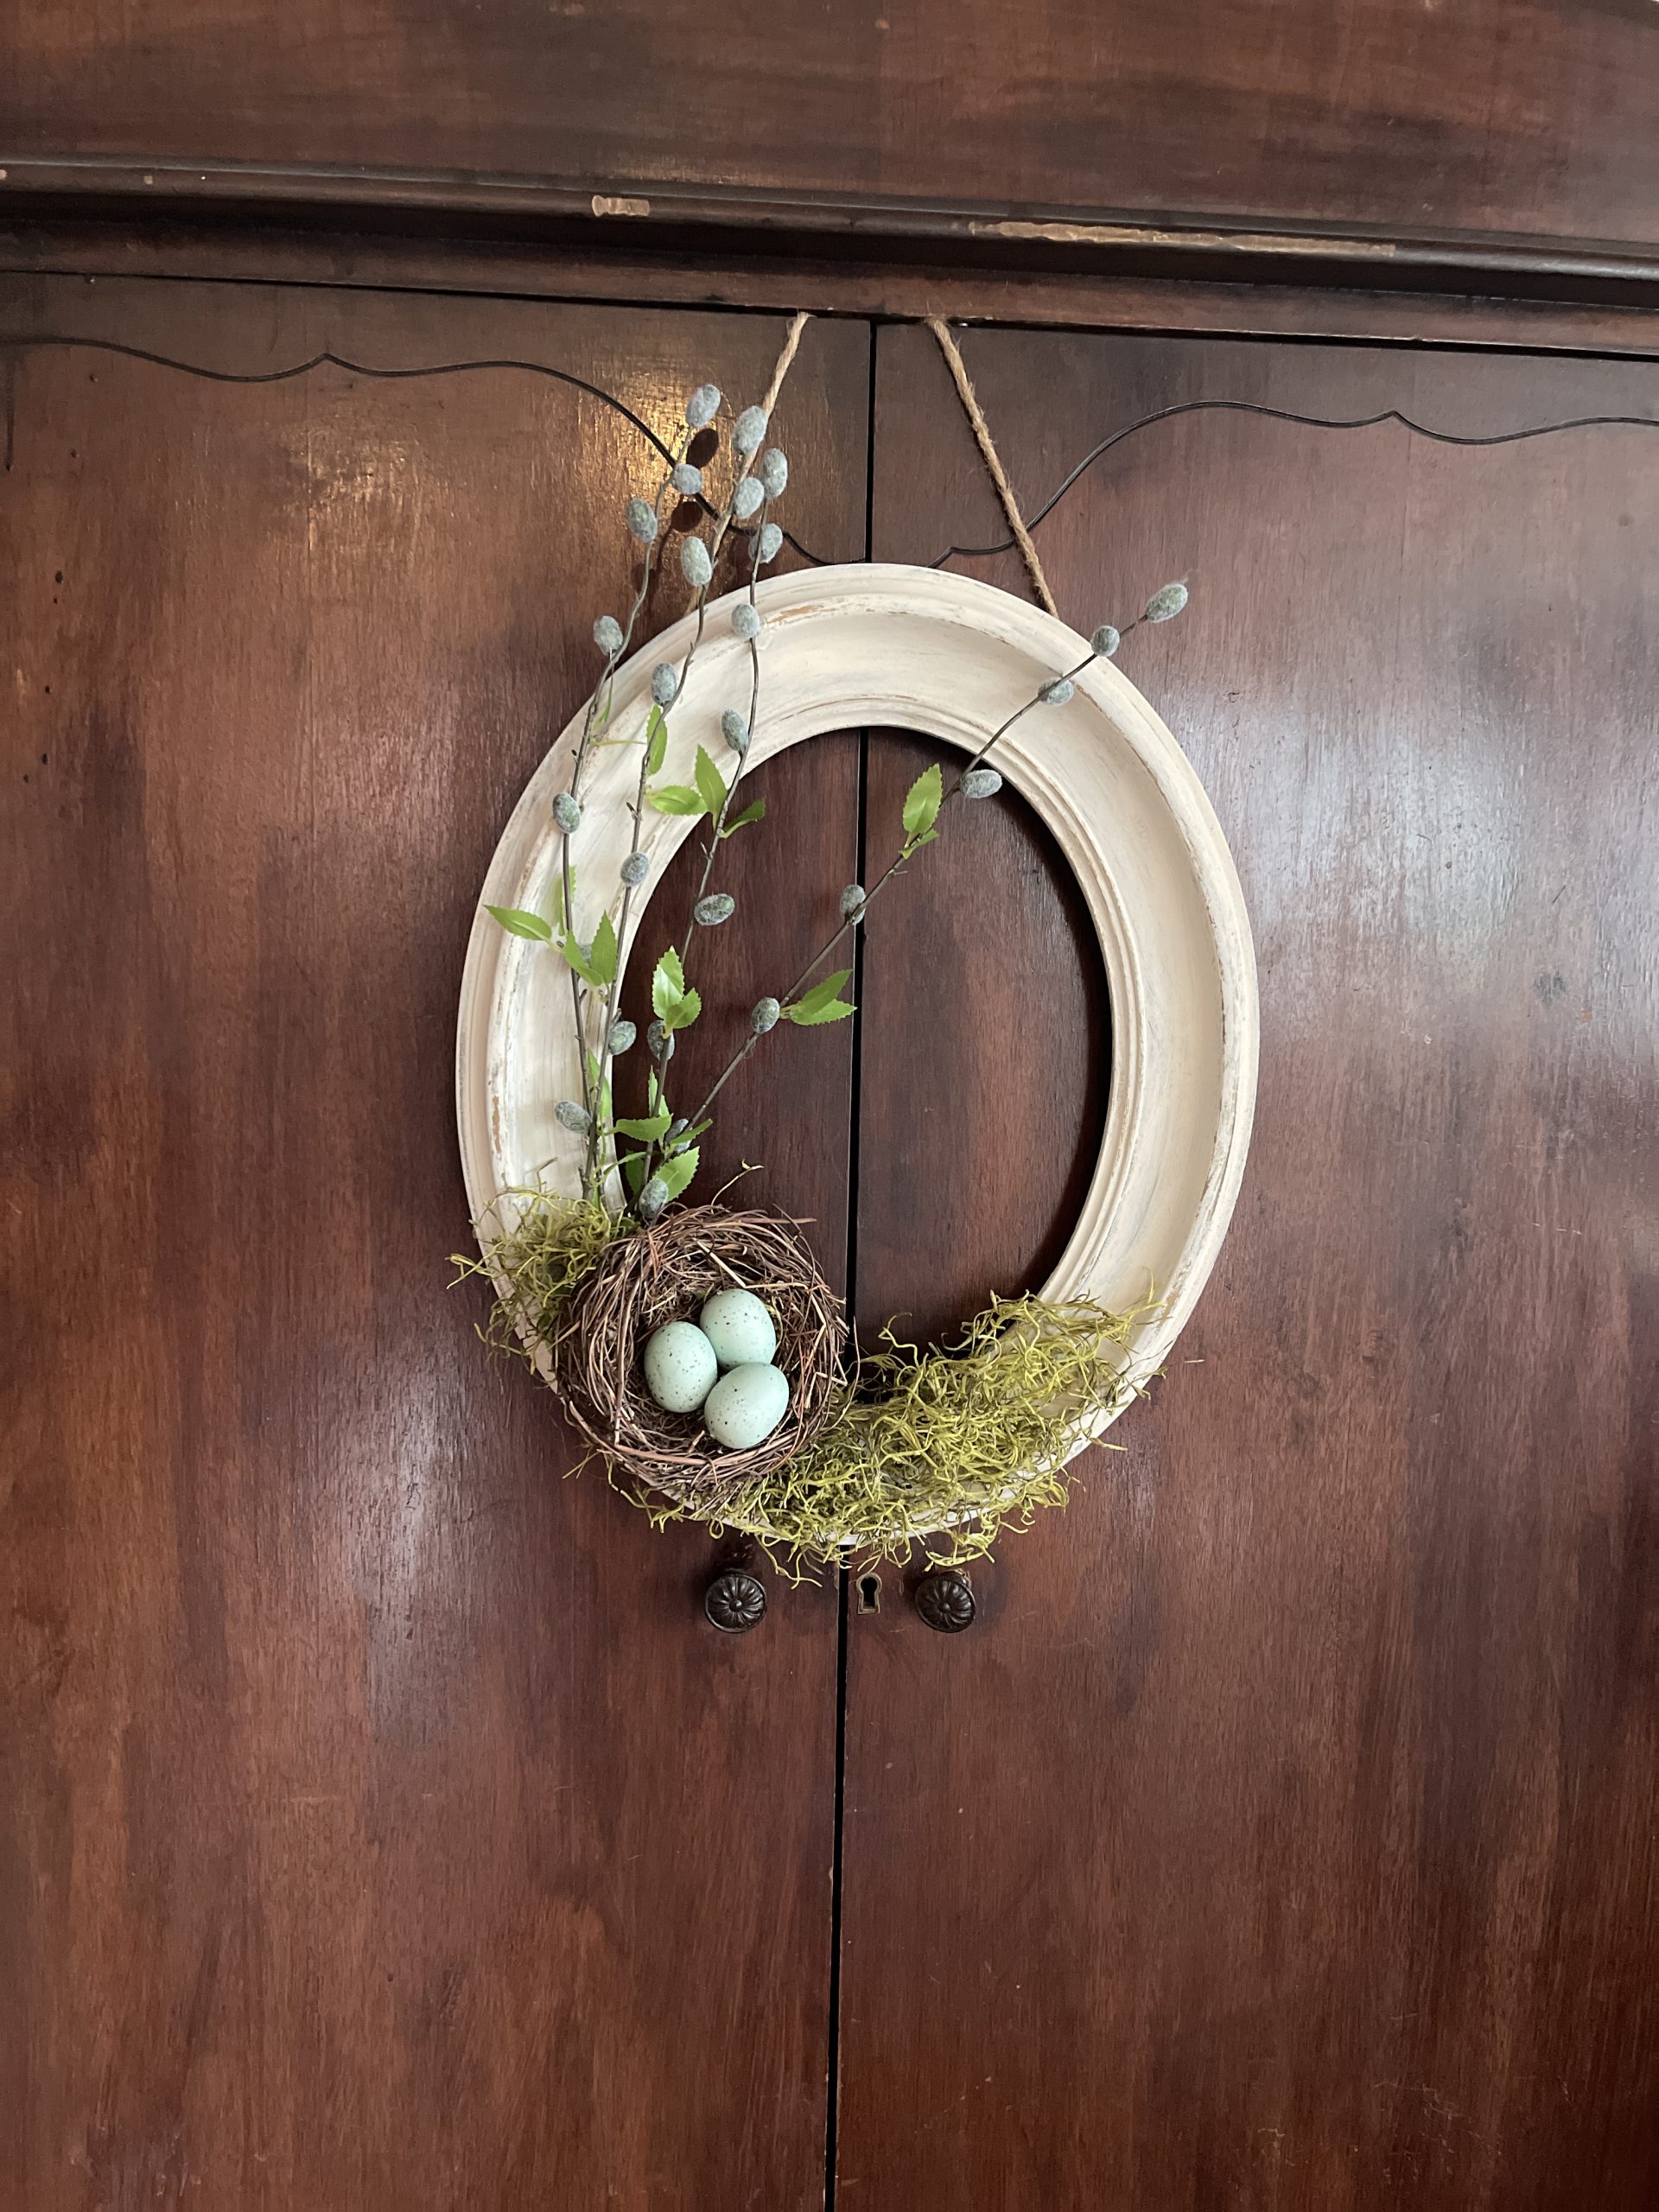
I started by painting the frame. The frame did not have glass so I would be attaching my items to the bottom of the frame.
I chose an off white paint and dry brushed it onto the frame. I used Dixie Belle Chalk Mineral Paint in Drop Cloth.
After it was painted, I used a sanding block to distress it just a little bit so the dark wood showed through.
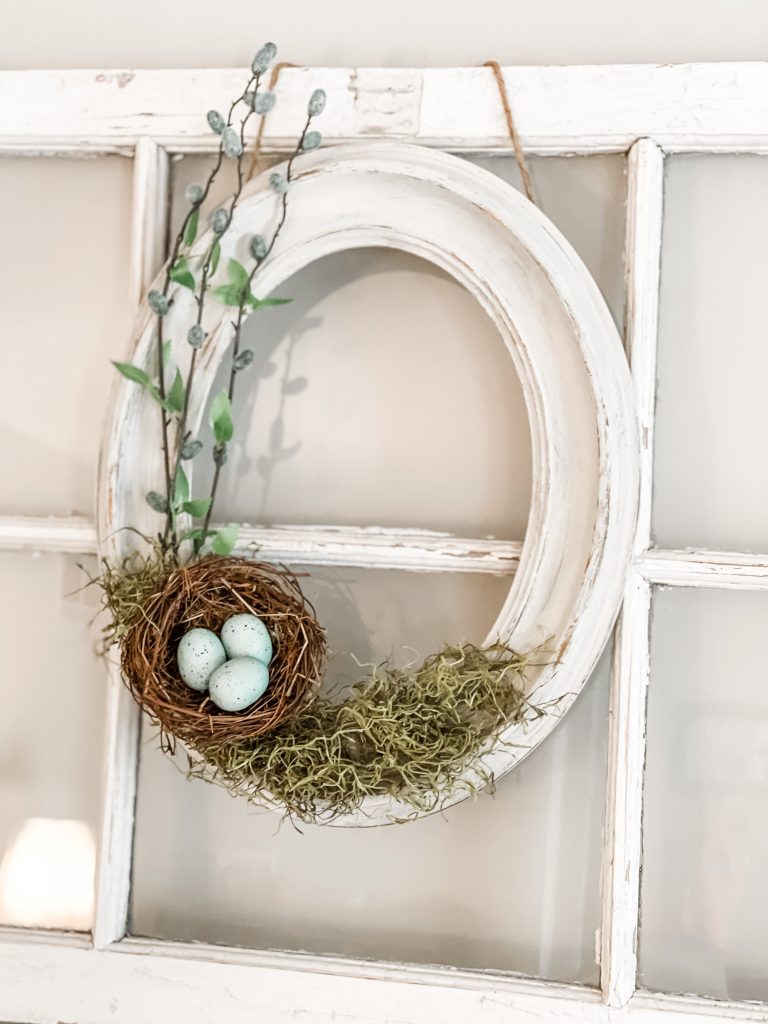
Next I gathered my moss, birds nest and flowers. Pussy willows for the win. I never see them anymore but we had a tree in our backyard growing up and they always were a sign of spring to me.
Spanish moss filled out the bottom of the frame and I attached it with hot glue. Gorilla glue sticks, are my go to, they work the best.
Then I added my sprigs of pussy willow across the frame and secured them with glue as well.
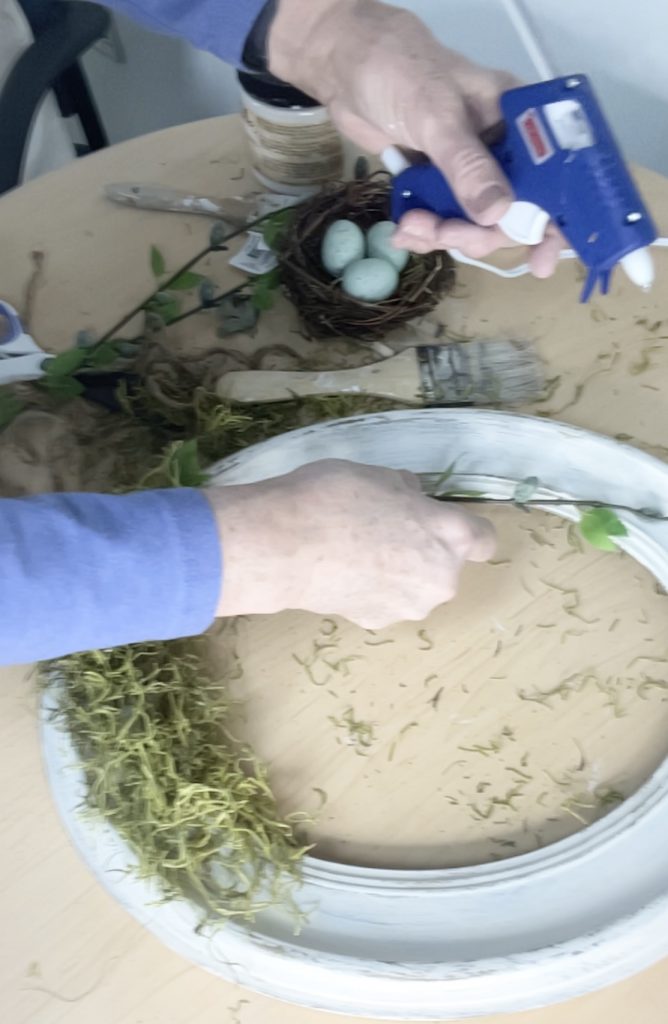
Next I attached my birds nest on top of the Spanish moss and covering the base of the pussy willow.
Lastly I attached twine to the back of the wooden frame with a heavy duty staple gun.
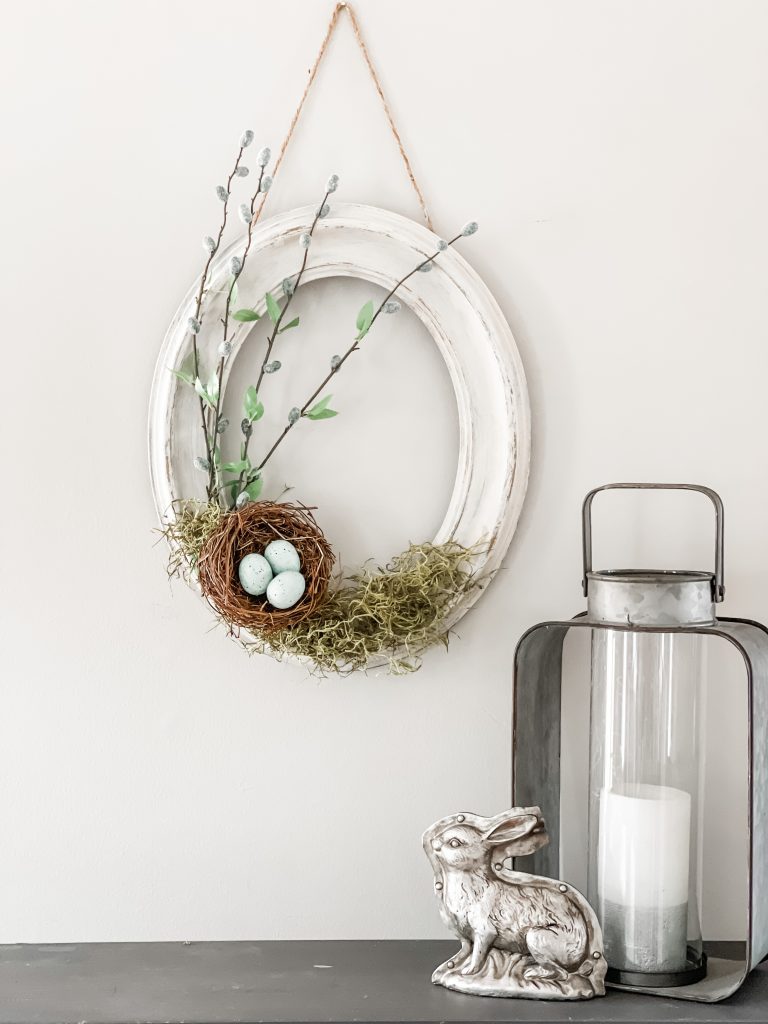
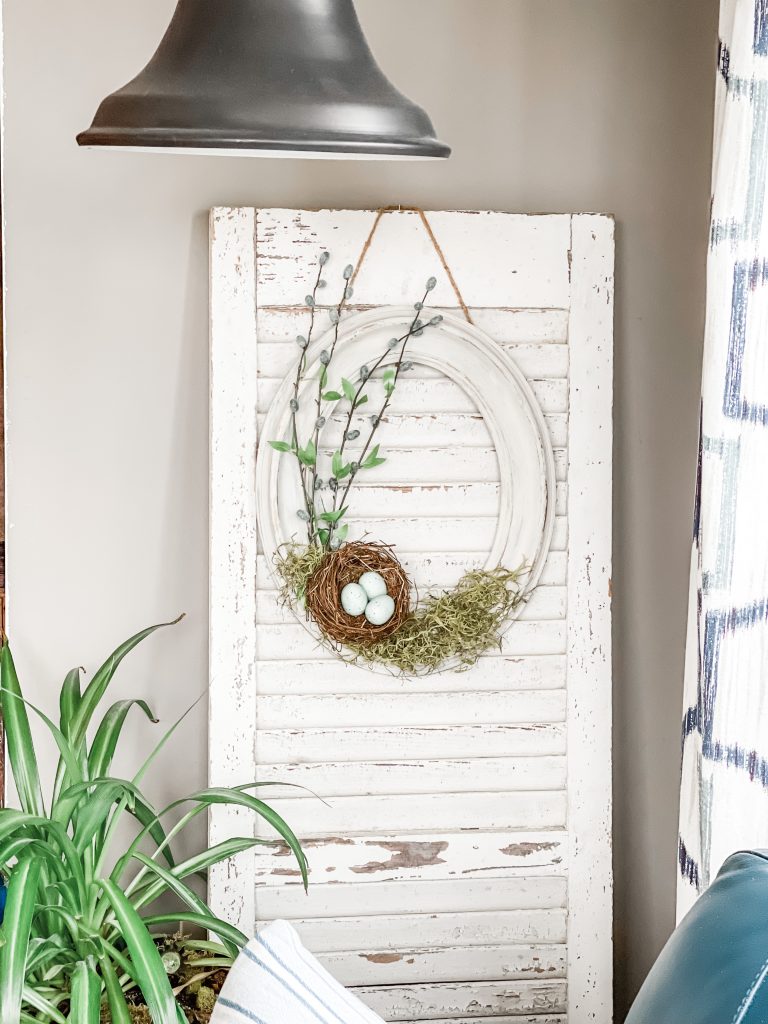
This is an easy and quick DIY Wreath, perfect for spring and easily changed up for other seasons.
DISPLAYING MY DIY SPRING WREATH
This looks so cute in many different spaces, the front door, my vintage shutter, and on my vintage armoire.
Next time you are thrifting, hunt for a thick frame, even square would work, I’ve seen some cute wreaths on Pinterest in square frames.
I think this would look really pretty in a green or grey color also, I might try the second picture in that color and mix up the flowers a bit.
MORE OPTIONS
For more spring wreath inspiration, click here.
If you wanted to add items to a frame but not hide the bottom, I would staple on a piece of cardboard to the back and use that to glue my items on. That way you could cover the cardboard up with moss or your birds nest and branches but you could see the entire frame.
If you had glass in the frame, you could glue your items to that. I did not have glass so I glued my items to the bottom of the frame.
To see what I did with second frame, click here.
Are you thinking about spring decor now? I’m sharing 10 Amazing Spring DIY Projects here.
THANKS SO MUCH FOR STOPPING BY! ARE YOU BEGINNING TO DECORATE FOR SPRING?
XO, REGINA
This post contains affiliate links. If you purchase using a link, I receive a small commission at no additional cost to you. Full disclosure statement is located under “contact me” tab.
Oh, how I love this!! Bird nests are always my favorite. I love how you have designed it on the frame. Gorgeous!
This is so charming! I really like it.
This very pretty and perfect for spring.
Love the frame. Anything with moss I love!
How beautiful and unique! Perfect for spring.
What a transformation! I love how it turned out! Simple and beautiful! Donna
Donna – thank you so much for the kind words!
Regina, this really is such a sweet wreath for spring.
Thanks you for sharing it at Create, Bake, Grow & Gather this week. I’m delighted to be featuring your DIY spring wreath at Friday’s party and pinning too.
Hugs,
Kerryanne
Thanks so much!
I love these Ideas! You are incredibly talented. I would love it if you would share this on The Fabulous Friday Link Party. You can find the link on my website. Hugs to you.
This is cute! Elegant and pretty, I like that it can be shown off in different places. The Salmon door color is gorgeous too
The wreath is very nice. I like the natural touches.
Thank you for sharing at the Sunday Sunshine BH!
Laurie
That is a beautiful spring wreath!
Thanks Joanne!
Regina, I love this–it had to be my first visit on the link party! I still have a wreath I made back in the day, despite never having been much of a crafter. It looks a bit “dated,” as they say. This gorgeous wreath looks so current, and the “faux flowers” you are not a huge fan of look fabulous.
Jean – thanks so much! I so appreciate the lovely comments. Have a wonderful weekend.
this is such a charming idea, and so well done. it definitely says ‘Happy Spring’!
i found you via Creative Crafts link party and am so glad i clicked over to view your project.
Regina, I love this and the pretty ways you styled it! Thanks for sharing at Vintage Charm–pinned!
Gorgeous spring wreath idea.
Happy Spring,
Kippi
Thanks Kippi!
Hi Regina, just dropping by to let you know I’ll be featuring your pretty wreath tomorrow for Feature Friday! Blessings, Cecilia @My Thrift Store Addiction
Cecilia – thanks so much!
Not crazy about the project’s result, but as it happens I have a couple of frames almost identical to those. Over the years, I’ve collected digital prints numbering around 500 and will find two that go well together. About the finish on the frames themselves, I don’t know yet. Hubby gave me a palette of colors in spray paint and I have some craft paint for accent. Before the summer is over, maybe I’ll have another creation from the same basic material. Cheers, m’dear. Sue
Love it! I have a larger antique oval frame I did not what to do with. Now I do!
Susan – Thanks so much for stopping by the blog. I’m glad you liked it!
Those pictures were mass produced back in the day. When I was a kid everyone had them. So much better now. Very pretty.
Thanks for coming by Nancy and I’m so glad you like it.
Regina,
This is just the cutest idea. Why didn’t I think of that? LOL. I’d love to share a link on my Dirt road Adventures.
Such a great idea Regina! I’ve bought these oval frames from the thrift store, but never knew what to do with them! Thanks for the spring-spiration!
Cindy – Thanks so much. I love to decorate them for each season.
This is such a creative idea, Regina. I would have never thought to use an old photo frame to make a wreath, but now I can’t wait to try it. Thank you for sharing. Pinned!
Regina,
this is such a great idea. I’ll be looking for frames to make wreaths now. Thanks for sharing your creativity.
Thanks so much Rachel. So appreciate getting to be part of your “share”
Regina what a great wreath idea! I love it!
Stacy thanks so much. Fun to “share” with you.
Love this wreath, simple yet beautiful.
Thanks for sharing it with us.
Blessings,
Nellie
Thanks so much Nellie
I LOVE this, Regina! The oval frame is such a clever idea. Pinned!
Thanks so much Anne!
This is one of my all time favorites!!!
Such a creative and beautiful wreath Regina! Thanks so much for sharing.
I love the way you have transformed this picture frame Regina! Thank you so much for sharing your creativity with us, you always have such lovely projects.
Cara – Thanks so much for the kind words!