Are you looking for an easy Easter or Spring decor idea? I created these stamped clay eggs to add to my vignettes, decor and more. Come see how I made them.
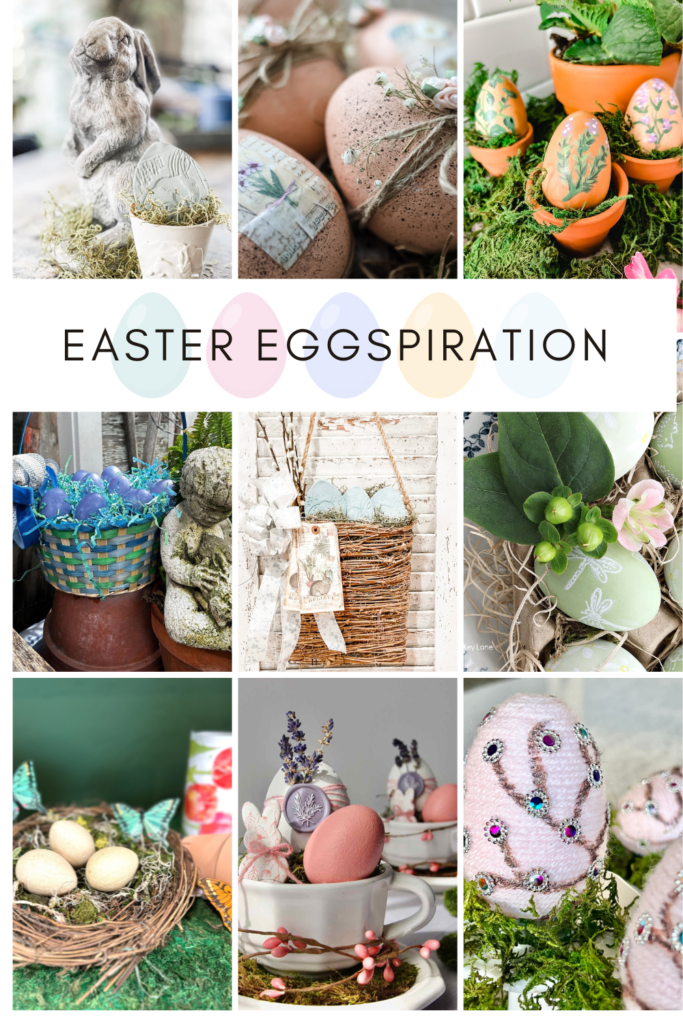
This is the second project of the Handcrafted Society and our charge was to create something with Easter eggs and we were assigned a color. Mine was light blue. Wait until you see all the eggspiration I’m sharing at the bottom of my post. If you are coming from Amy at Amy Sadler Designs, I’m so glad you stopped by. How sweet was her centerpiece?
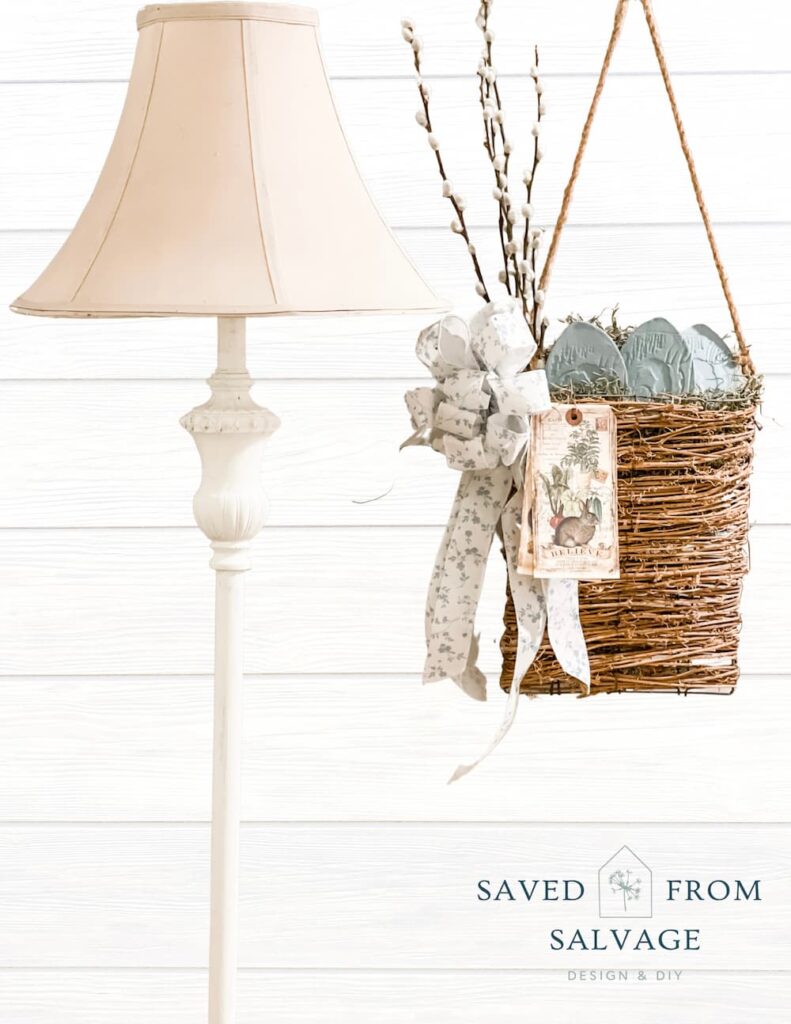
Table of Contents
WELCOME

Hi, I’m Regina and this is Saved From Salvage. I love to share DIYS from furniture flips, upcycling and repurposing for the home and garden. Thanks so much for being here.
MY EGG PROJECT SUPPLIES
- DAS AIR DRY CLAY IN WHITE
- DIXIE BELLE CHALK MINERAL PAINT IN DUCK EGG
- DIXIE BELLE BRUSH
- EGG SHAPED COOKIE CUTTER
- WOODEN RUBBER STAMP
- PLASTIC SPICE JAR
- KNIFE
- GLUE GUN
- HOT GLUE
STAMPED CLAY EGGS
Creating with clay is one of the most versatile mediums you can work with. Truly the sky is the limit when it comes to what you can come up with.
I’m working on an e-book right now titled “A Year in Clay”, creating for holidays and events. If you’ve been to Saved From Salvage before, you know I just love to use it to be creative. Let me know in the comments if you have experimented with clay, I’d love to hear.
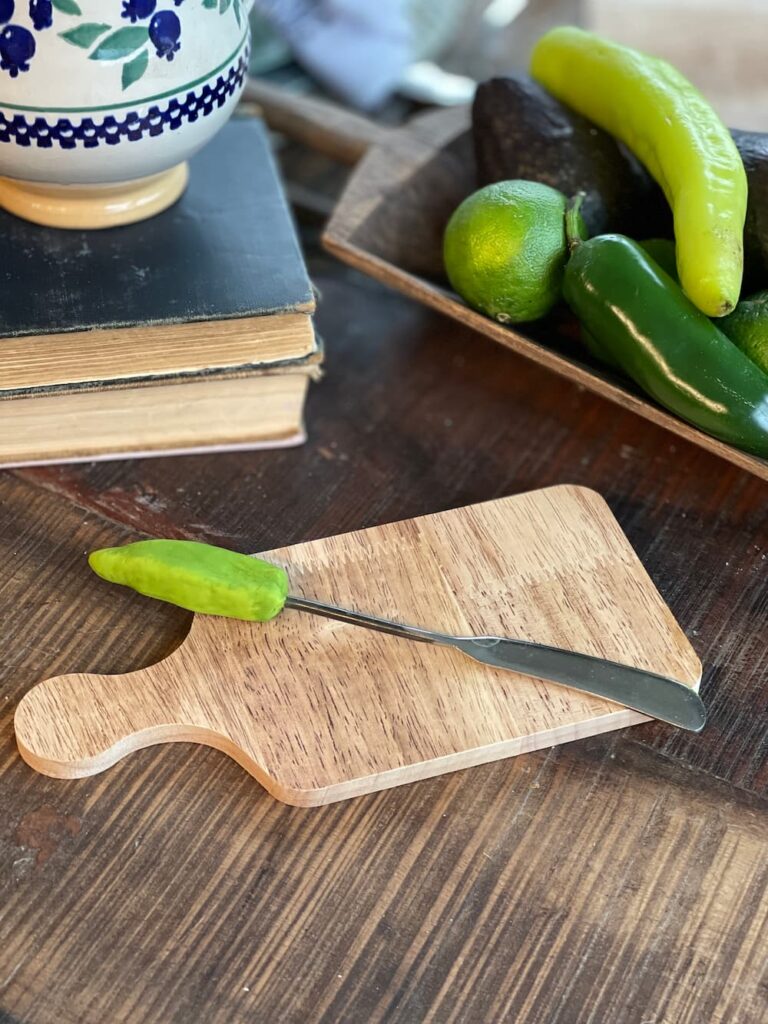
Here is a glimpse at a project from last month, I made these knife ends and napkin rings to look like green chiles for my chili cook-off.
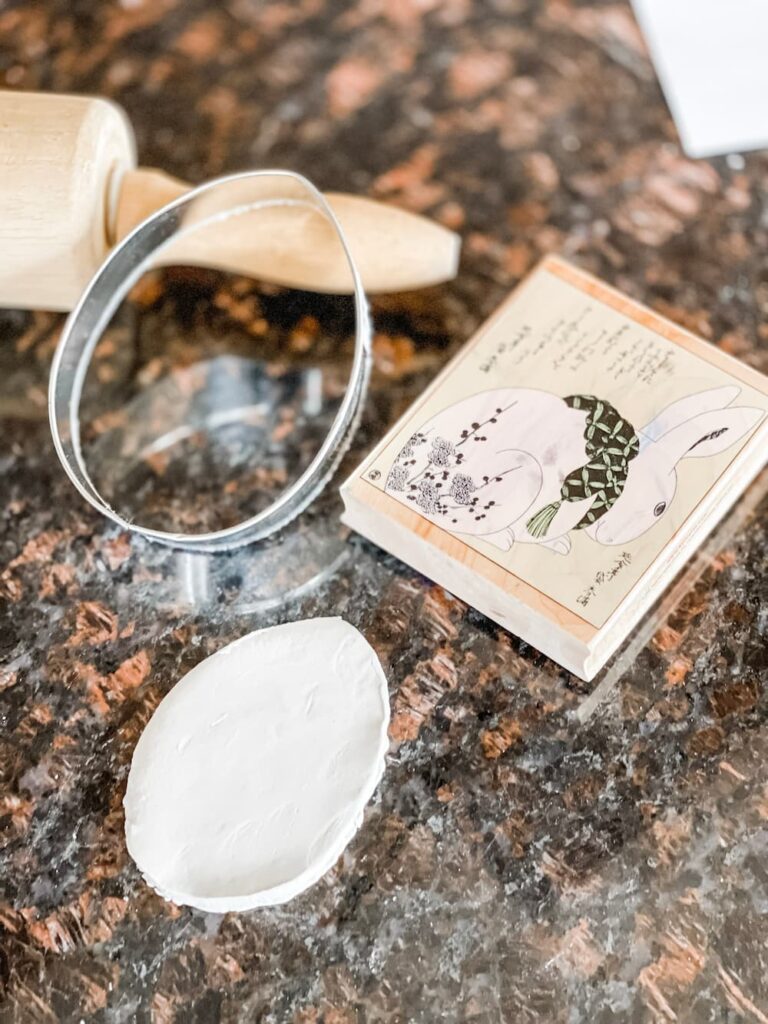
STEP ONE – ROLL YOUR CLAY
The first step is to grab a chunk of clay and roll it out on your counter. You can use your hand to flatten it or you can use a rolling pin or fondant roller.
STEP TWO – CREATE YOUR SHAPE
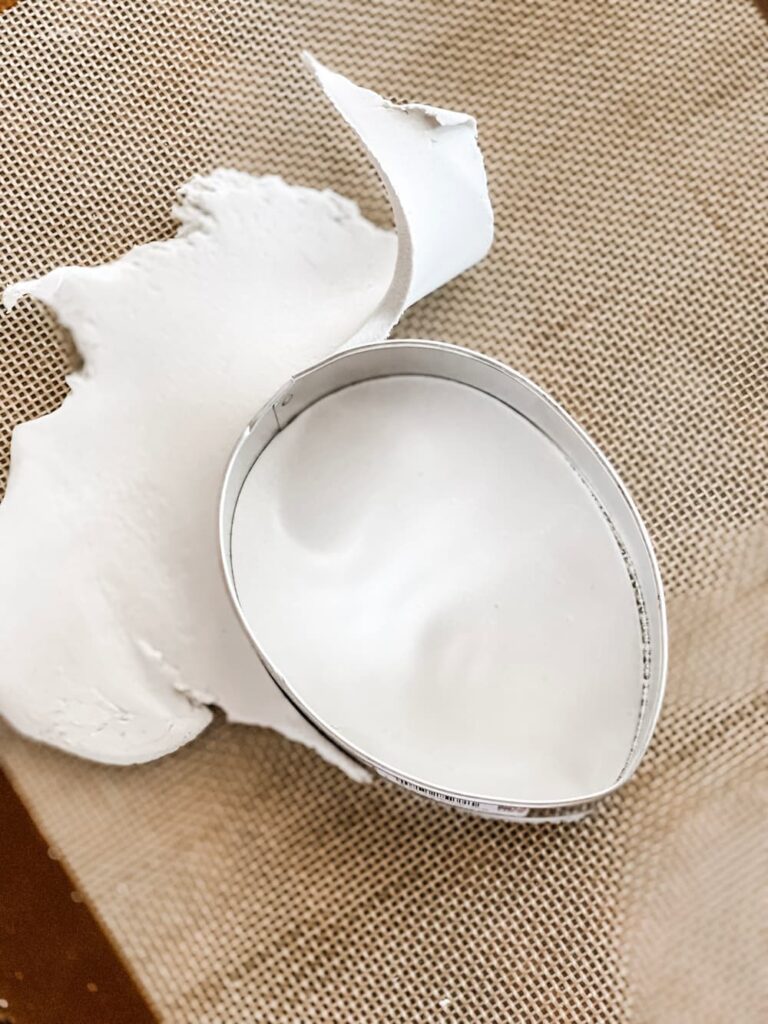
After you roll your clay to your desired thickness, use your cookie cutter to cut your shape.
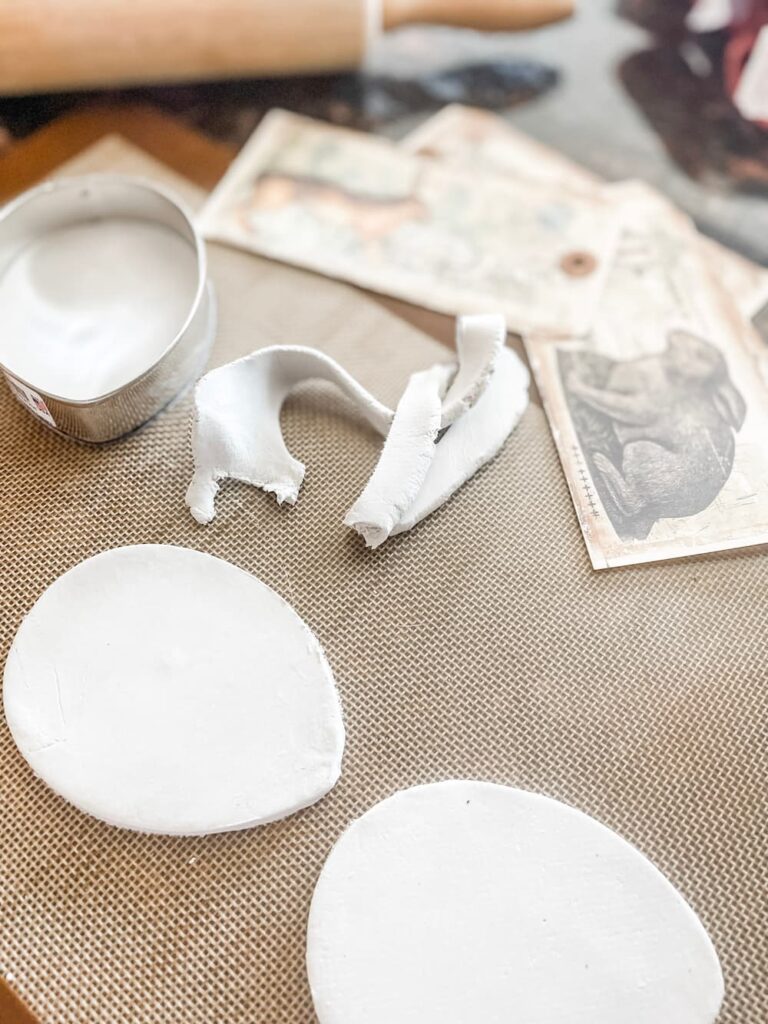
Next peel the extra clay from around the cookie cutter and set aside your egg to stamp.
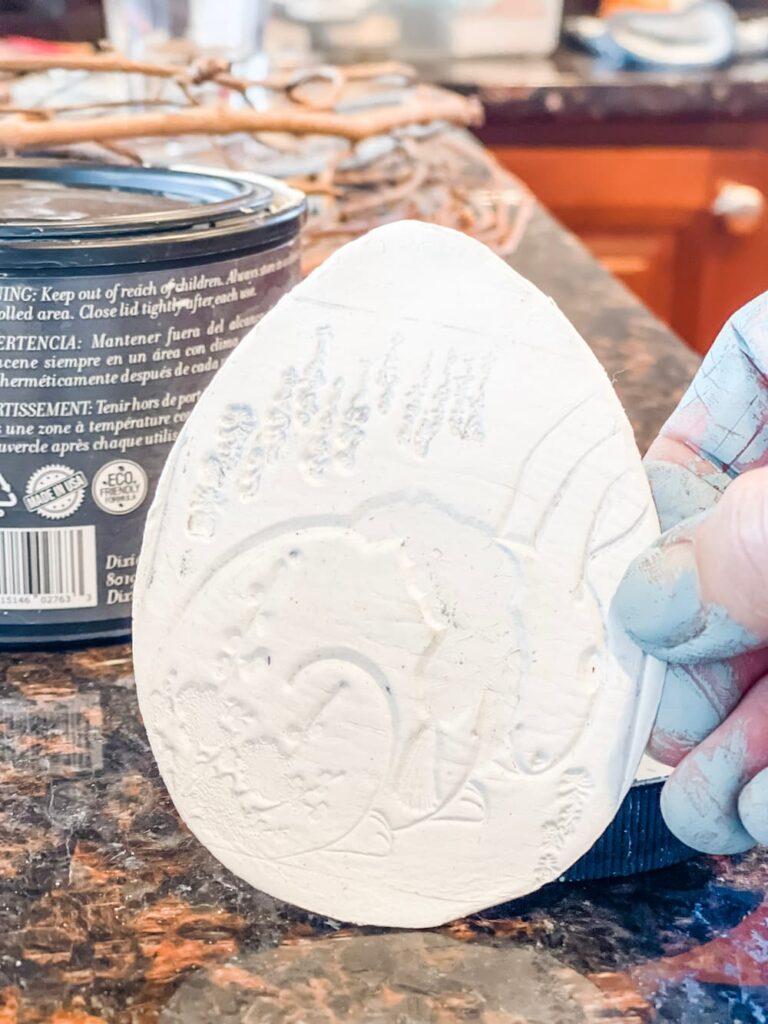
STEP THREE – STAMP YOUR EGG
After you have cut all of your eggs out, then you want to take your rubber stamp and press it down onto your egg.
The stamp I used is large and square and all of the surface does not fit on the egg.
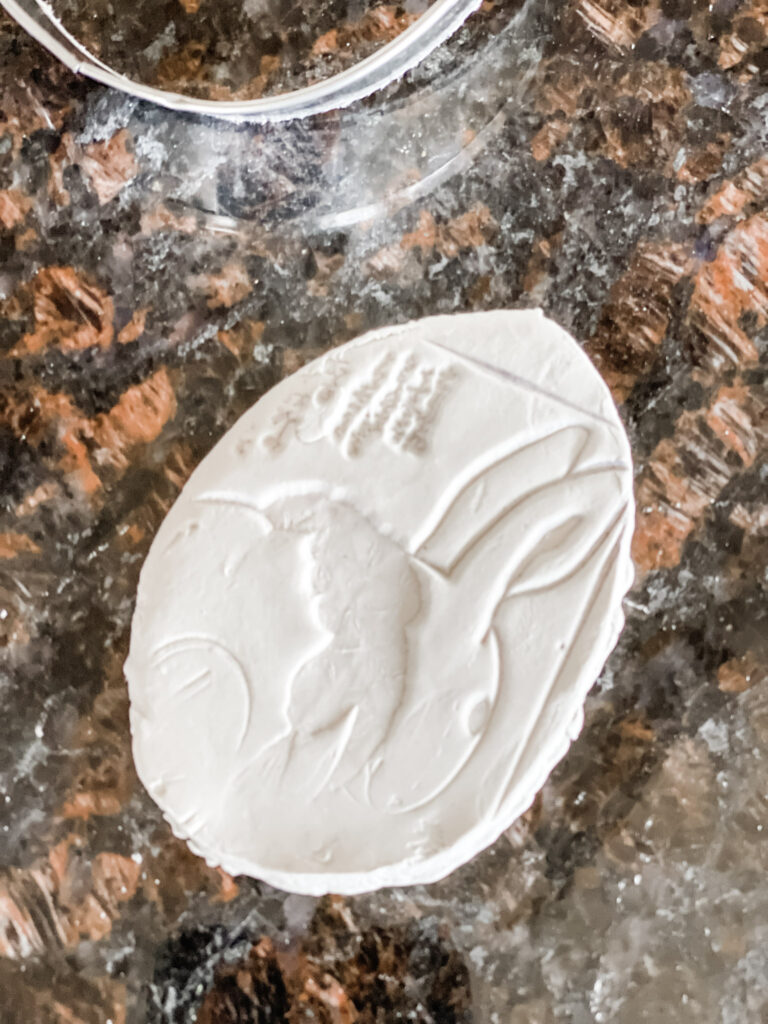
That is ok, I really wanted to focus on part of the bunny for the egg.
STEP FOUR – LETTING YOUR EGG DRY
I would give your eggs at least 24 hours to dry. If you are impatient like me and want to get painting, you could pop on the oven at 200 for about 40 minutes, flipping them half way through.
Then they will need to cool before you can proceed.
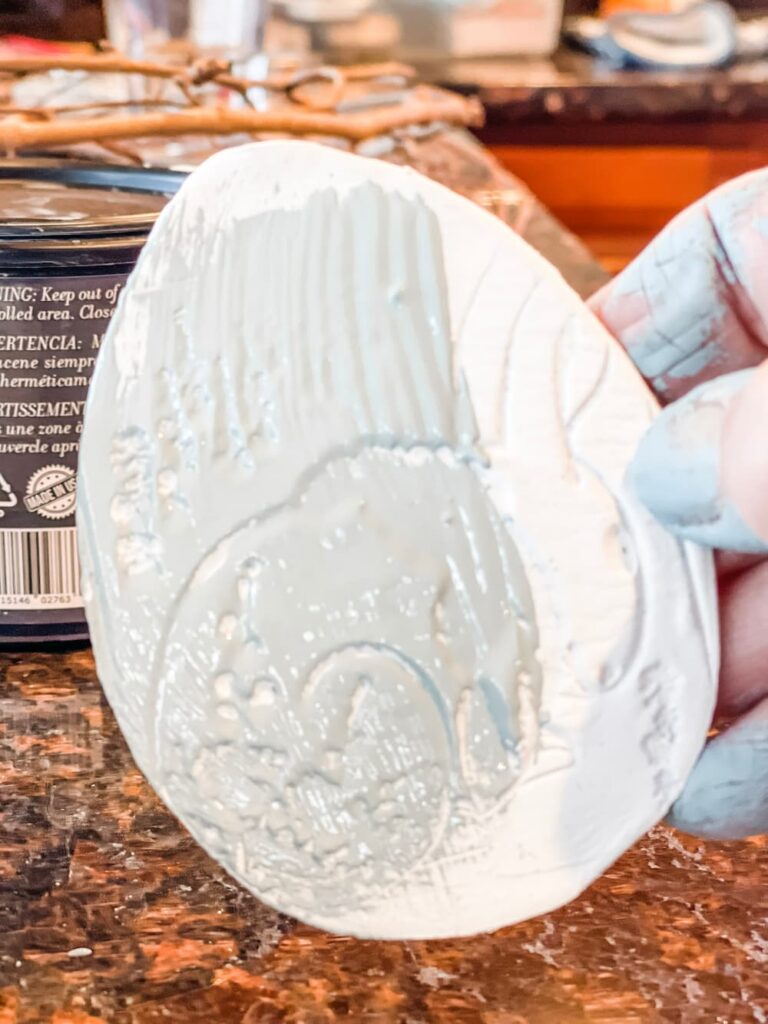
STEP FIVE – PAINTING YOUR EGGS
Since my color was light blue, I opted for Dixie Belle Chalk Mineral Paint in Duck Egg Blue, how perfect was that? The eggs only needed one coat of paint.
Depending on how you are going to use you eggs, you could opt to add a coat of sealer to your eggs. I chose to keep mine plain.
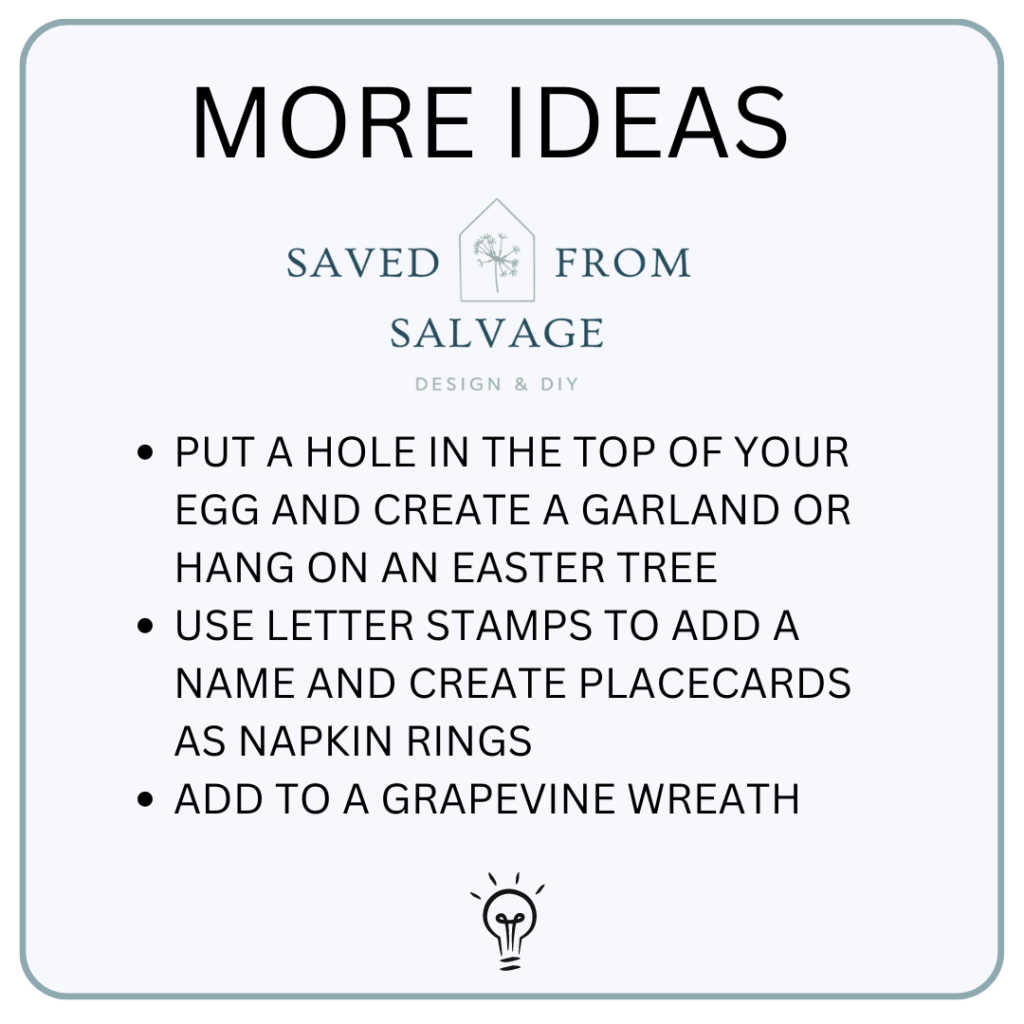
WAYS TO USE EGGS IN YOUR DECOR
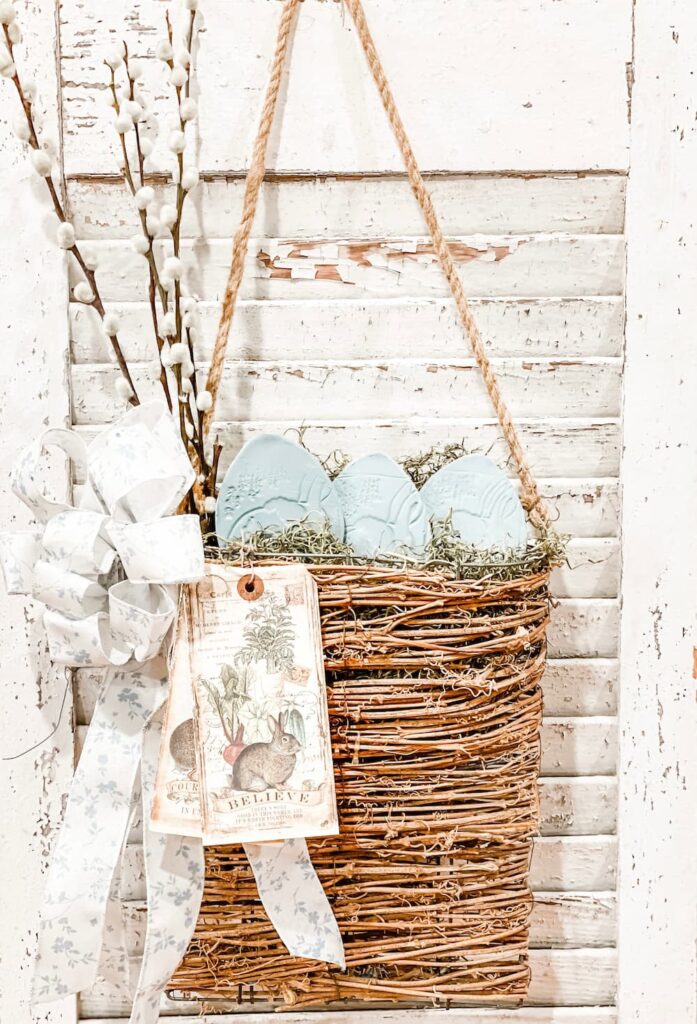
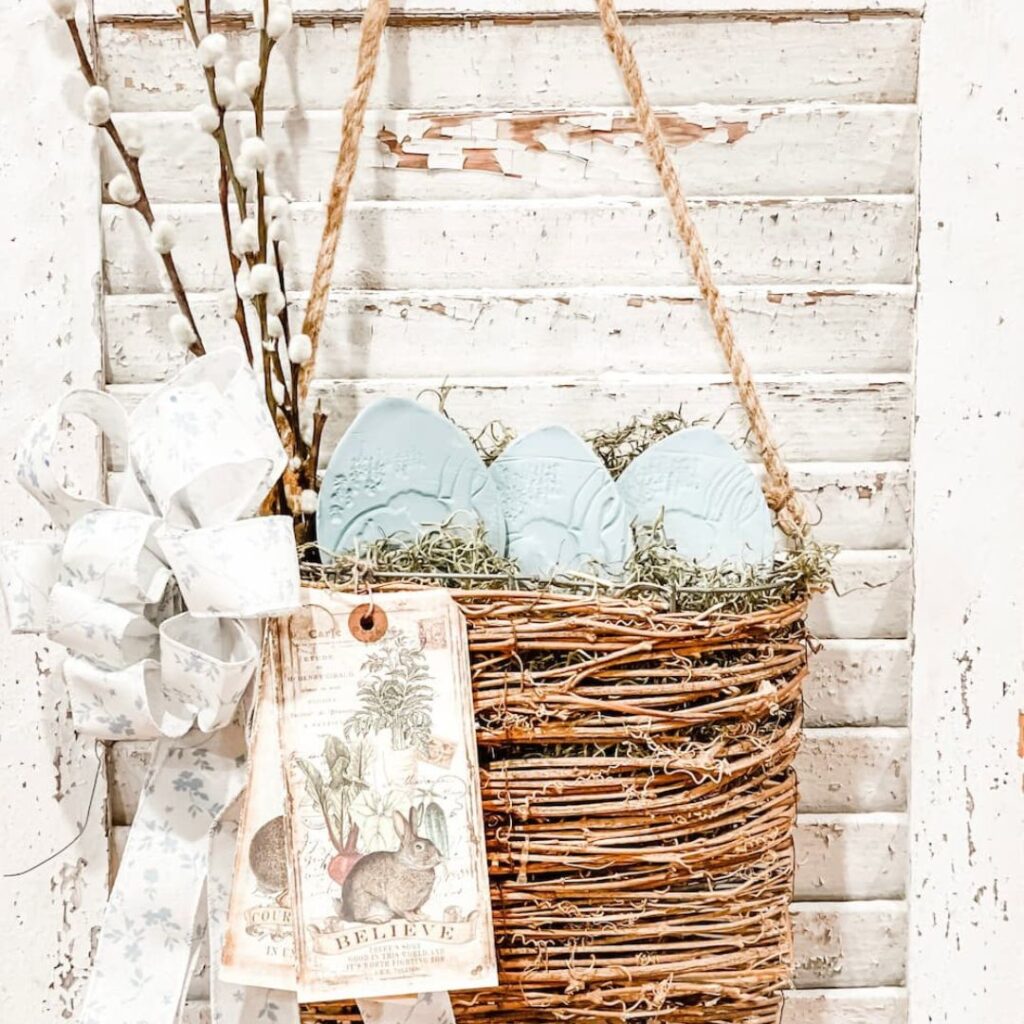
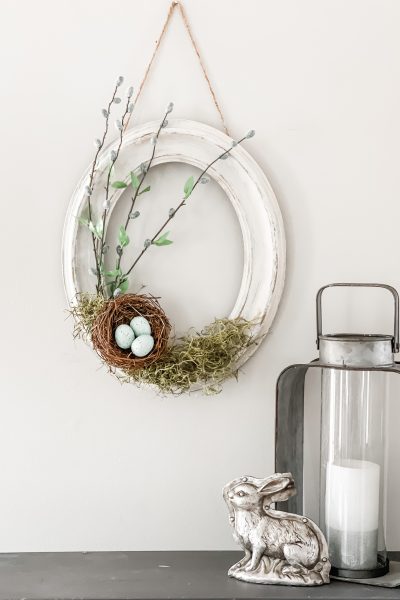
These clay eggs are easy to tuck anywhere you want to add a little color and touch of spring. I am showing you how I styled them around my home. I began with them in a hanging basket.
The next way I styled them was to tuck them into this darling bunny that I’ve had for years.
He stays out all year but now he has some cute little blue eggs to hold.
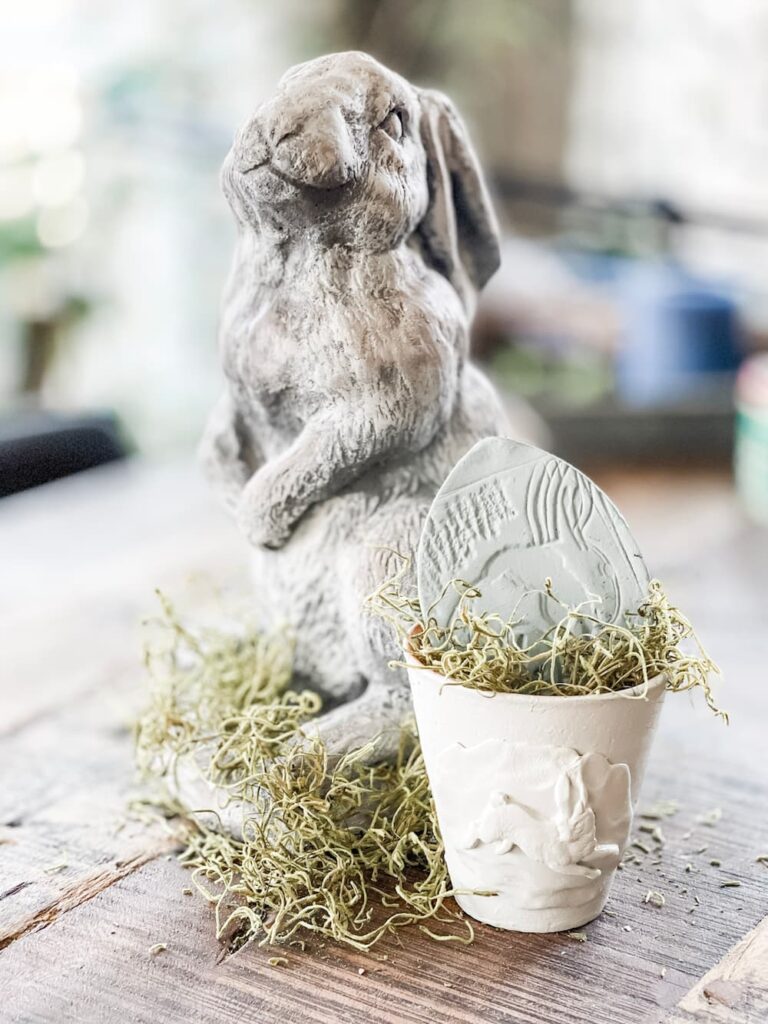
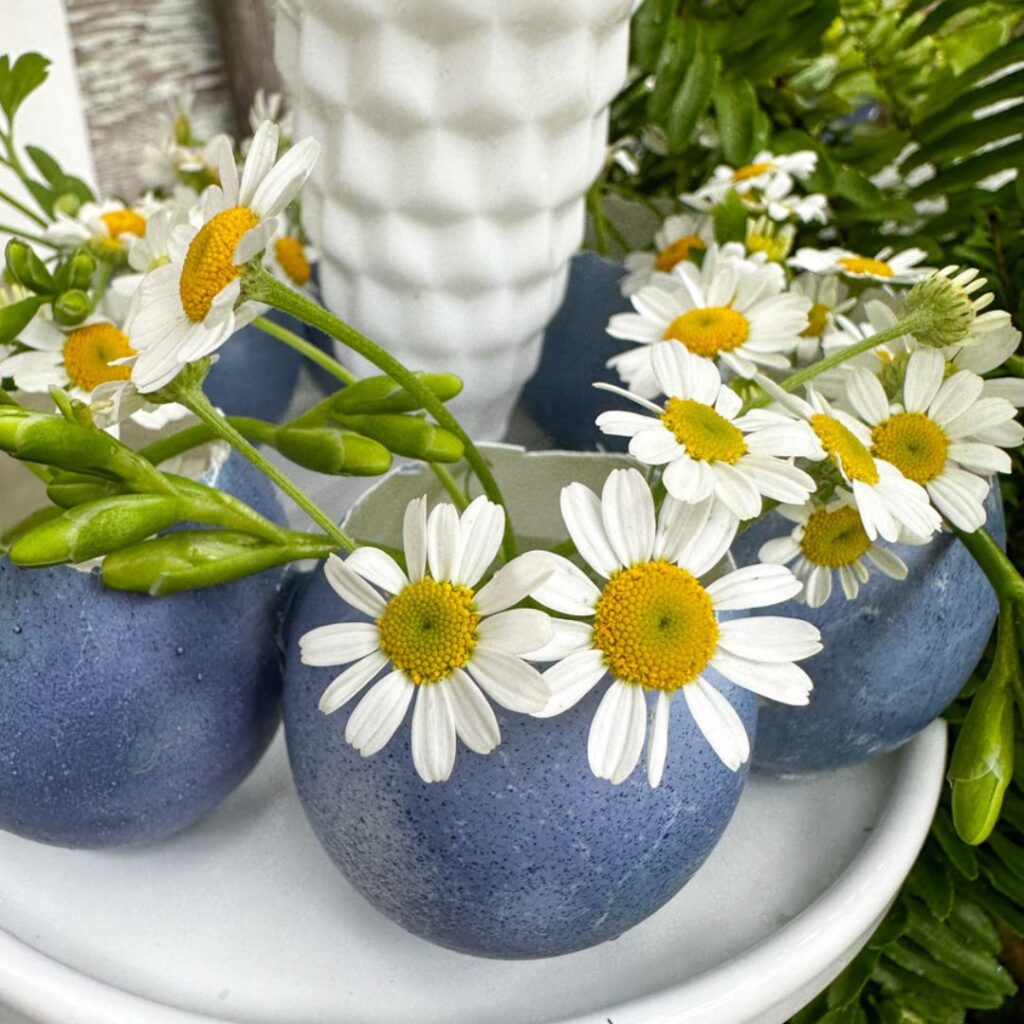
The next way I styled them was in my new little english pots that I worked on. I am in love with them and they look so cute holding an egg. I love them in this vignette with my large bunny watching guard.
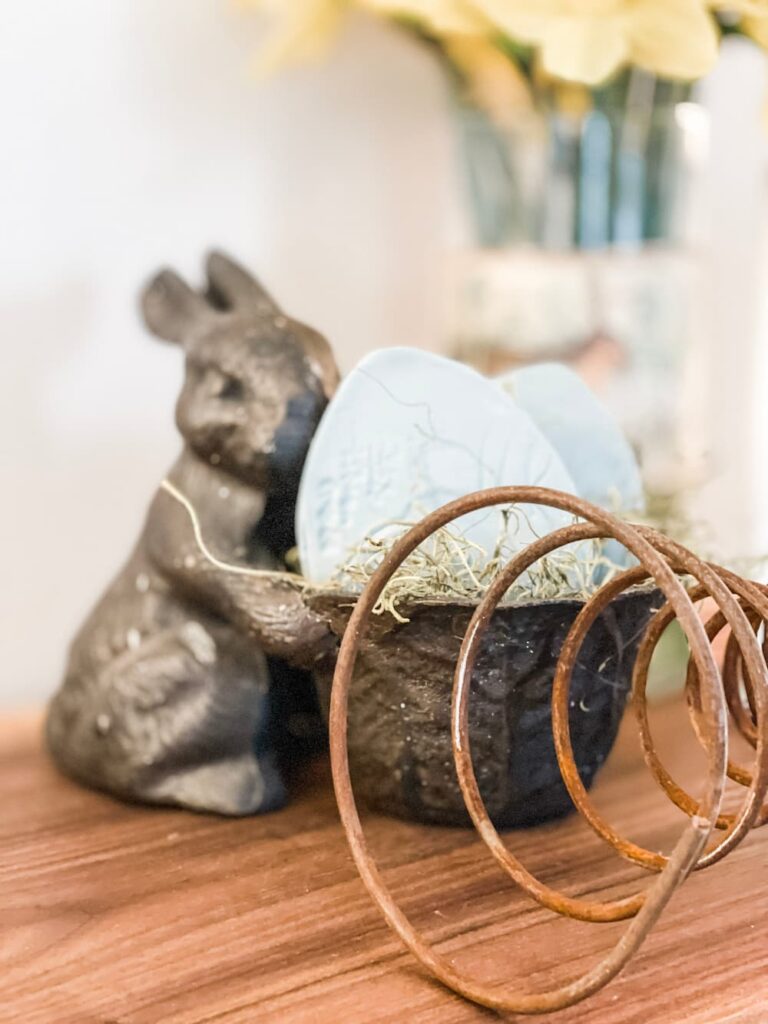
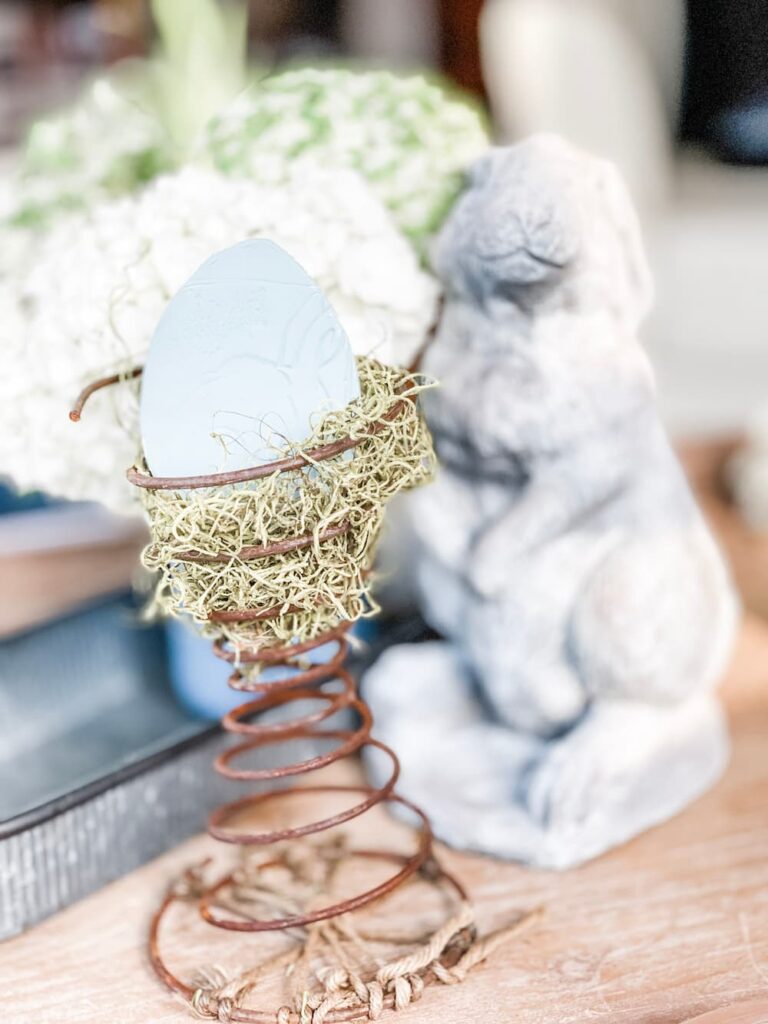
I always bring out my vintage bed springs for spring. I tucked an egg on top of some grassy moss and it gives a nice pop of blue in front of my white and green hydrangeas.
HOW TO USE EGGS AS NAPKIN RINGS
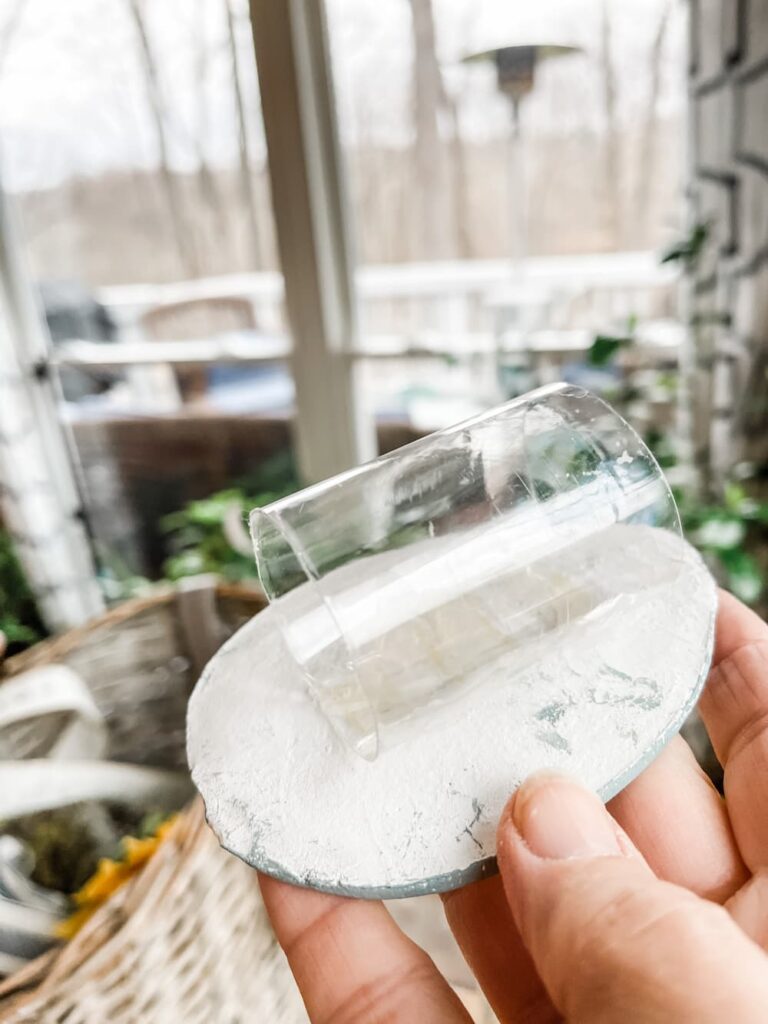
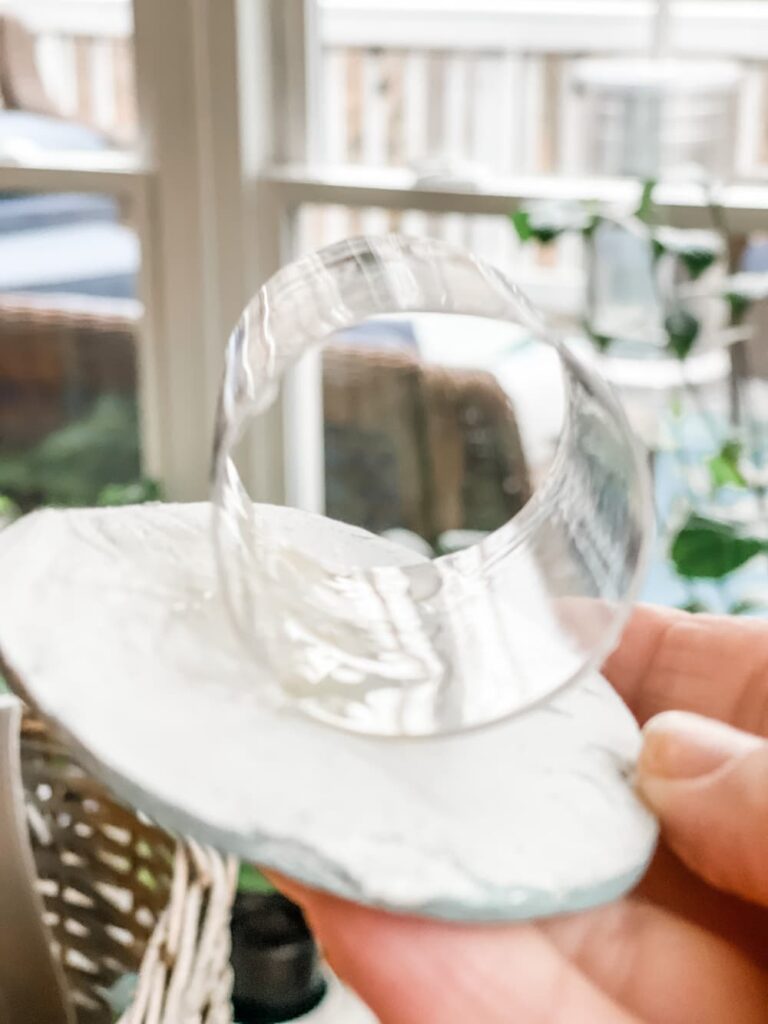
DIY napkin rings is another favorite of mine to make. They allow you to set a unique place setting that no one can buy in the store. For these I used an almost empty plastic spice bottle.
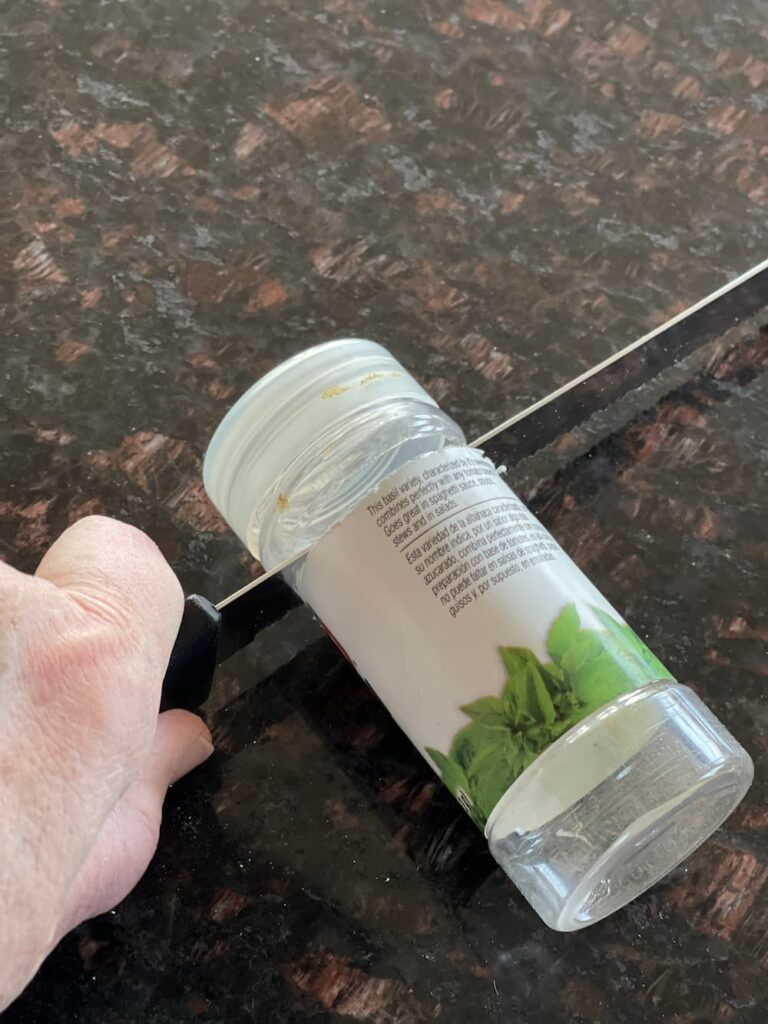
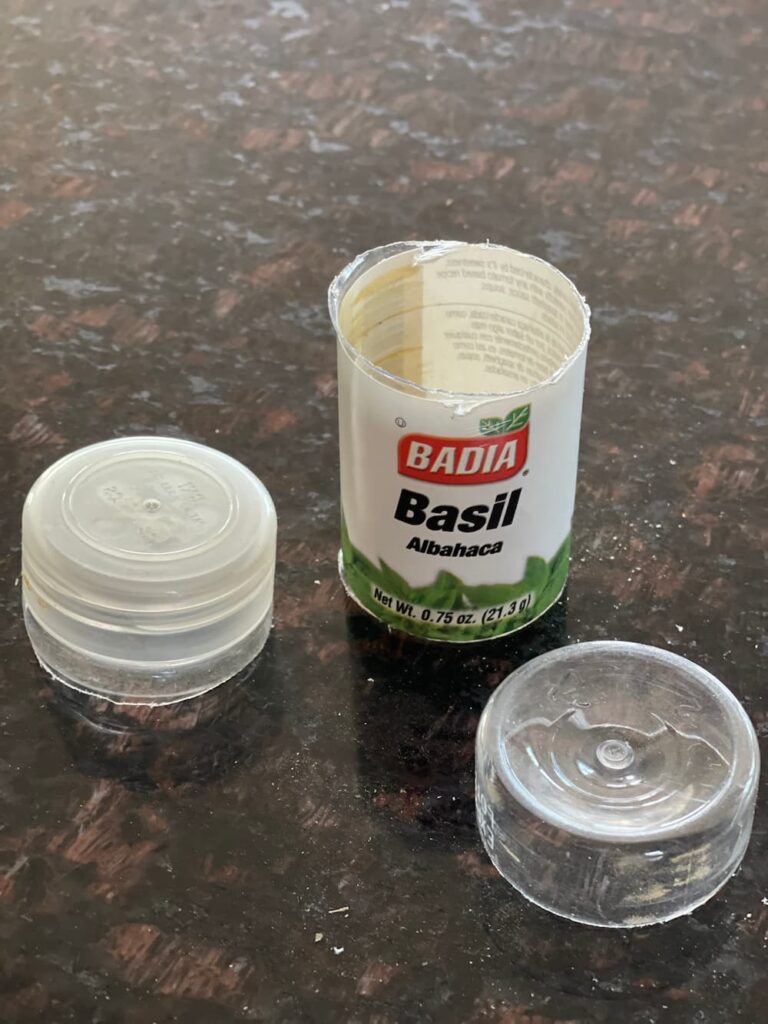
I cleaned it out, cut it with a serrated knife, trimmed the edges and then glued the eggs onto it.
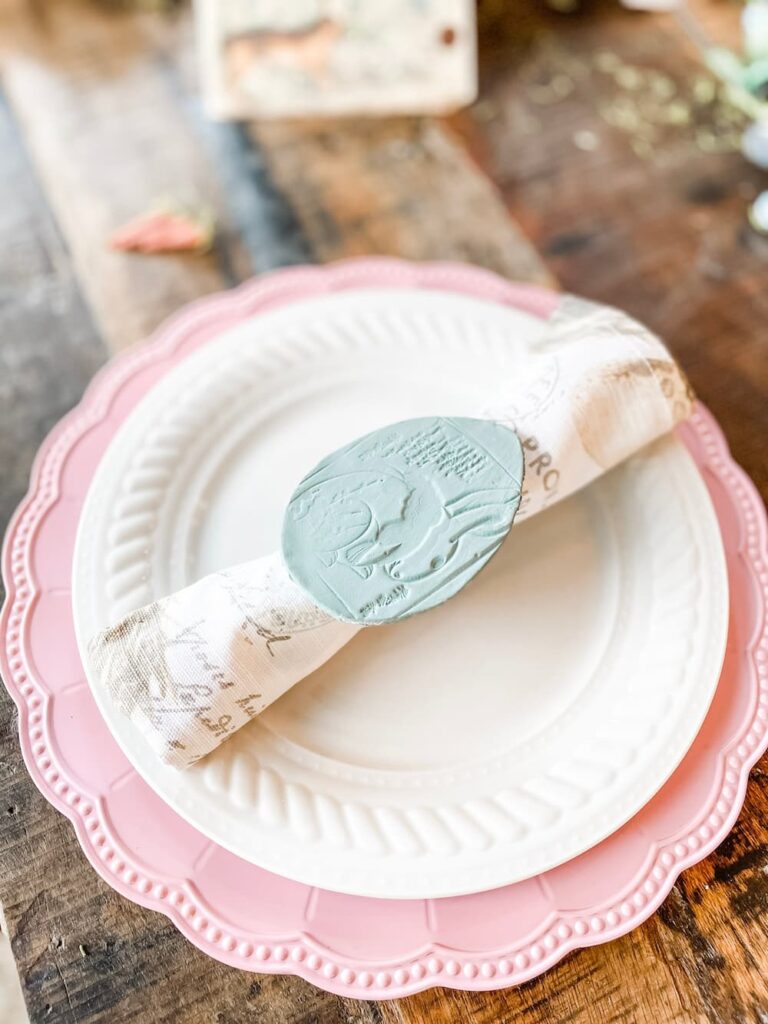
Talk about an inexpensive DIY. How cute did these turn out?
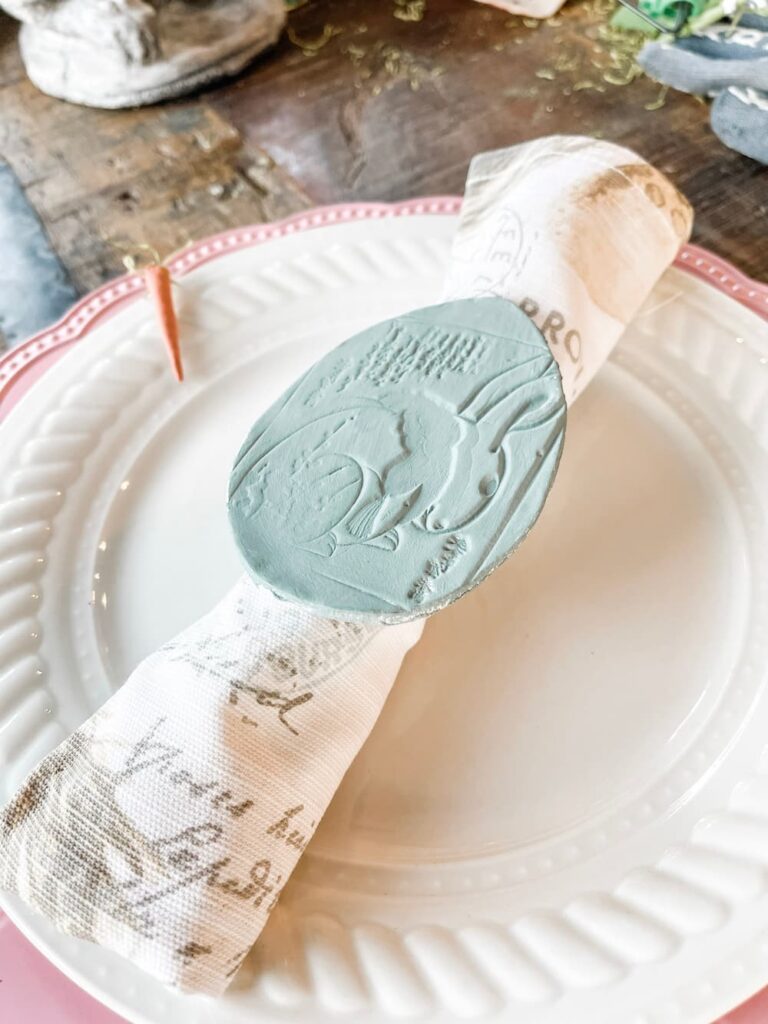
You could cut them again and get two napkin rings from one plastic spice jar.
They just happen to match these new napkins perfectly since they also have blue eggs.
For a little more Easter inspiration, see my post on Easter Tablescapes here.
I hope you enjoyed my ‘blue eggs” and enjoy more EGGSPIRATION below. Next on the list is Jennifer from Cottage on Bunker Hill, you’ve got to see her vintage eggs.
Thank you for visiting.
XO, Regina
HANDCRAFTED SOCIETY POSTS
You won’t want to miss all the details on these creative egg projects below. Click on the Handcrafted Society members and get inspired.

SHOP THIS POST


I love how cute your clay eggs turned out Regina! I’ve been into clay lately and still have a lot left over to give this a try. Using the old rusty springs for spring decor is an adorable idea!!
These are so sweet, Regina! I love the detail of the stamp and the color is so pretty! I also love how you turned them into napkin rings! Pinned!
These are so sweet Regina! I am inspired to make something like this now! I love the color too! Pinned!
These are just darling Regina! I just love the color and how cute they look in your pretty basket.
So cute Regina! I love that stamp and the way you painted these sweet eggs. And sooo many way to style them — brilliant way to make napkin rings.
This is such a cute and practical project! How cute would these be for an Easter brunch?? Pinned.
Really cute, Regina!! I l love working with air dry clay too. I need a bunny stamp I think.
I’ve been wanting to work with clay! I’m a plant person and so many times I need just the right pot for my miniature plants. . I find it but no base to put it on to catch the excess water. This would be ideal. I love the eggs and could use them also as accents. Thank you!
Michelle – What a great idea. I never thought of that!
Such a cute idea, Regina!! II love your eggs and the basket is so pretty! Pinned 🙂
xox
Your Easter eggs are beautiful, and I love that they are unique as well. I made a hanging basket this year and your egg idea would be great in it. Thank you for sharing.
Leanna – So glad you liked them!
Thanks so much Leanna
LOVE these sweet eggs, Regina! We will be featuring you starting Wednesday at the Creative Crafts Linky Party! Pinned and shared
Creatively, Beth
Thanks so much Beth!
Regina, these stamped eggs are so cute! I especially love them on the table, and the color is beautiful! Thank you for sharing with Whimsy Home Wednesday.
These are so adorable and I love that you show how to use them several different ways. This post will be a feature this week. #HomeMattersParty
Oh Donna. Yay. Thanks so much!
Regina, I love these sweet stamped clay Easter eggs! I am so excited to feature your post at this week’s Tuesday Turn About link party. Thank you so much for sharing!
These are truly GORGEOUS! Featuring when my party opens. Can’t wait to see your book!