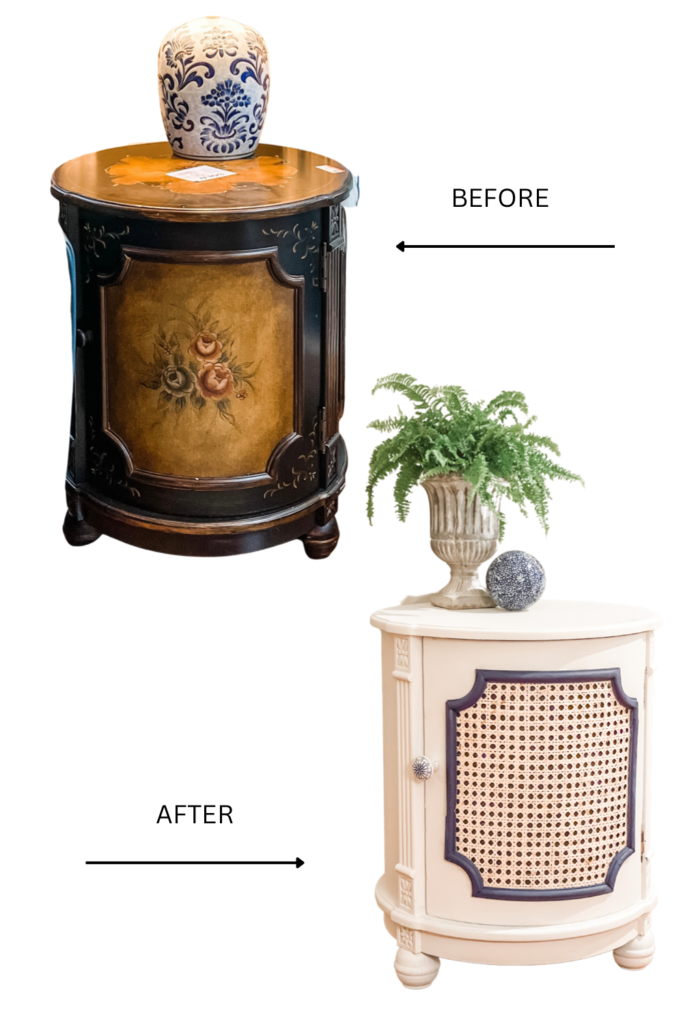
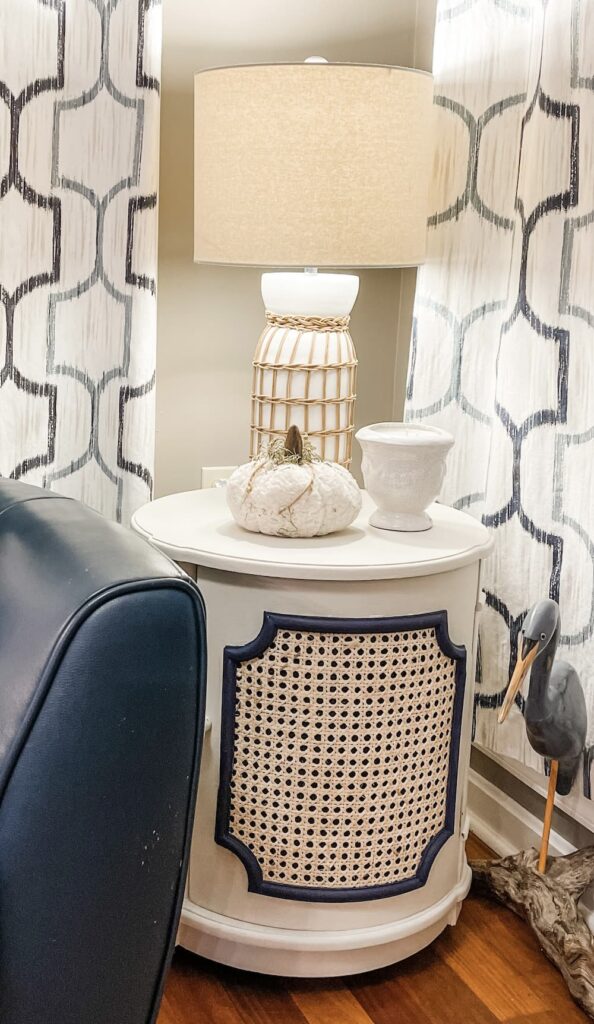
Do you love a good before and after? This side table flip with caning is adorable and was from the thrift store.
I’ve been loving the caning I’m seeing on projects. I purchased caning in a small roll and was just waiting to try it.
I spotted this table at Goodwill. It was $14.

Yes to me it was UGLY, but it was heavy and I knew it had potential.
I’m excited to show you how it came out.
Do you love flipping furniture? When they are great deals and turn out awesome, you just have to share.
Working with the caning was super easy. Below I’ll share the steps I used to get this look.
Table of Contents
TABLE FLIP STEPS
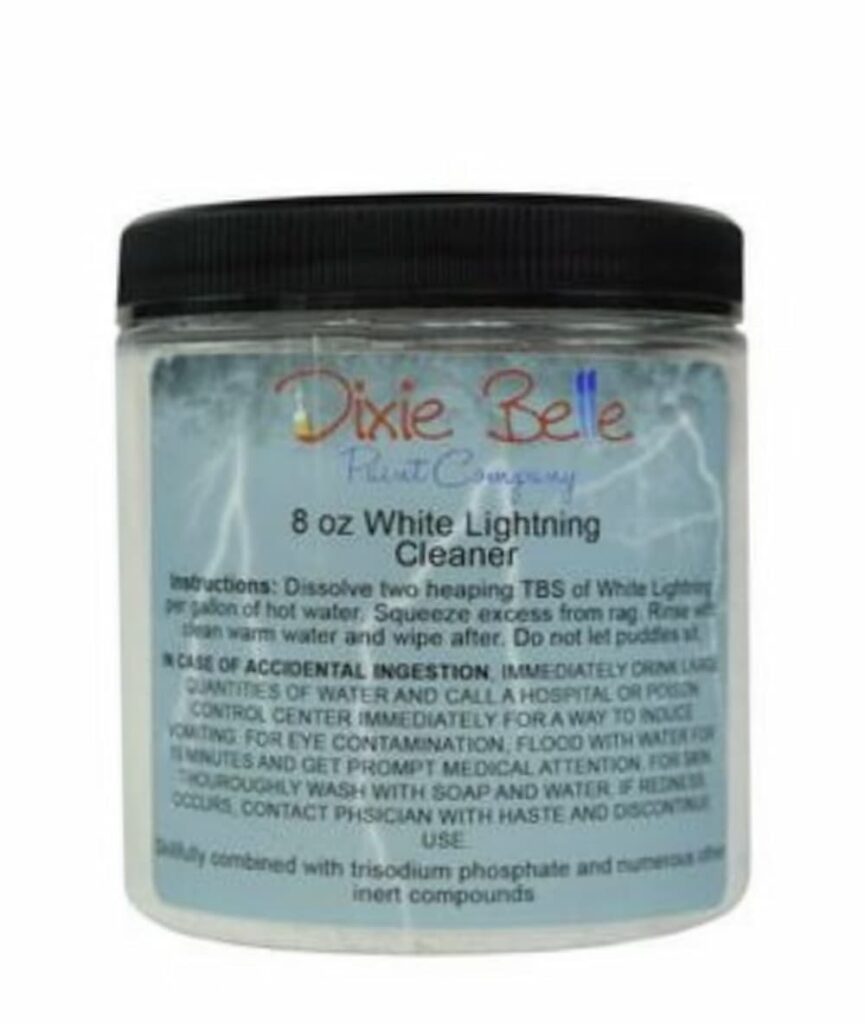
STEP ONE – CLEANING
The first step is always a good cleaning. In this case it was dusting it first, then I used Dixie Belle White Lightning Cleaner all over.
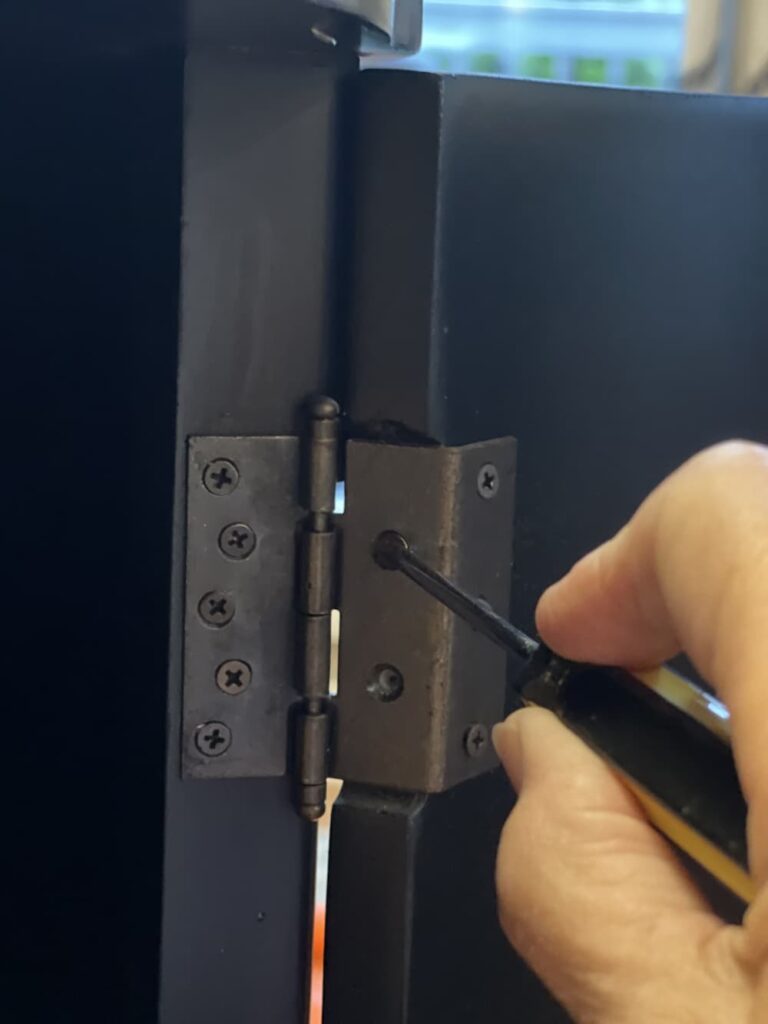
STEP TWO – PREPPING TO PAINT
Next I removed the hardware. This included the door pull and hinges for the door.
After the hinges, I unscrewed and removed the feet, there were three of them.
The last prep was to remove the trim on the door.
That is where I planned to use the caning.
It was glued and nailed so it took quite a bit of prying to remove it.
STEP THREE – PAINT
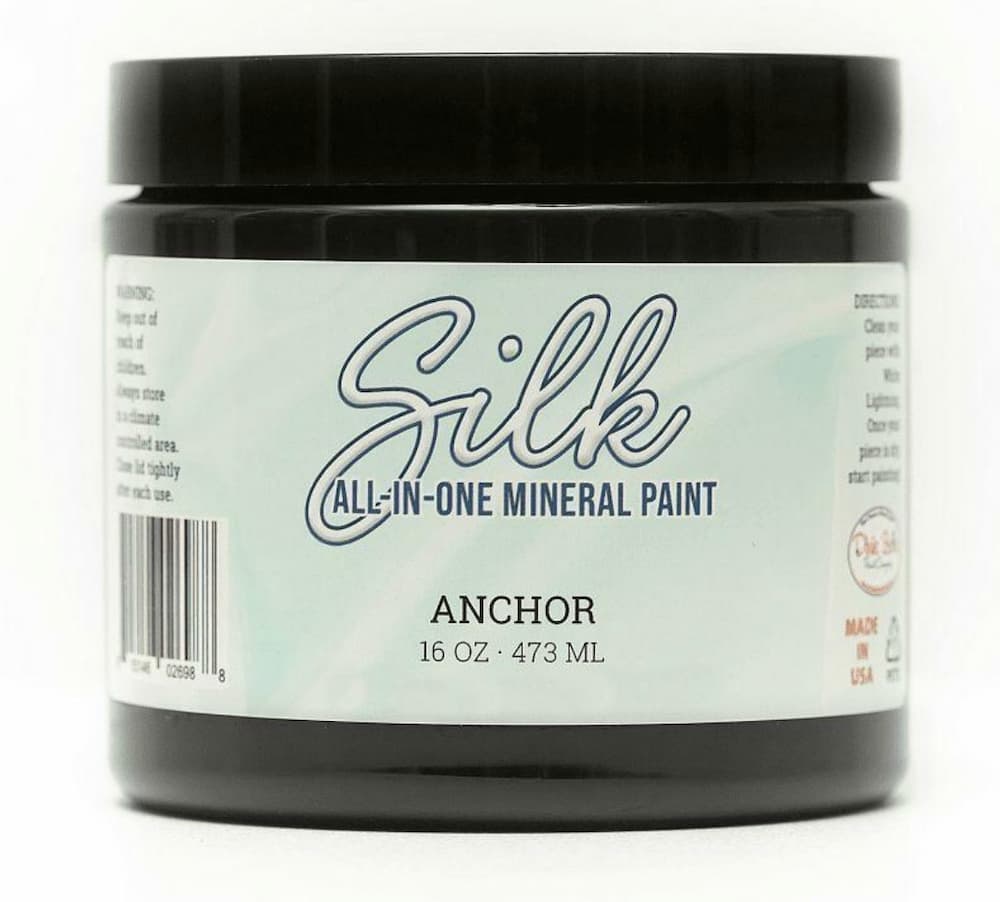
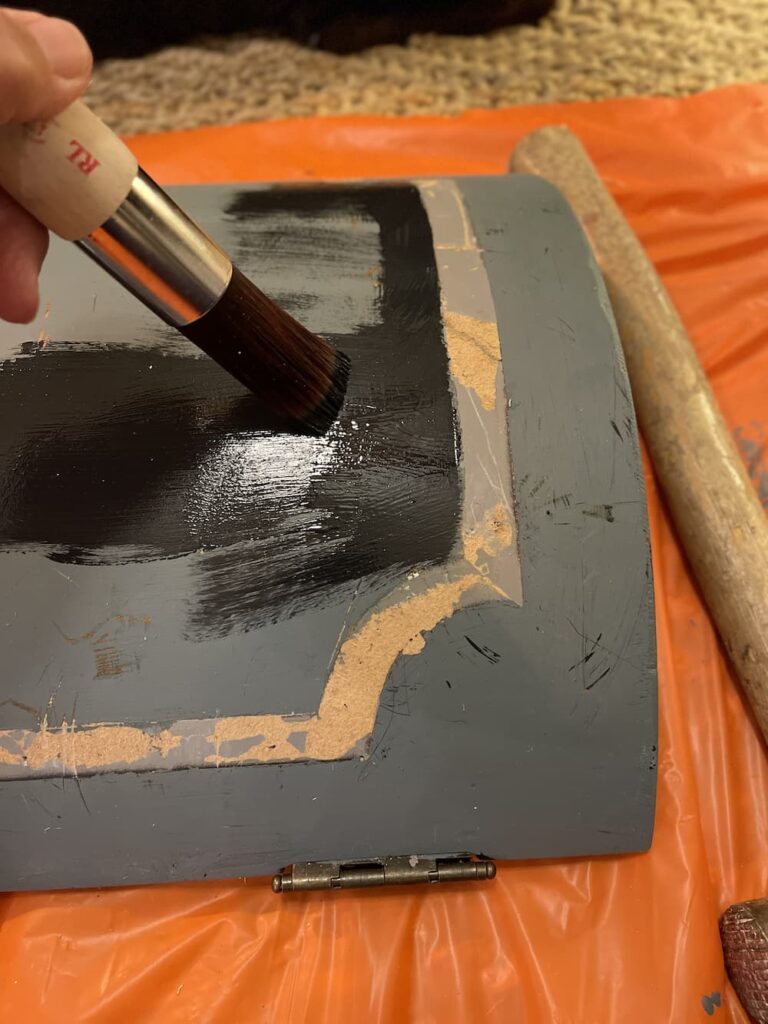
Since my plan was to put the caning inside the trim area on the door, I decided to paint it with Dixie Belle Silk Mineral Paint in Anchor.
That way when you look at the piece, it looks like there is nothing behind the caning.
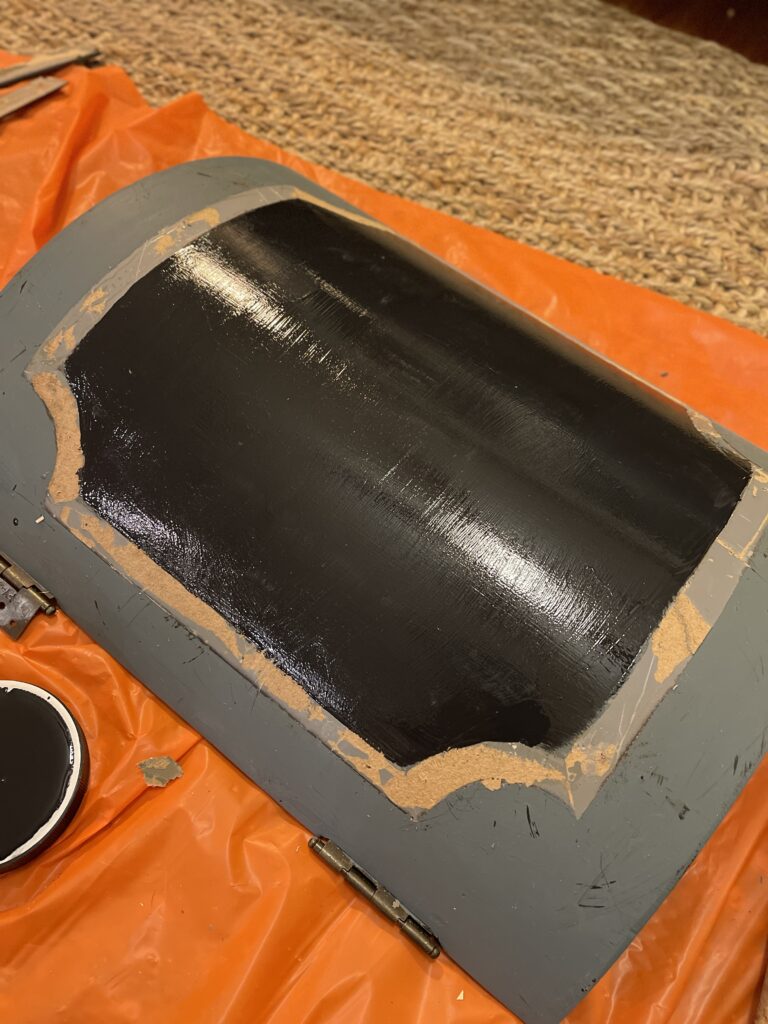
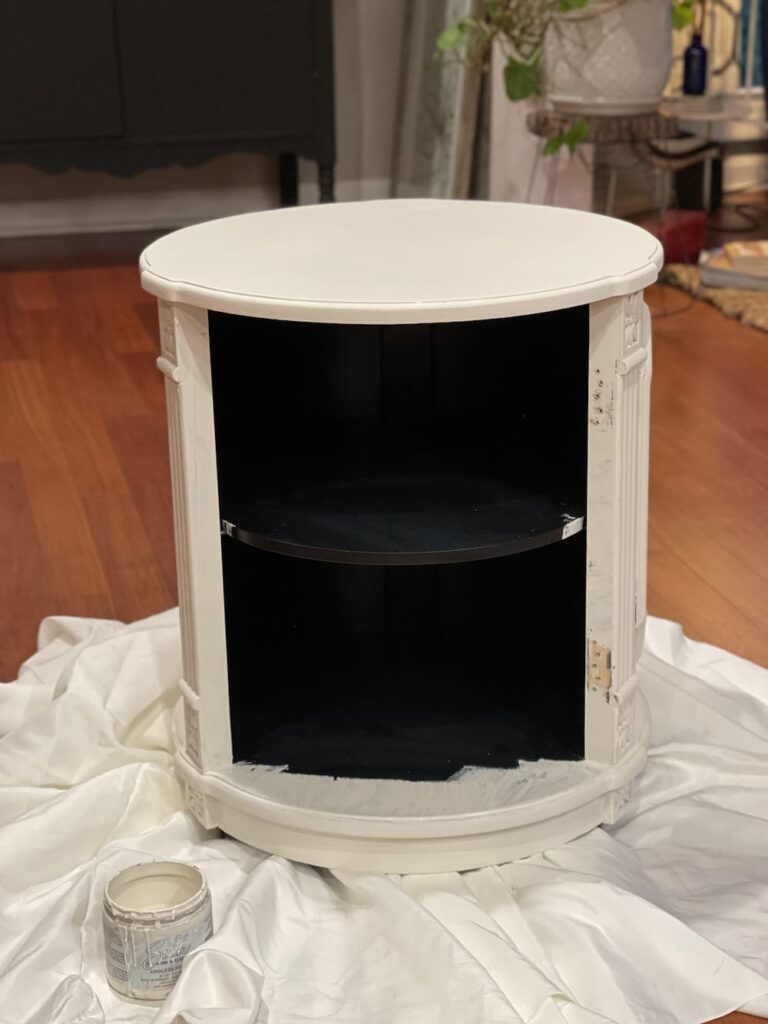
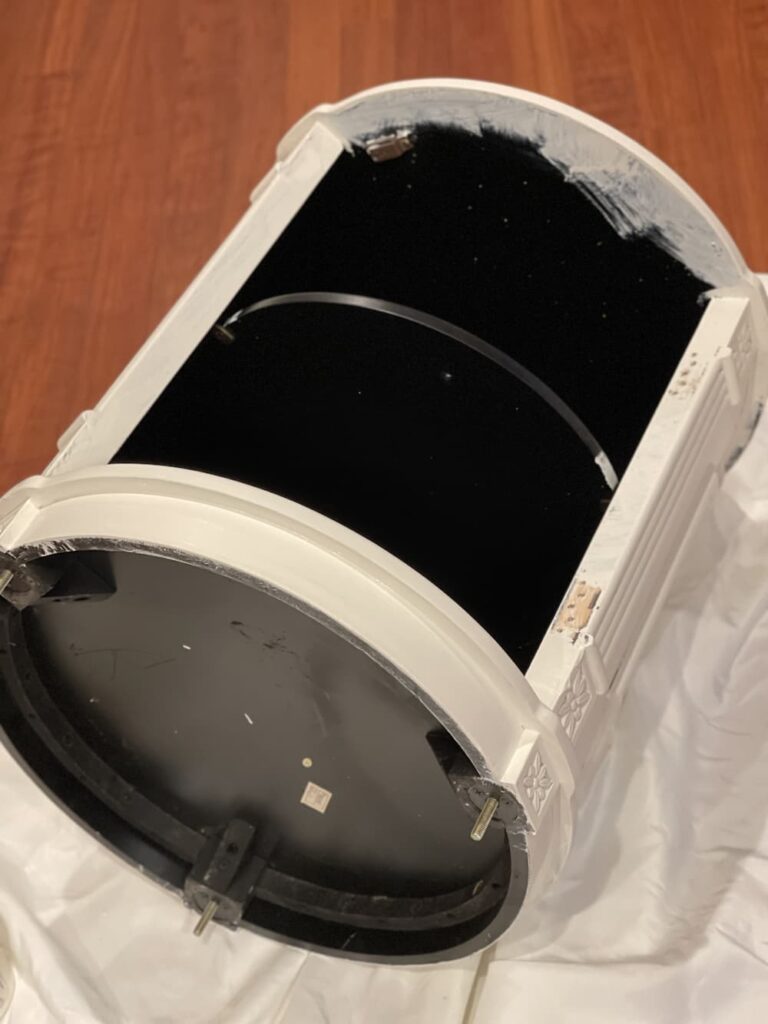
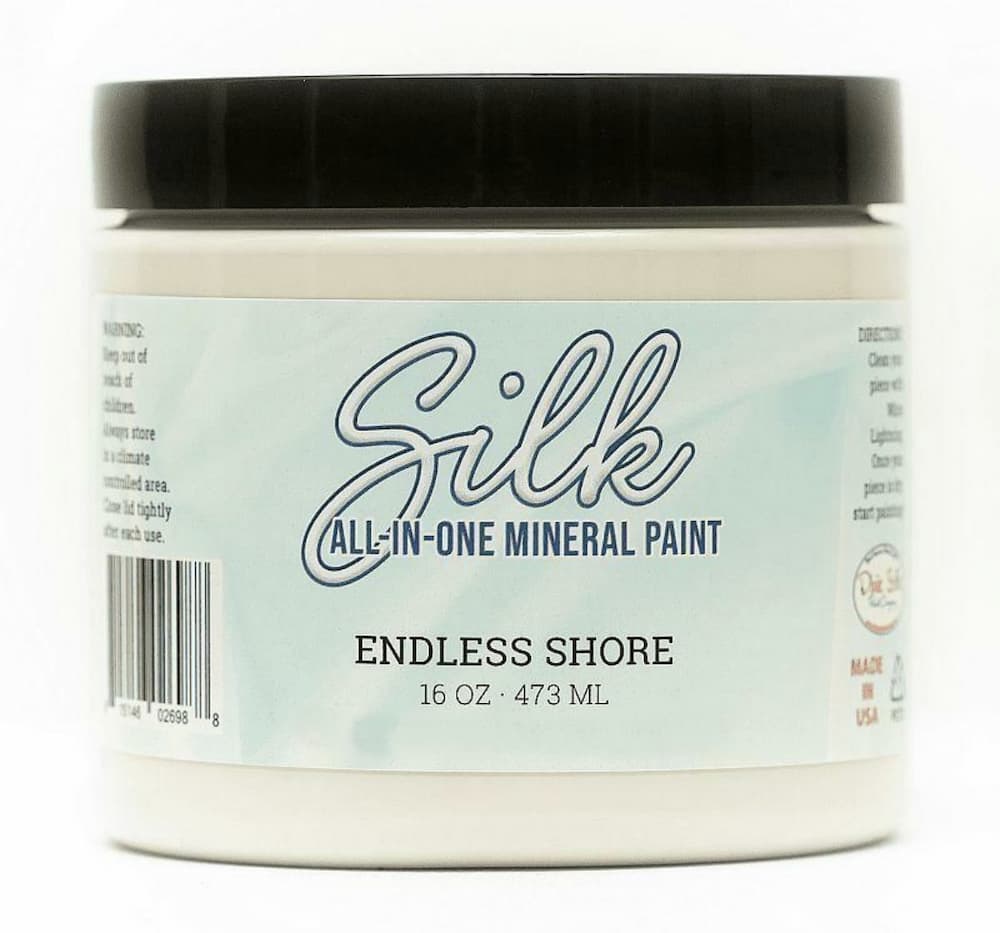
After painting the black, I began covering the remainder of the piece with Dixie Belle Silk Mineral Paint in Endless Shore.
An off white color which will look great in my reading nook.
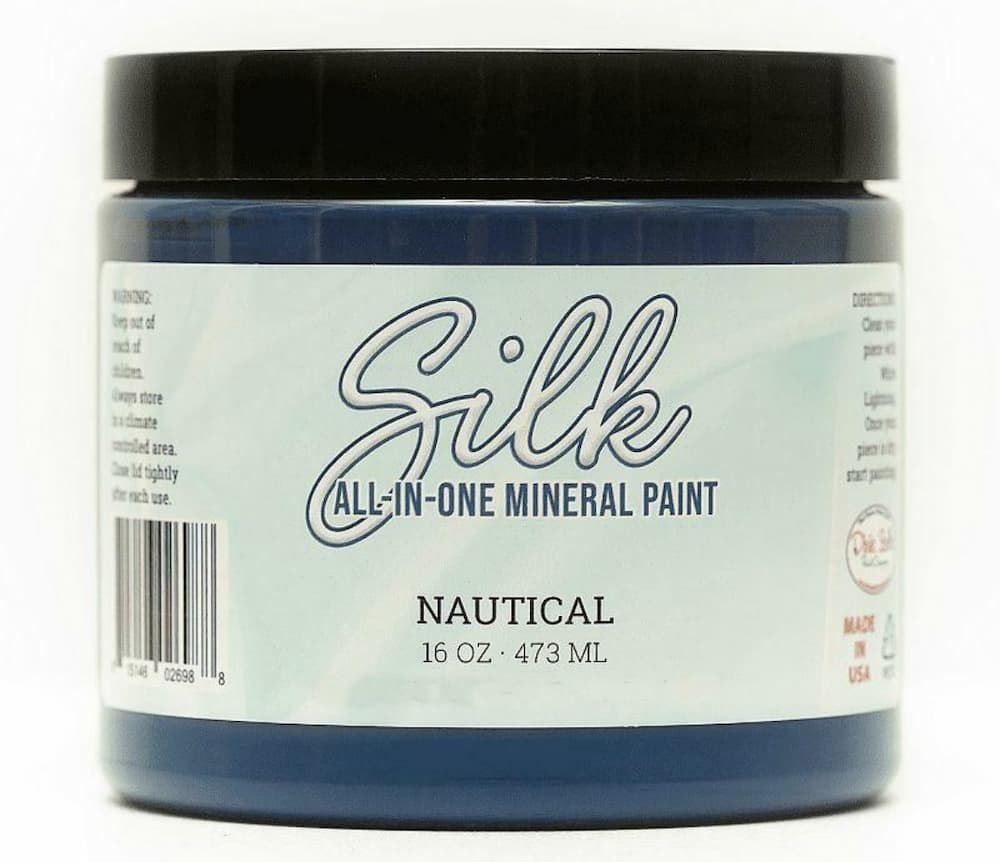
The final color was Dixie Belle Silk Mineral Paint in Nautical.
This bright navy would be perfect for the trim on the door, it pops against the caning.
I used only two coats of the Endless Shore on the cabinet.
STEP FOUR – CANING
I purchased the caning from Amazon in a small roll.
I unrolled it and laid it against the door.
There were markings from where the trim was, so I could see exactly where the caning would cover.
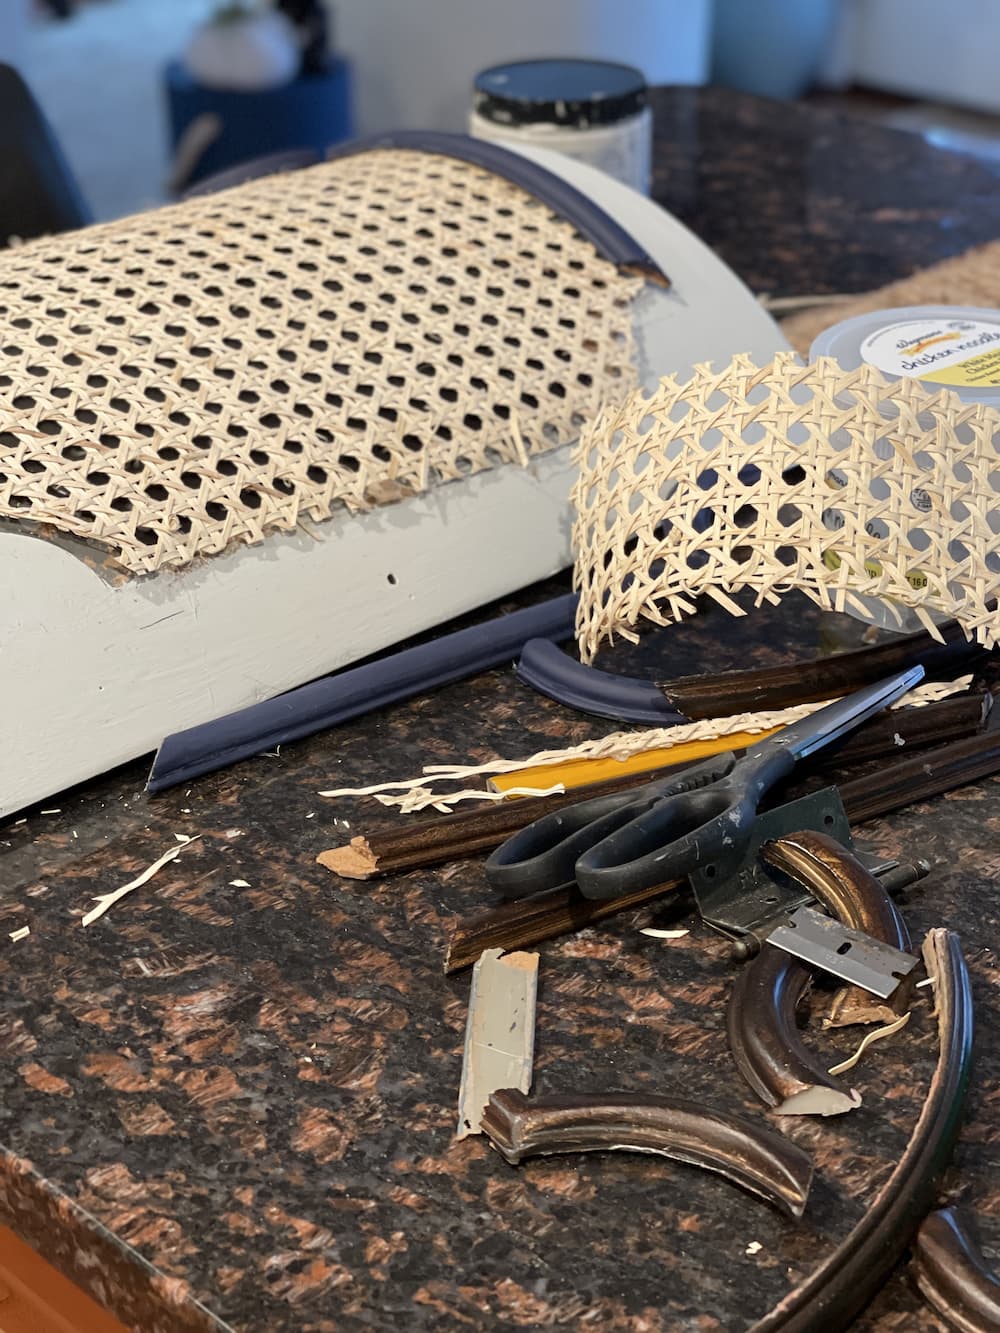
I sprayed it with my misting bottle of water. I’ve read that it shrinks a bit, so my goal was to spray it, then tack it down so then it stayed tight when it dried.
I tacked it down with a few drops of hot glue and then trimmed it with scissors to fit the area.
After trimming, I tacked the edges down with more hot glue and next was to add the trim back on.
STEP FIVE – PUTTING IT BACK TOGETHER
I was ready to add the trim back on top of the caning. I used a nailer to attach the trim but because the smaller pieces were plastic, some of them chipped.
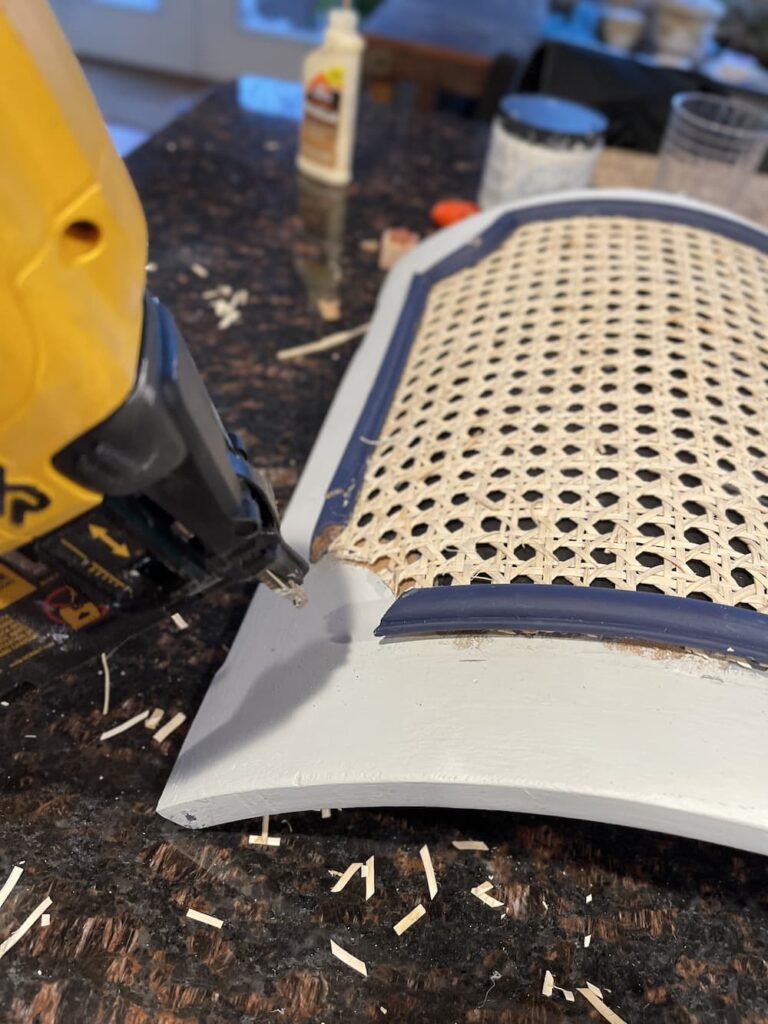
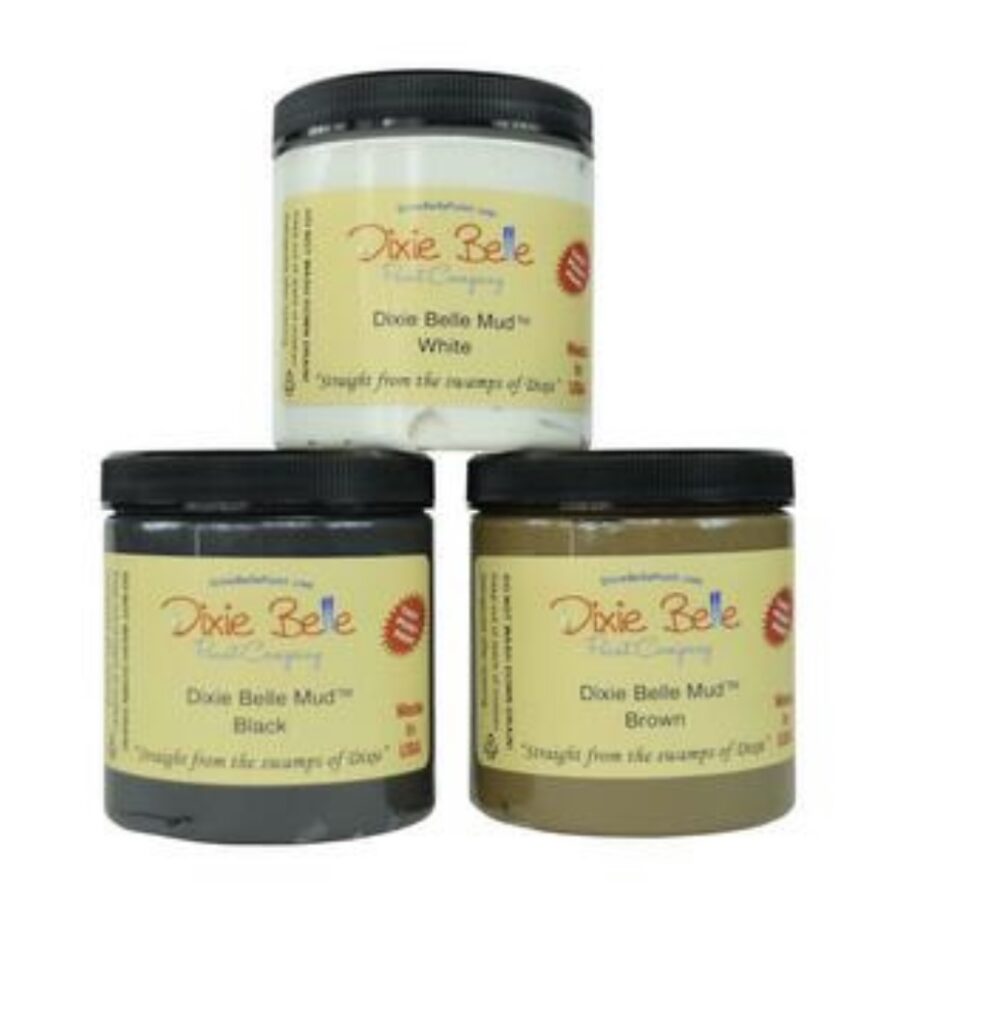
I used Dixie Belle Mud to repair the crack and fill the nail holes on the trim. After it dried, I touched up with the Nautical.
Next was to put the legs back on, the hinges and add a blue and white porcelain knob with a compass on it for the door.
I still can’t believe this heavy piece was only $14. When I was at Goodwill, I had a person writing up the ticket when a couple walked up and decided they wanted it. Fortunately I was already in process of buying, so I got this steal!
My advice, don’t go into the store unless you have a way to bring it home! Haha, that is one way to motivate me to keep my car clean.
Happy Thrifting.
Thanks so much for stopping by, I hope you enjoyed it.
If you are interested in more ideas and inspiration, please subscribe to my newsletter. Oh and if you want some Christmas inspiration, click here. Ok, if it’s too soon for Christmas, you can check out my Thanksgiving Tablescape here.
I’d love to have you join me on my journey, if you enjoy trash to treasure flips, click here.
XO, Regina
LET’S GO SHOPPING

Regina, your goodwill end table came out amazing! I love a good furniture project. How fun! The canning was such a genius idea. I love the natural look it has. It is always a pleasure to see what you have been up to lately. Thanks for sharing on the home Imagined party. Have a good week.-Meagan
Oh and pinned!-Meagan
Oh my gosh! I am absolutely bowled over by this transformation. I love that you used caning on the door. That was brilliant. Thank you for sharing this post on the Home Imagined Link Party.
Thanks for participating in Whimsy Home Wednesday’s! Your table project turned out amazing! What a transformation!!
Thanks for participating in Whimsy Home Wednesdays! We have selected your project to feature in our next edition this Wednesday 11/9! We loved what you did with this table transformation.
Meredith – Awe! Thanks so much
Regina, I am so excited to tell you that I will be featuring you Tuesday at the Home Imagined link party. Congrats!
Yay – thanks so much!
This is an amazing “flip”! I appreciate the way you didn’t let the dated look of the table dissuade you. What a great way to repurpose an older piece and create something beautiful once again.
Thanks so much for joining the Grace at Home party at Imparting Grace. I’m featuring you this week!