Ready to create a one of a kind upcycle project? This paint can project turned planter is perfect for those cans of dried up paint you may have piled up in your garage. Come along and make an old paint can into a planter with me.

Hi, I’m Regina and welcome to Saved From Salvage. I love to share DIY’s, furniture flips, tablescapes and event inspiration. I’m so glad you are here.
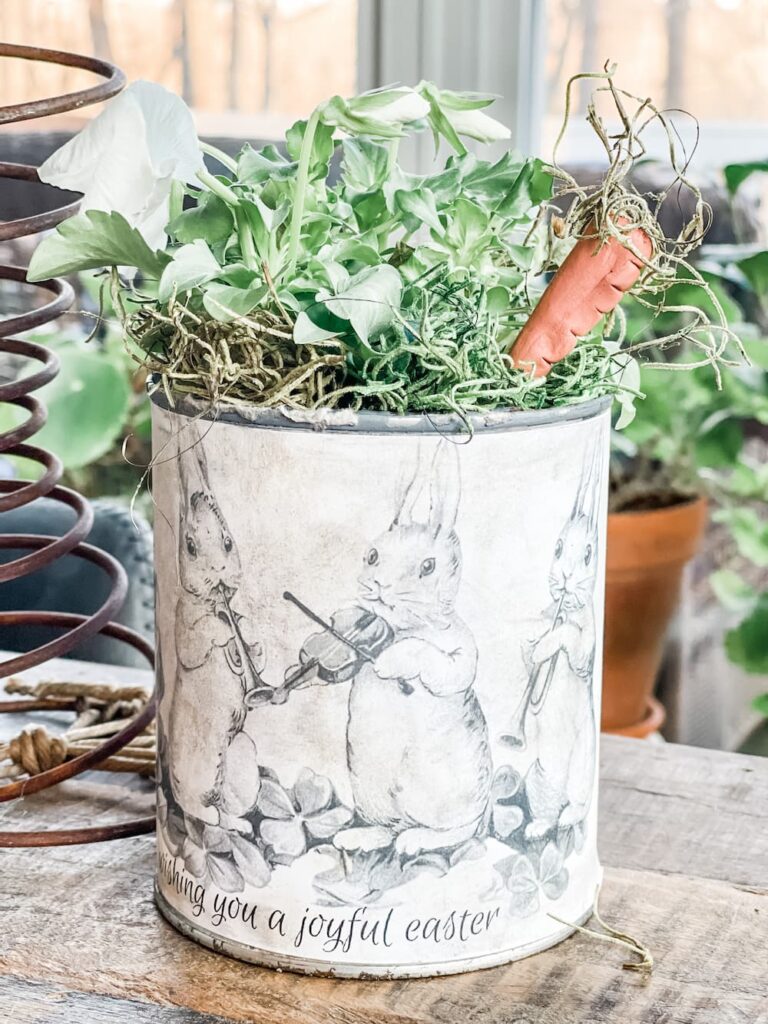
Table of Contents
OLD PAINT CAN PREP
There are a variety of ways to prep your can.
- To gift a plant, drop the plastic container the plant came in, right into the can.
- To plant inside your can, add gravel, dirt and the plant.
- Drill a few holes in the bottom and place on a saucer for better drainage.
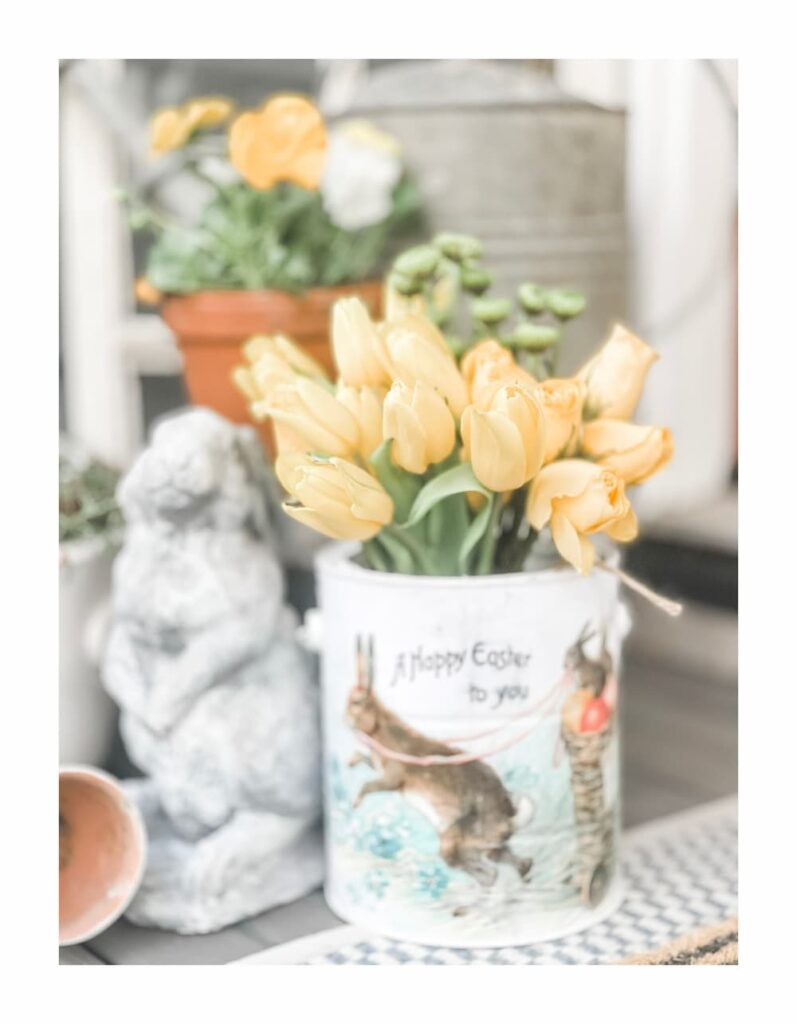
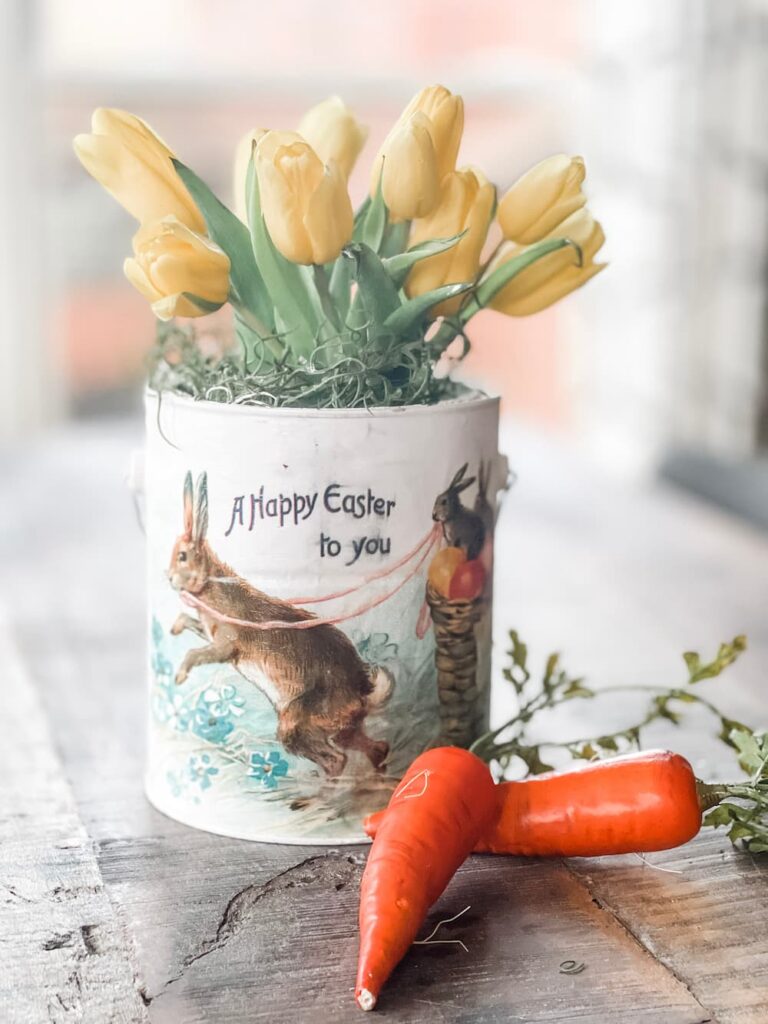
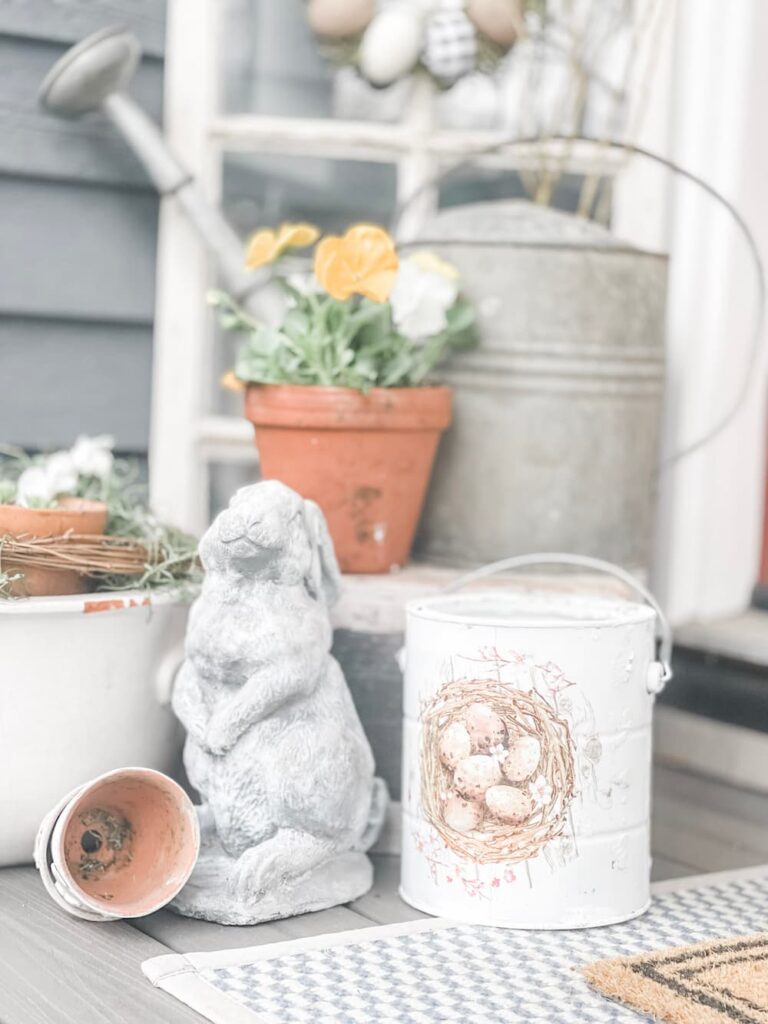
I was using them as temporary pots for my pansies and for Easter I am going to fill them with planted tulips I found at Lowes.
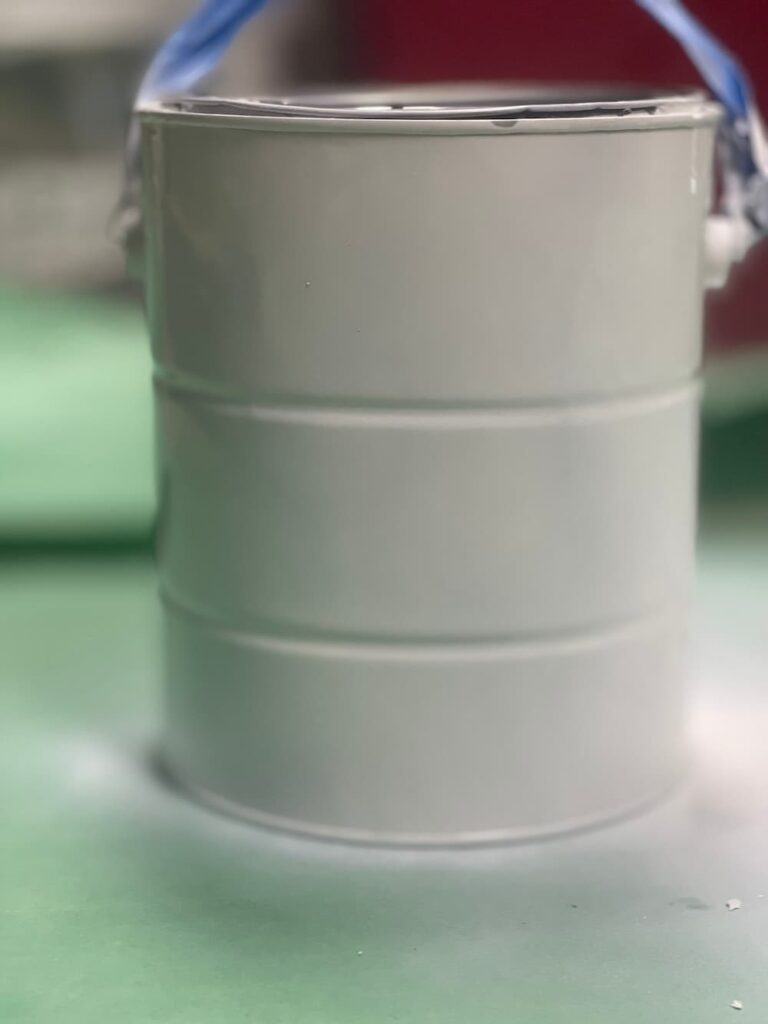
My can had very little paint inside, and it was dried up so I didn’t need to do anything else with it.
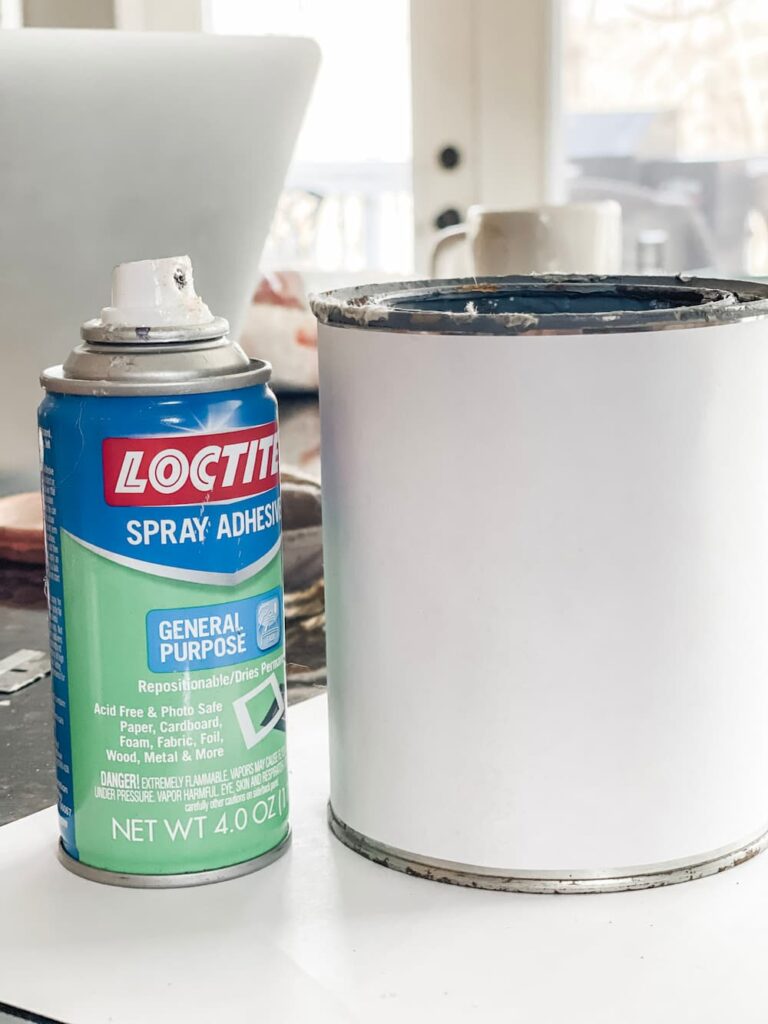
There are also two ways to prep the exterior of your can. I covered my small quart can with paper and I sprayed the larger gallon can with white primer. I only used one coat of paint to cover the can.

FINISHING YOUR OLD PAINT CAN
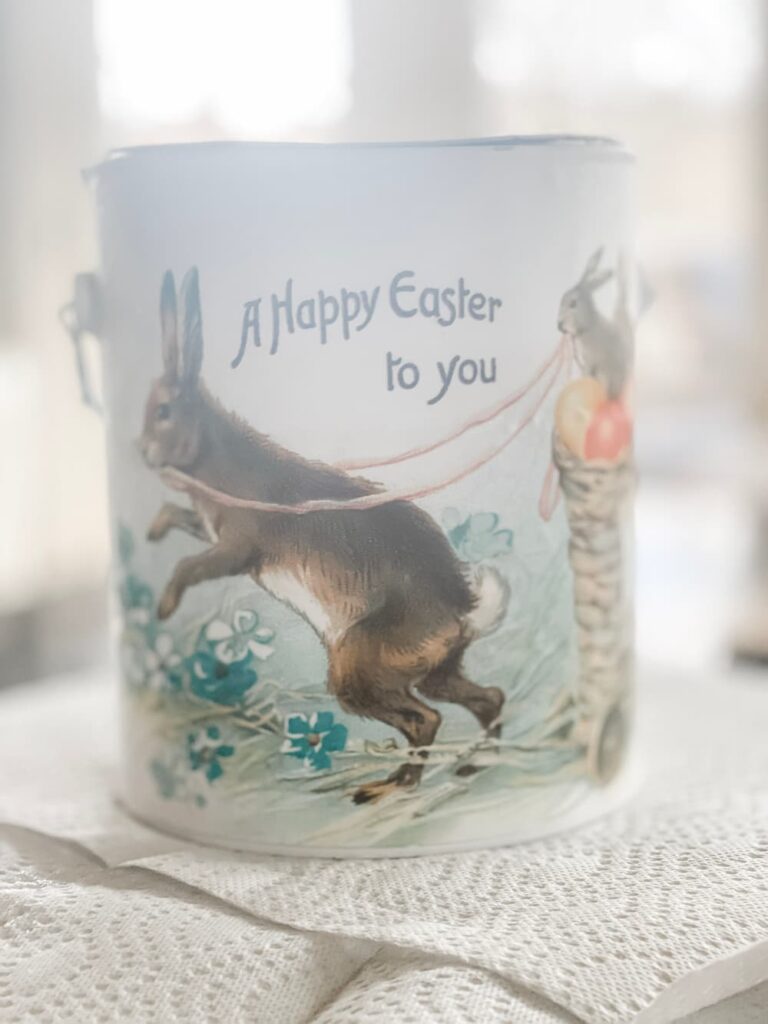
If you are looking for a wonderful variety of designs for your can, you need to check out The Graphics Fairy. I think it was 2014 when I tried my first design from this fabulous site.
DECORATING YOUR PAINT CAN WITH PAPER AND ADHESIVE
First I downloaded an image, I chose these bunnies. I uploaded it to Canva and recolored it, the original image was in color and I wanted the black and white.
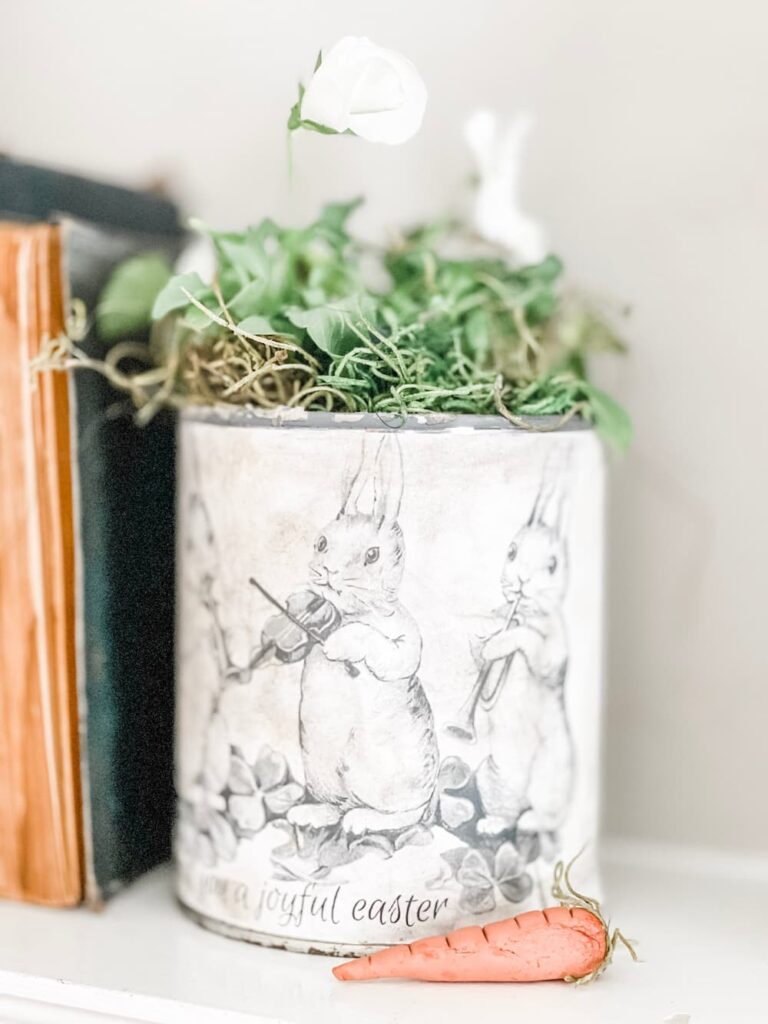
Next, I printed the image directly onto copy paper. I had covered the can with white paper, using a spray adhesive, then I added the image on top.
After I added the bunnies, I decided to use a little grey wax and distress it a bit.
DECORATING YOUR PAINT CAN WITH NAPKIN AND MOD PODGE
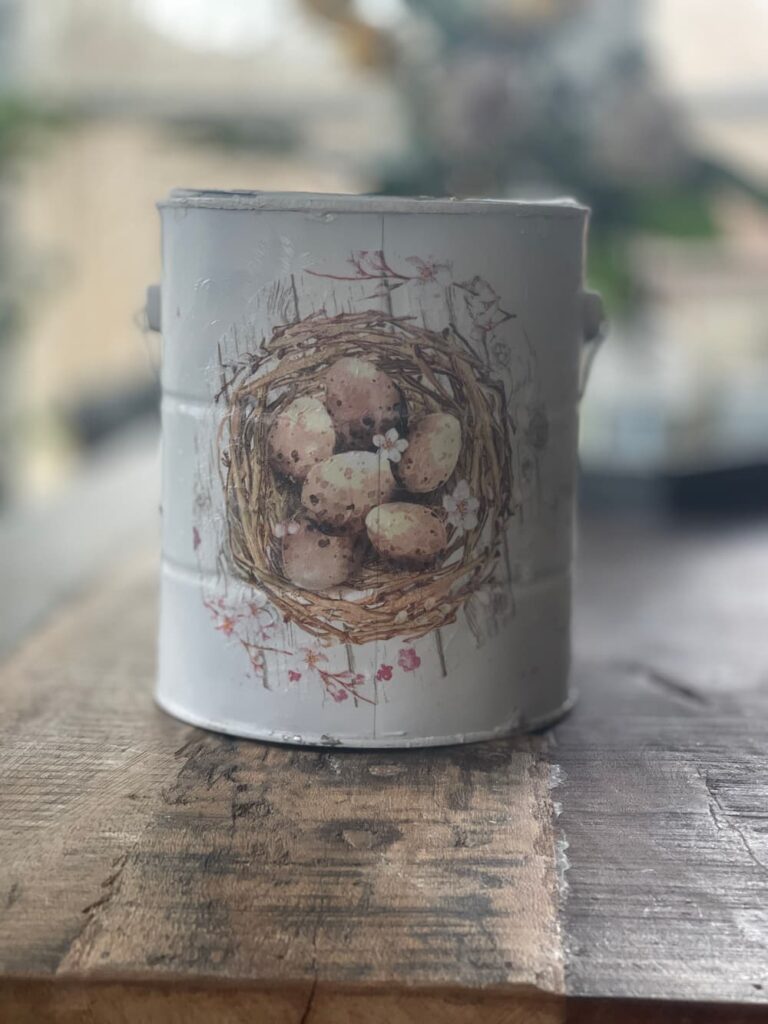
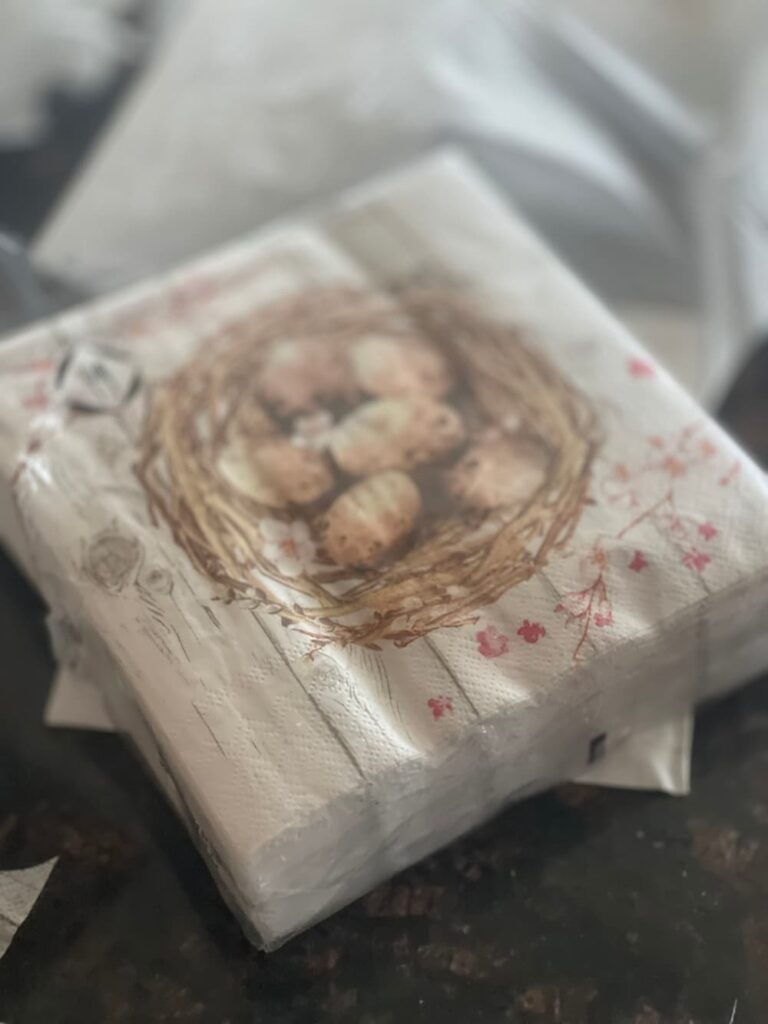
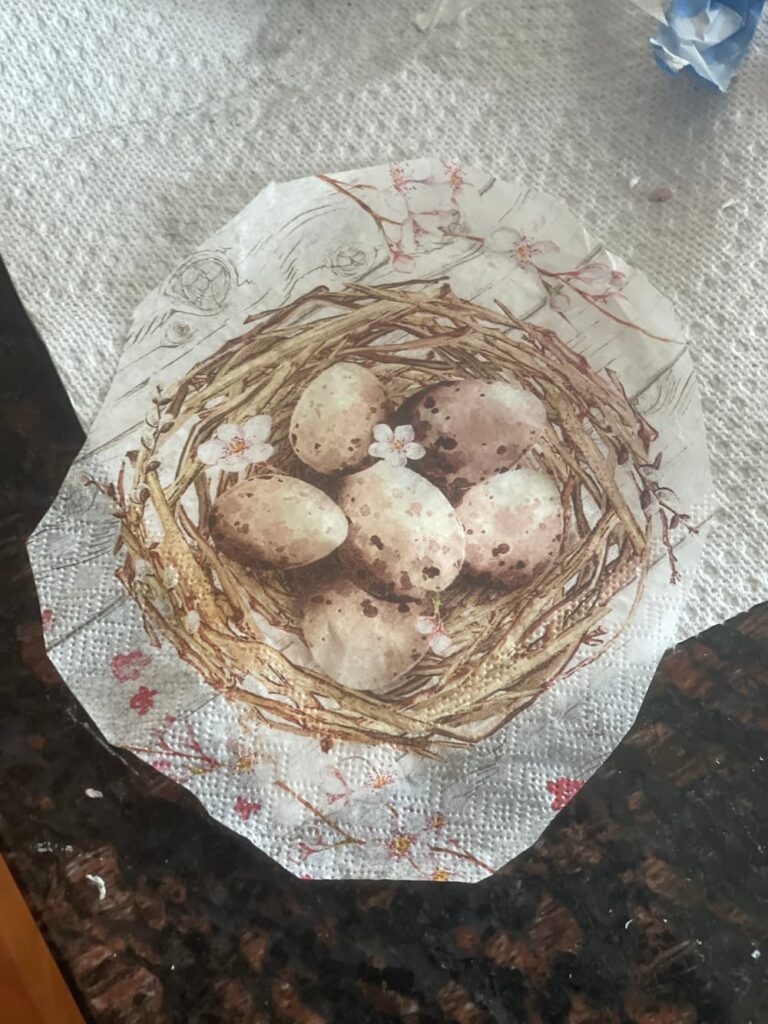
For my gallon sized cans, I created one with a napkin with this adorable nest on it and then I used Mod Podge to adhere it to the paint can.
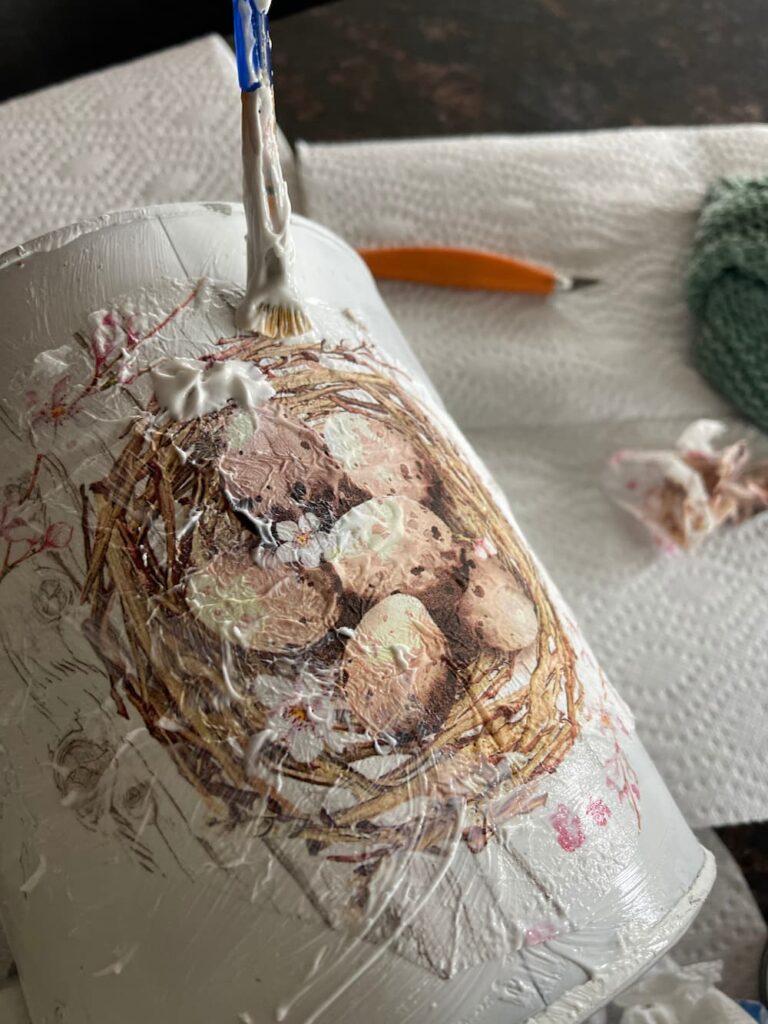
Then I coated it with Mod Podge and let it dry. When using the napkin, you must separate it from the backing before using. It will be very thin, I used Mod Podge for tissue.
DECORATING YOUR PAINT CAN WITH PAPER AND MOD PODGE
For my next gallon can planter, I used The Graphics Fairy again. I found this cute little rabbit print. After I downloaded the graphic, I then printed it onto copy paper.
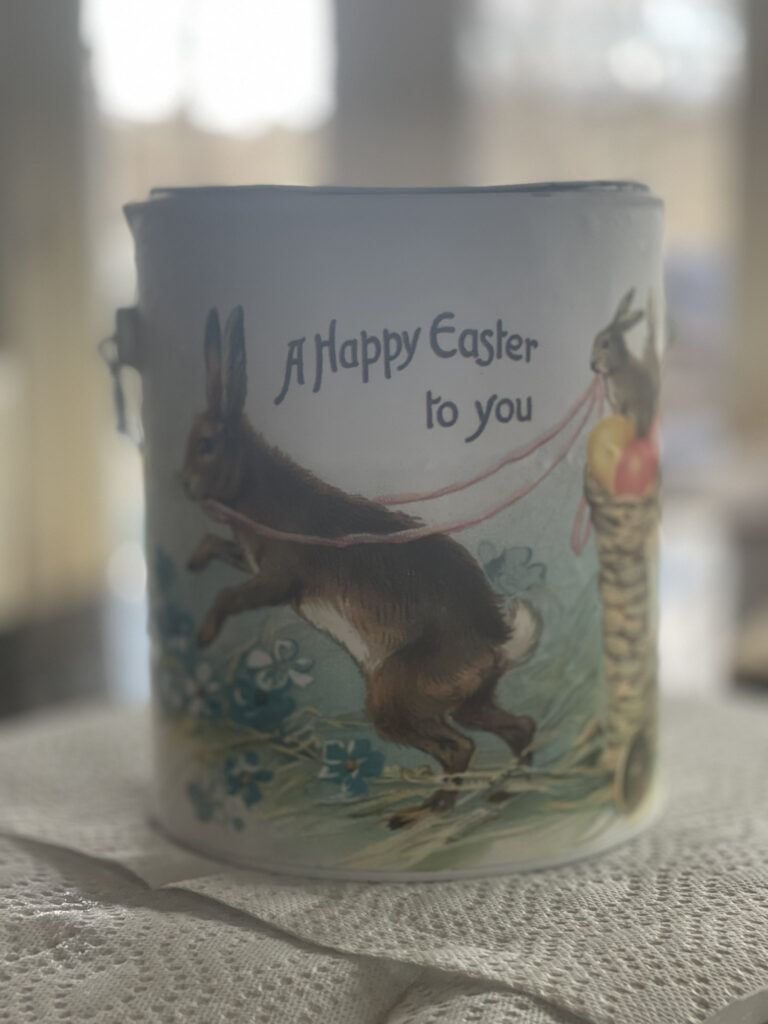
For this print, I used Mod Podge to adhere it to the gallon paint can. Then I sprayed it with a Mod Podge sealer. I used my finger to smooth out the paper and the color smeared. That did not make me happy, and I tried to wipe it away but it was definitely staying smeared. You can see below it smeared.
After the spray dried, I used regular Mod Podge and brushed a layer onto the image. I may redo this one after I get more printer paper and print another clean image.
FILLING YOUR PAINT CAN PLANTER
CUT FLOWERS / PLANTS / EGGS / GIFTS
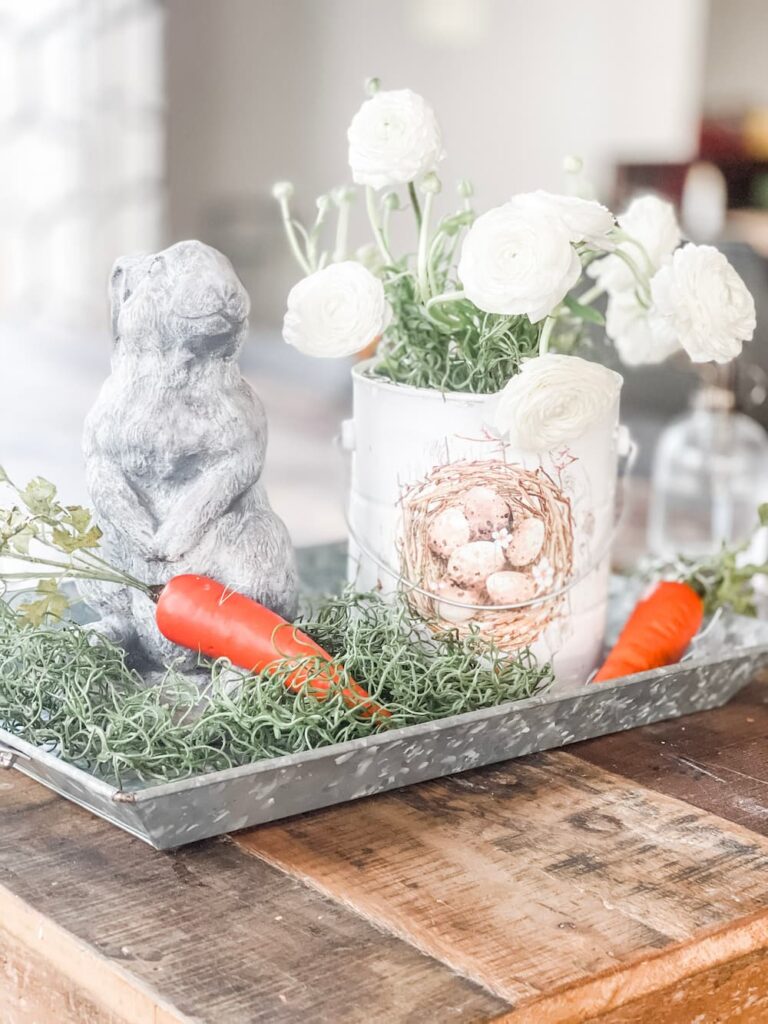
I filled my paint can planters a few ways. I dropped a ball jar with tulips inside, I planted pansies directly into the can and I place a plastic pot with pansies inside and I placed a plastic container with ranuculus inside.
You could also line the inside with paper or tissue and add wrapped little gifts inside.
It would also be a super cute container for an egg hunt don’t you think?
I hope you enjoyed this little upcycle and repurposing project. I also just finished a little upcycle using some leftover materials, see my UPDATED THRIFT STORE VASE. Just think of the possibilities for other holidays as well. I could see this decorated with a poinsettia for Christmas, mums for fall. My wheels are turning.
Thanks for coming by Saved From Salvage – Subscribe if you haven’t yet and you will get the weekly newsletter with all of my posts for the week. Oh and for more spring and easter inspiration, did you see my DIY SPRING GRAPEVINE WREATH? Or my collection of SPRING TABLESCAPES? Last but not least, my most favorite BUNNY POTS.
XO, Regina
SHOP THIS POST
This post contains affiliate links. If you purchase from these links, I receive a small commission at no additional cost to you.


-

DIY HAND DIPPED PINECONE FIRE STARTERS
It’s that time of year when we are searching for the perfect gift. Functional, useable, beautiful, unique. You can stop searching and start making. These DIY Hand Dipped Pinecone Fire Starters make a perfect gift for neighbors, friends, housewarming or hostesses. Come see just how easy these are to create in an afternoon. Hi, I’m…
-
LATELY ON THE LAKE
Hi and welcome to November and Lately on the Lake. Last weekend it was in the 80’s, I woke up Thursday and it was 29. Yuck. I know many of you have already seen that white stuff. Today I’m sharing what I’ve been up to, what I’m working on, what I’m loving and what’s inspiring…
-

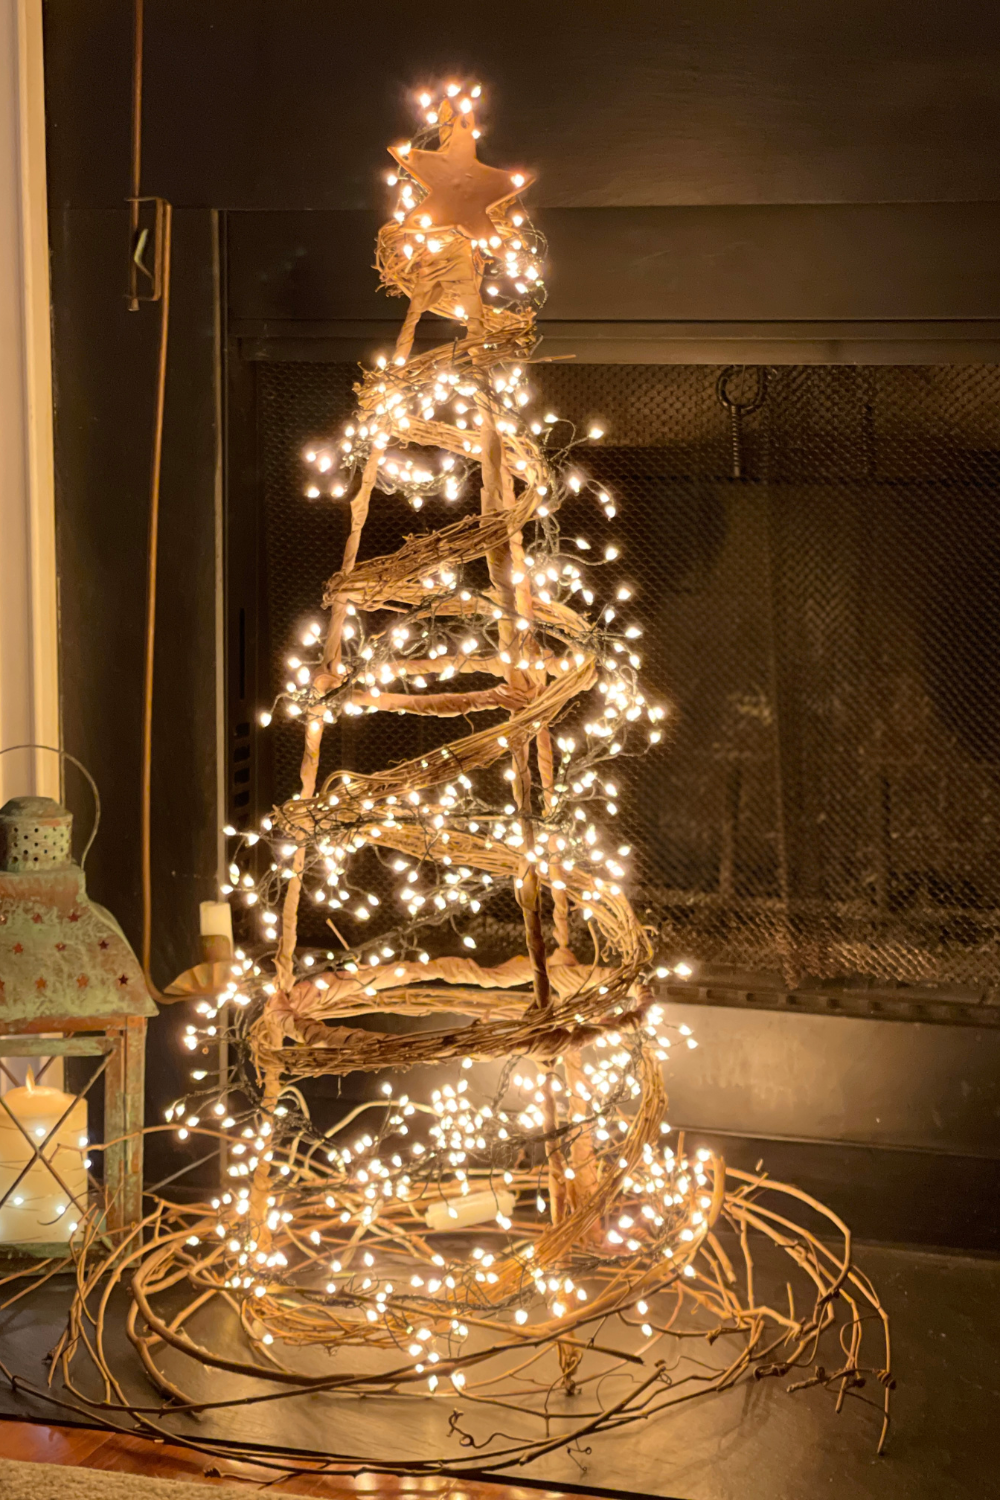
HOW TO DIY A FAUX GRAPEVINE TREE FOR CHRISTMAS
Do you love to use natural elements at the holidays? I do and today I’m sharing how to DIY a faux grapevine tree for Christmas. Inspiration came from the holiday shop at Terrain. If you’ve not been, it’s a great outing for inspiration and gifts. There are two in Pennsylvania that are a few hours…

Thanks so much for sharing this idea and including the tutorial Regina! It is absolutely adorable and I’m pinning it because it’s number one on my list of things to do this spring.
Denise – Thanks so much, I’m so glad you liked them.
These are all adorable! I can’t decided which one is my favorite! Such a fun and easy project for Easter. Thanks so much for this cool idea!
Rachel – Thanks so much! They were so fun to make.
Okay Regina, now I know where to come for all of the cute vintage bunny goodness! I love this idea, and using the Graphics Fairy always quickly becomes my new favorite project! Thank you so much for sharing your inspiration with us!
Cara – Ha Ha, I do have me some bunny issues! Thanks for the kind words
This is so cute Regina! I love how they turned out!