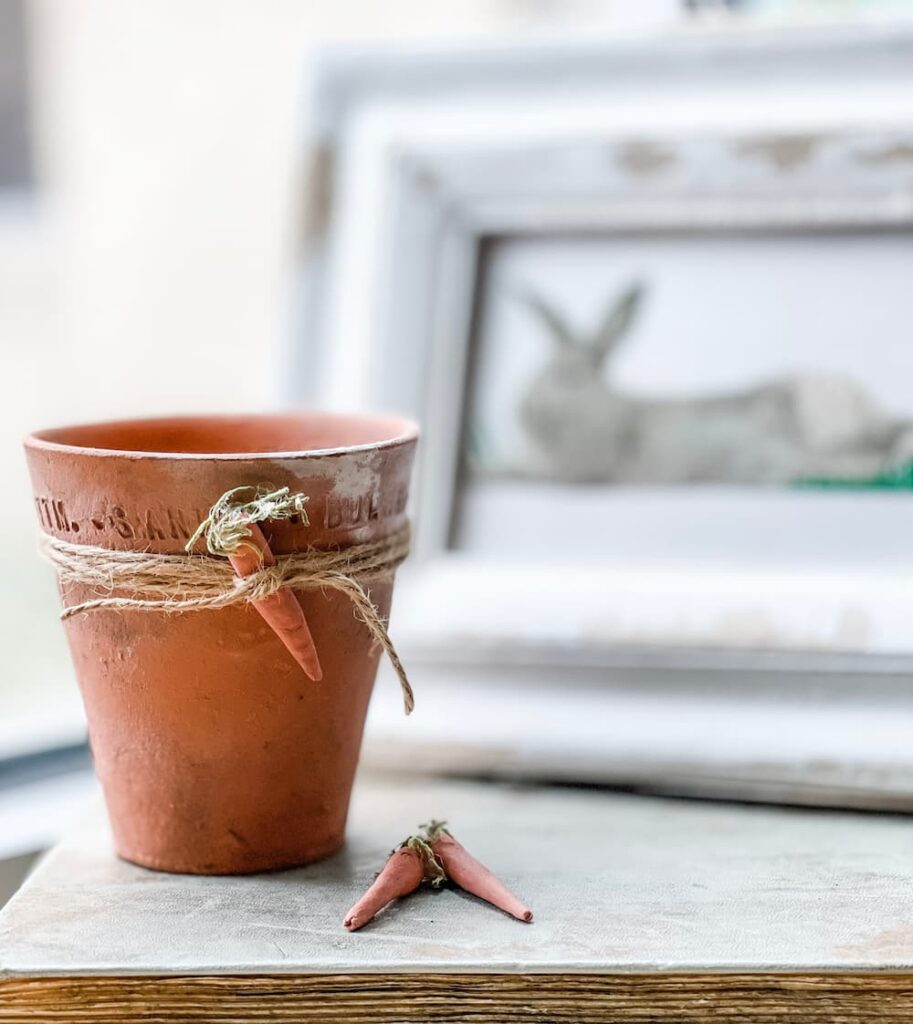
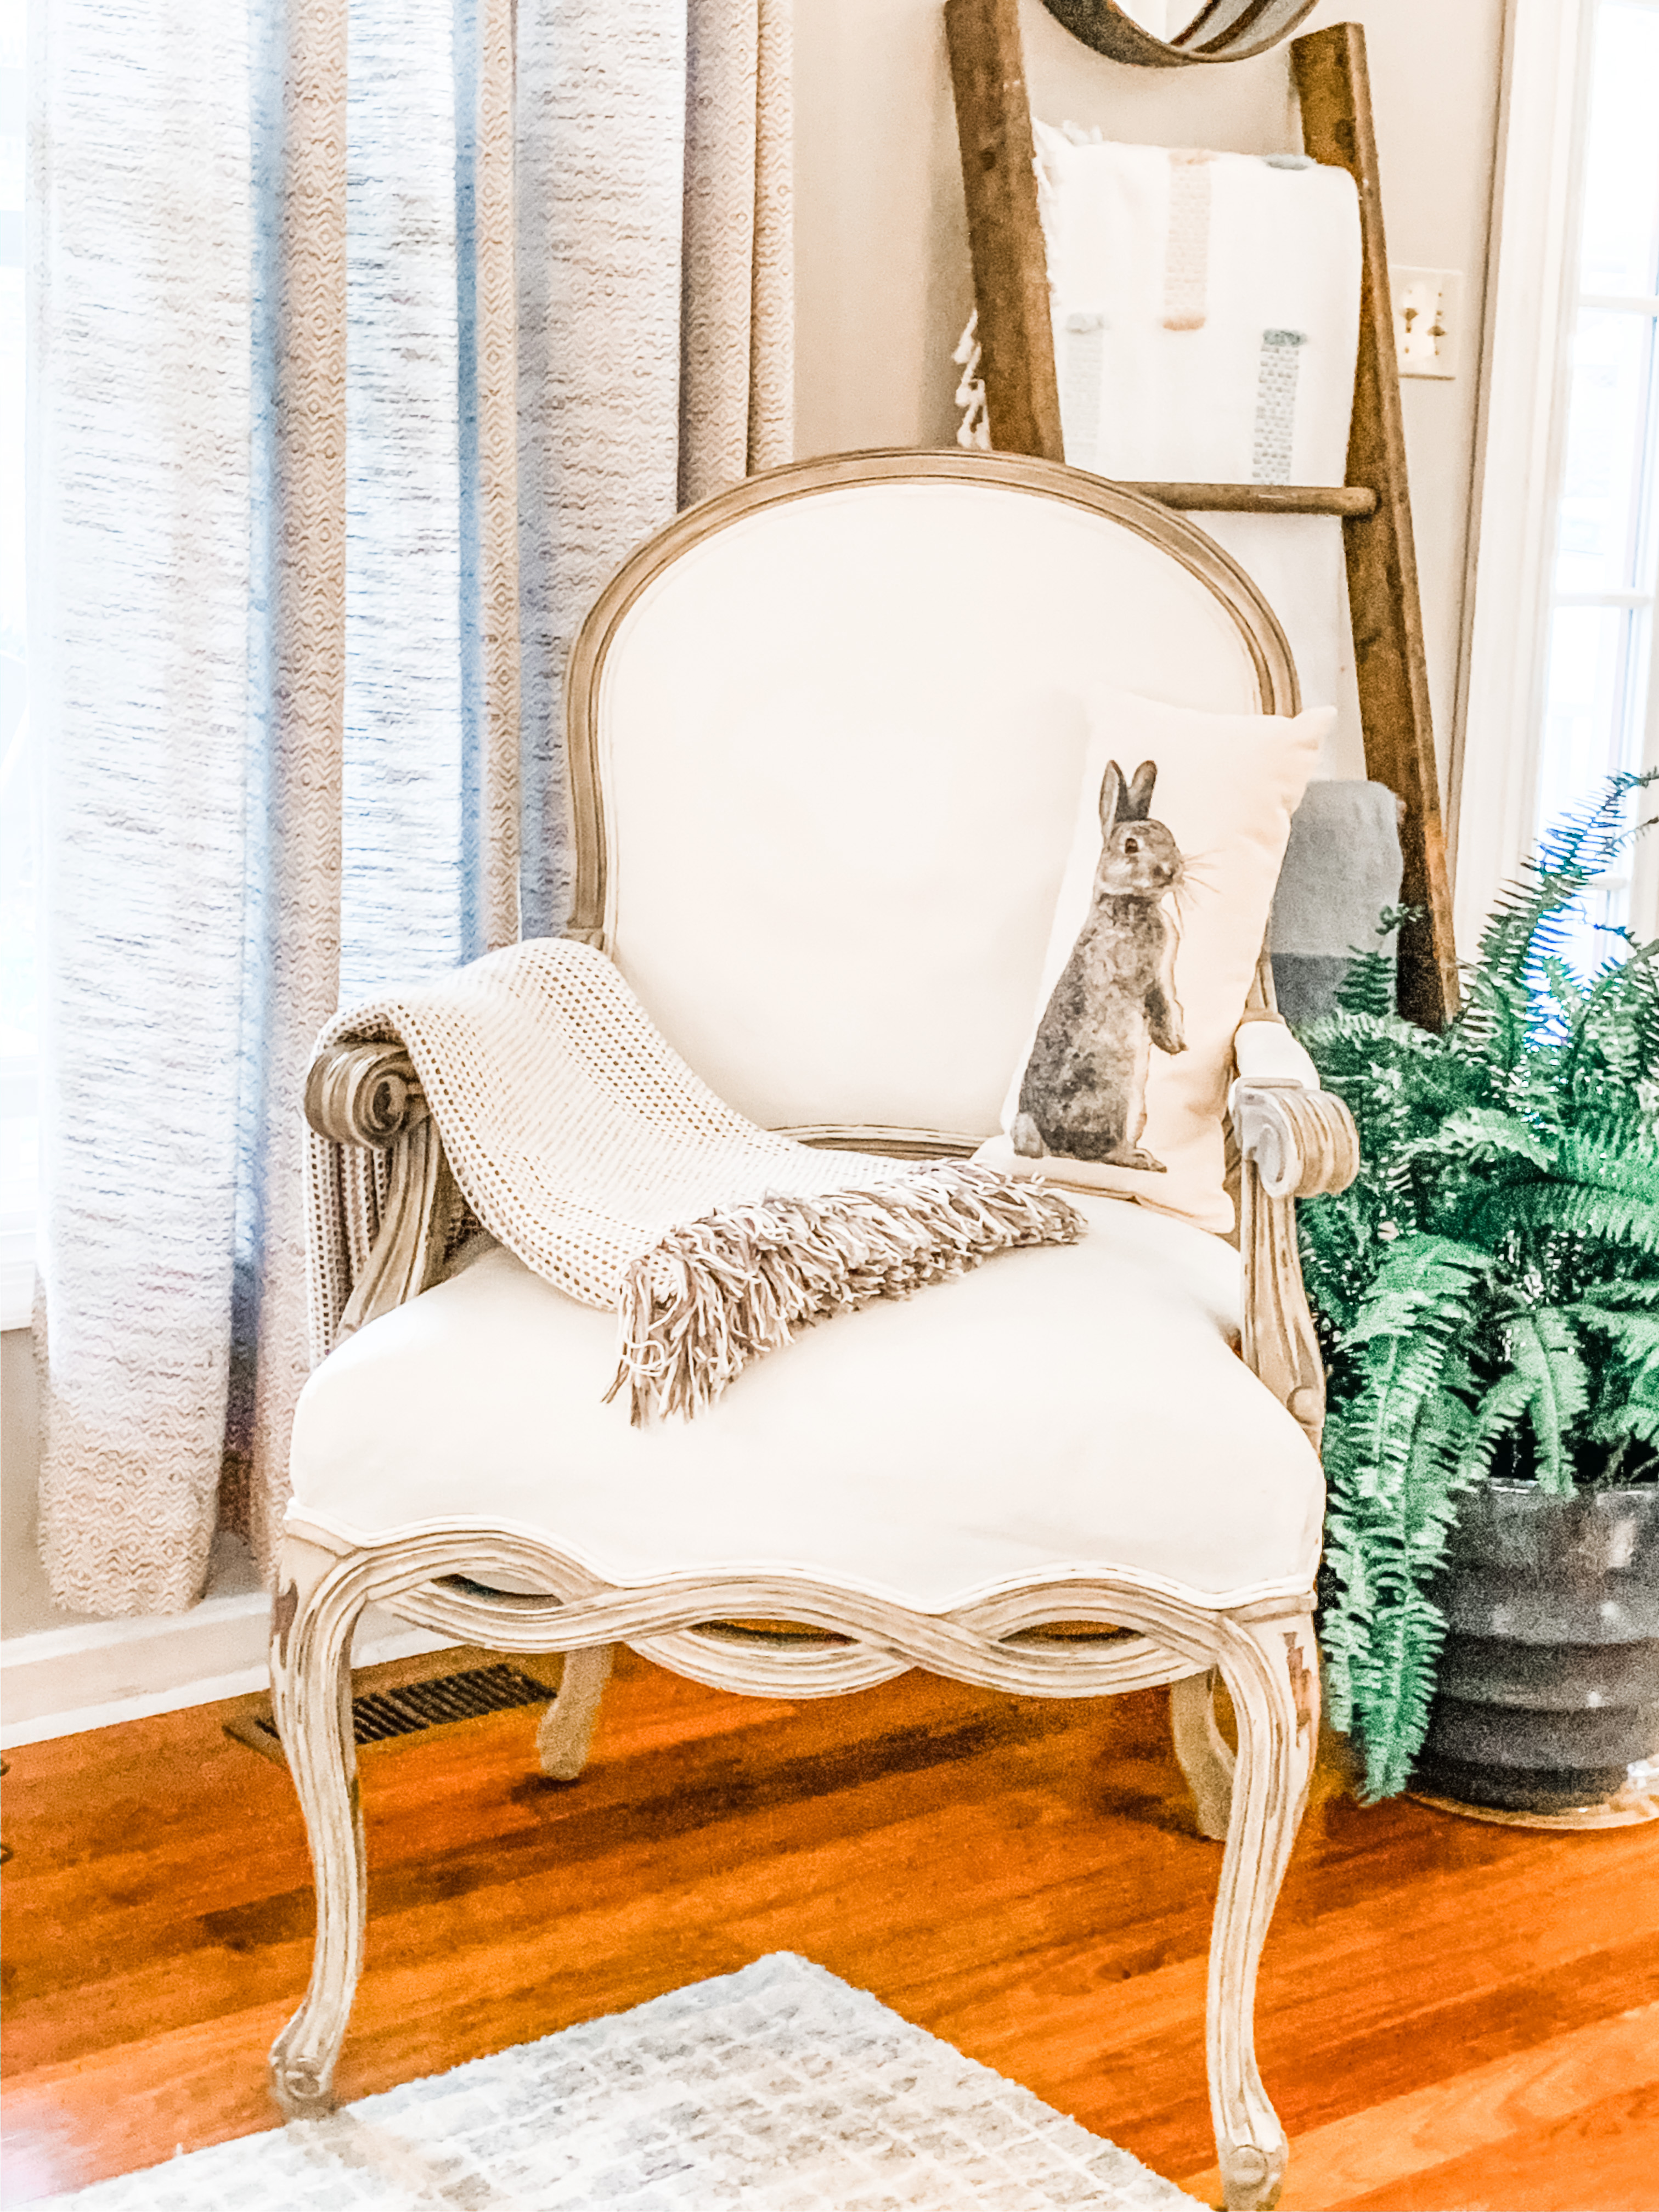
Looking for an easy and adorable bunny project? I’m sharing how to make a vintage bunny pot for Easter.
I have a bunny obsession, well I don’t have a bunny but I have lots of bunny things and I am always excited when the daffodils bloom, in my mind that’s when I can break out all things bunny.

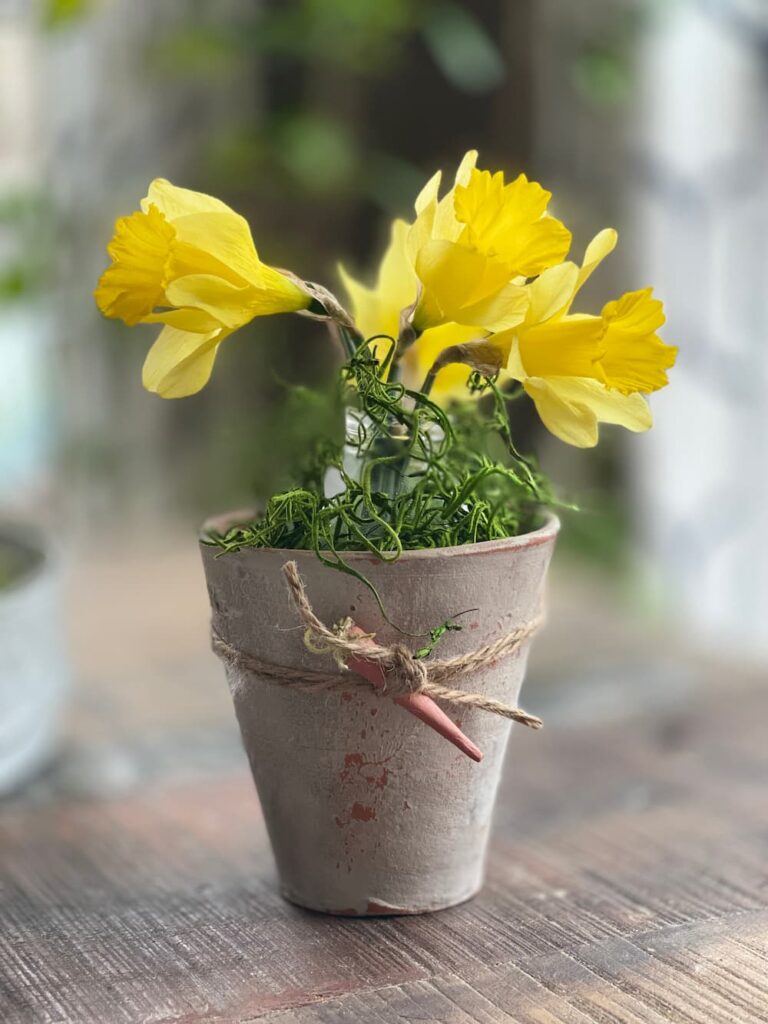
This year is no exception. I found these vintage english potting pots at an antique store and went right to work transforming them into bunny pots.
Perfect for a mini easter basket, to plant pansies in or add some grass or a candle.
Come see how to make one yourself.

Hi and welcome to Saved From Salvage, I’m Regina and I’m glad you are here.
I love to share DIYs, Furniture Flips, Tablescapes and all sorts of home decor inspiration.
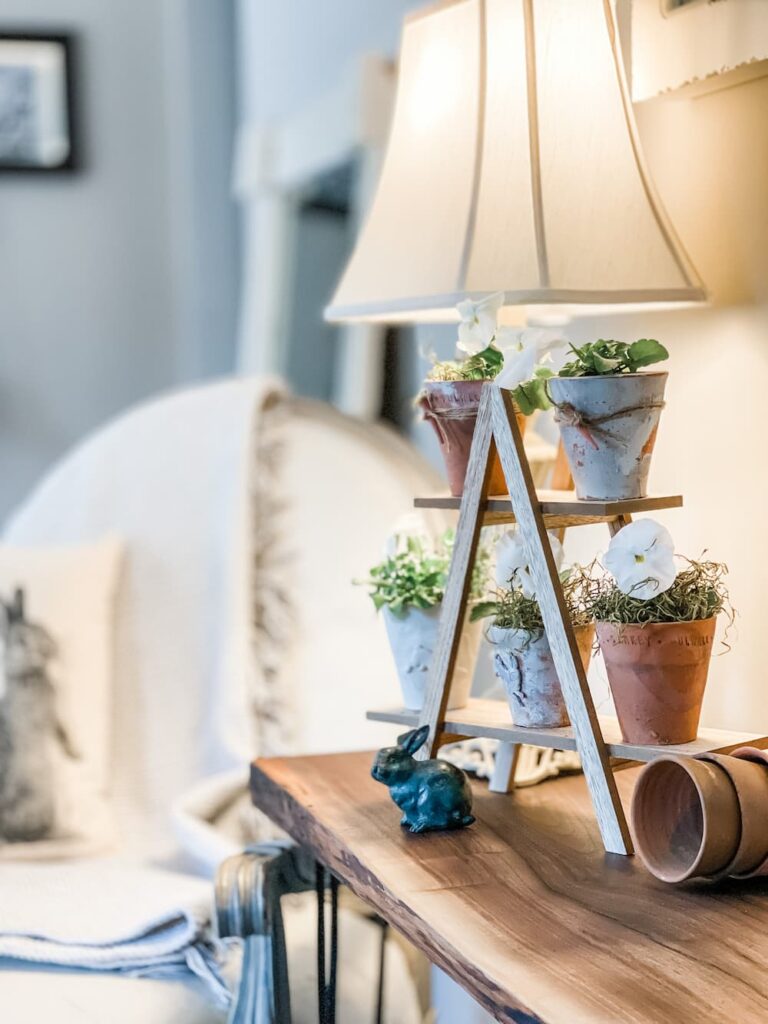
Table of Contents
CREATING YOUR BUNNIES AND CARROTS
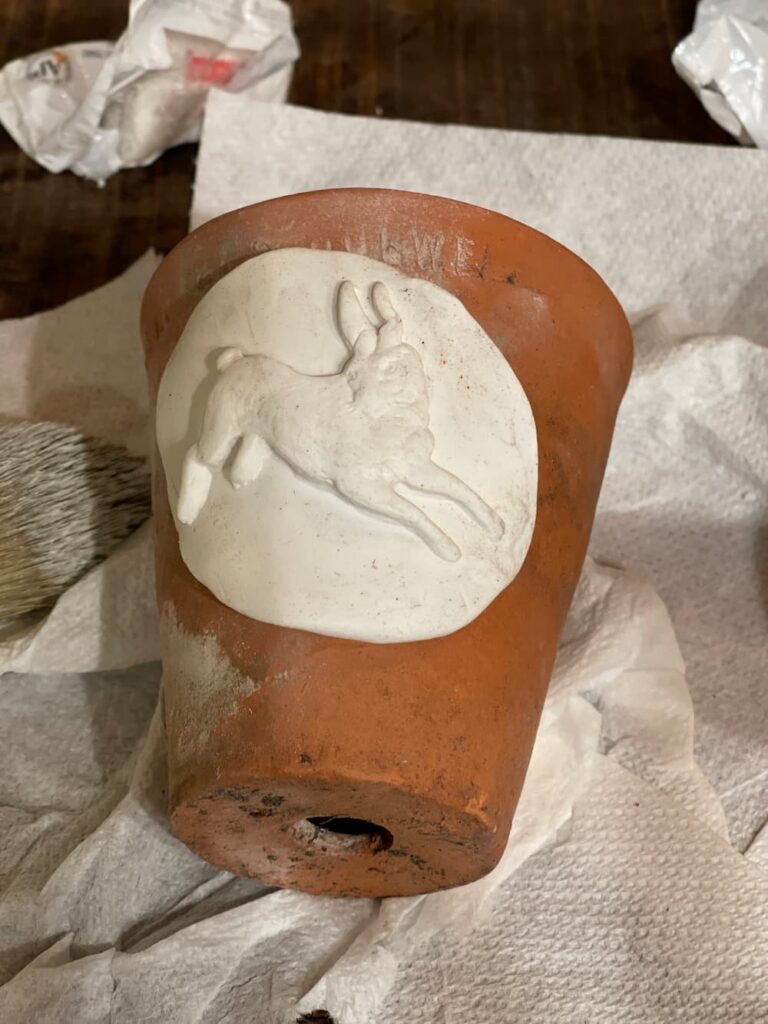
For my bunnies I used two different silicon molds.
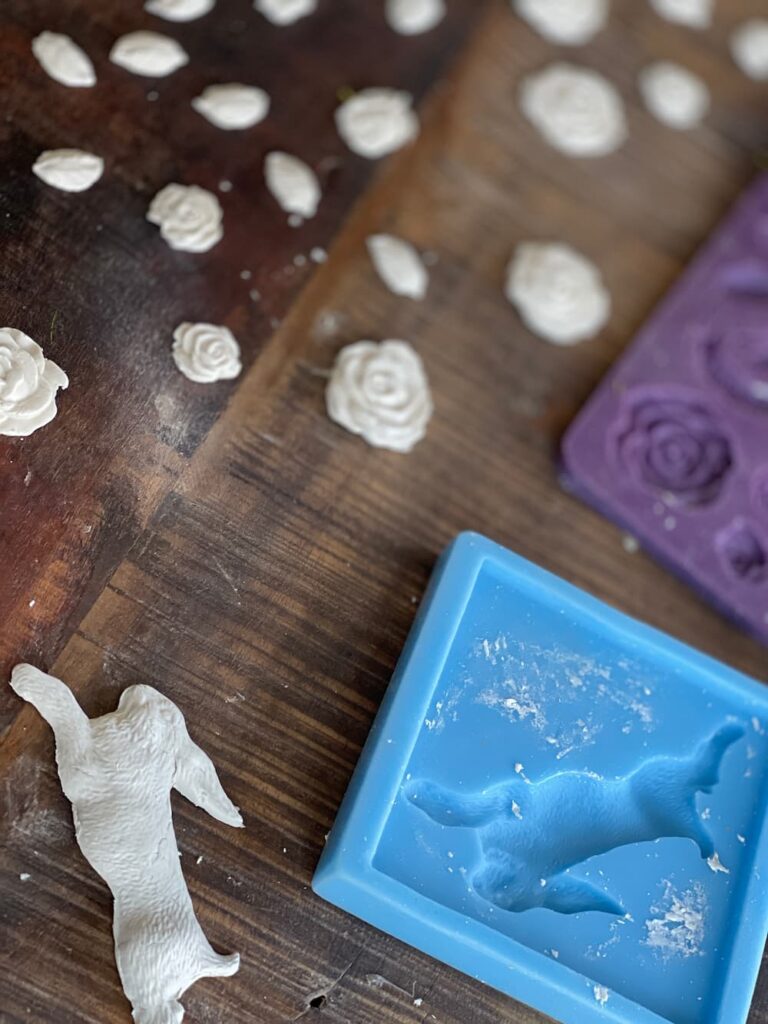
A larger jumping bunny and then a smaller bunny, like tiny actually.
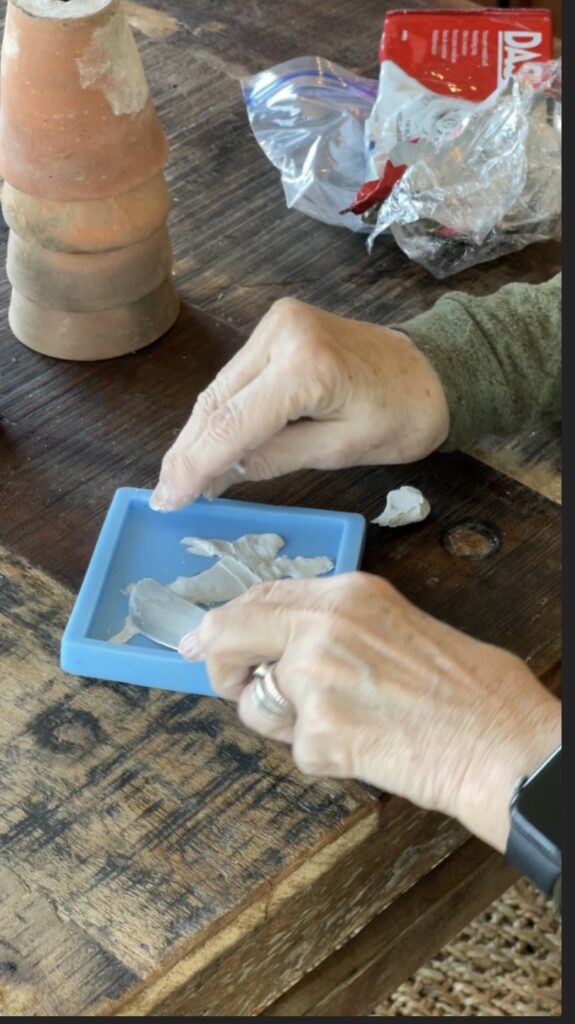
To create my bunnies I used both DAS Air Dry and Sculpey clay. The Sculpey is less brittle but either clay works fine.
VINTAGE BUNNY POT VIDEO
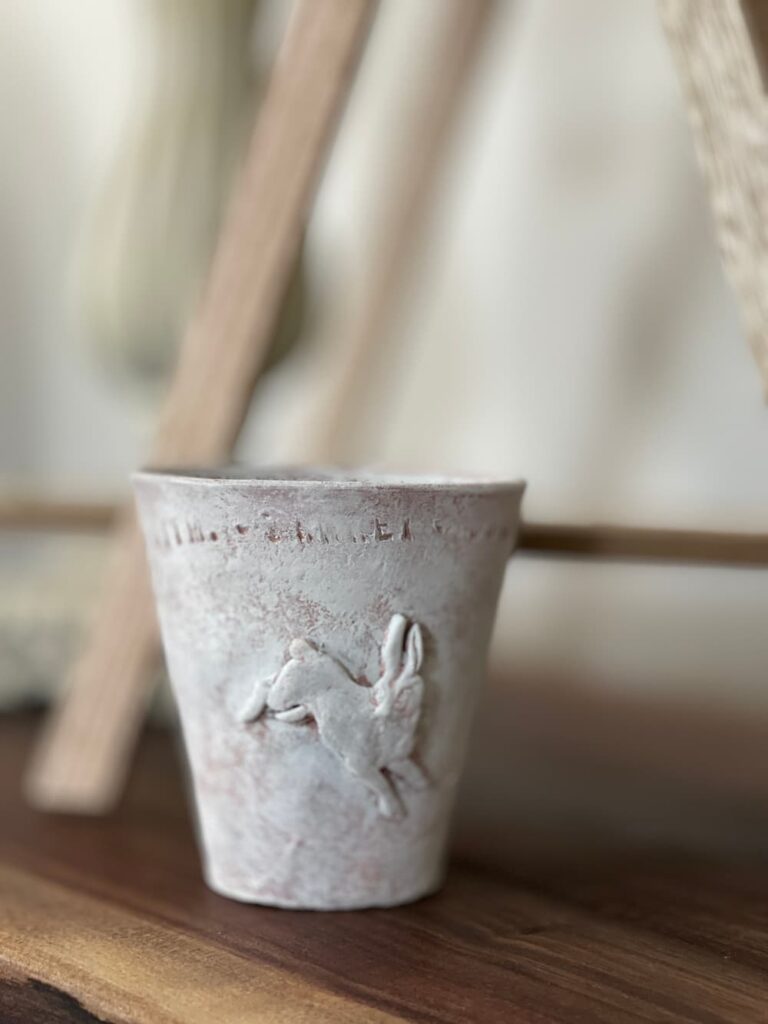
To get the curve of the pot so the bunny dries flat, I draped them across the pot with the pot on its side.
For the Sculpey rabbits, I made some just in the molds, then I made some where the clay filled the entire back of the mold so the bunnies were raised up on a flatter piece of clay. I like both looks, you can do either.
For the carrots, I rolled out my DAS Terra Cotta clay and took a butter knife and made lines along the carrot. I made several sizes as I used some for this cute Grapevine Spring Wreath I recently made.
For the green on the carrot, I put a drop of glue on the top and then dipped it in leftover moss. I also used this green leaf garland on the larger ones.
DECORATING YOUR POTS WITH CLAY
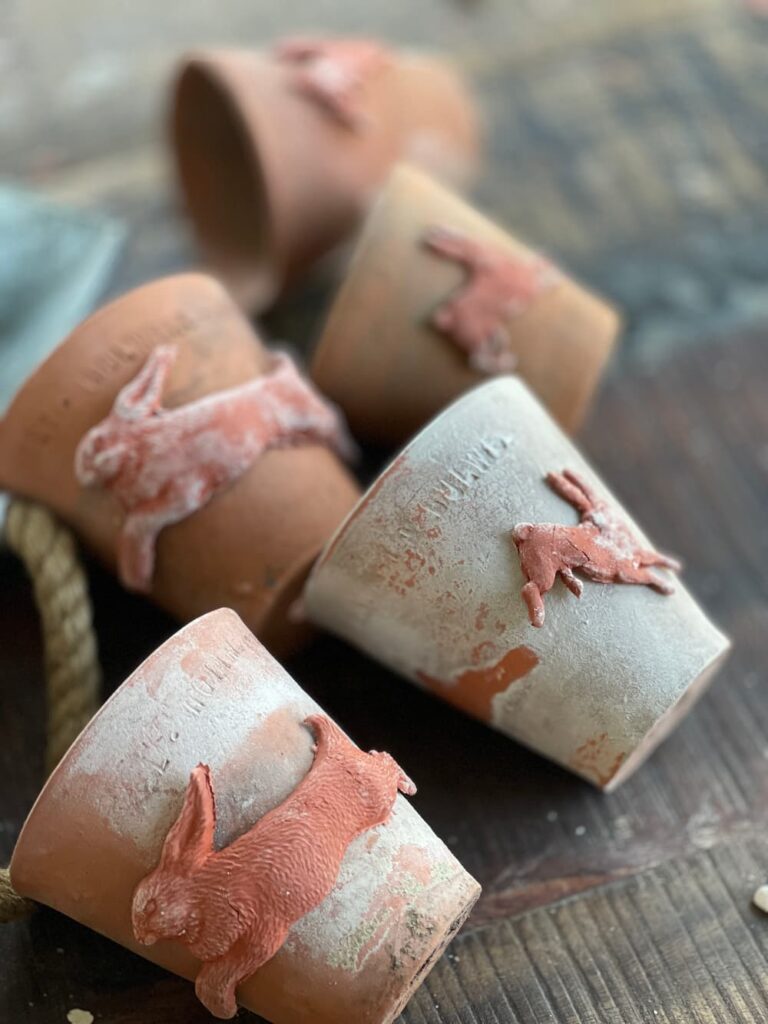
After you make your bunnies and carrots, then you need to decide if you want to paint your pots.
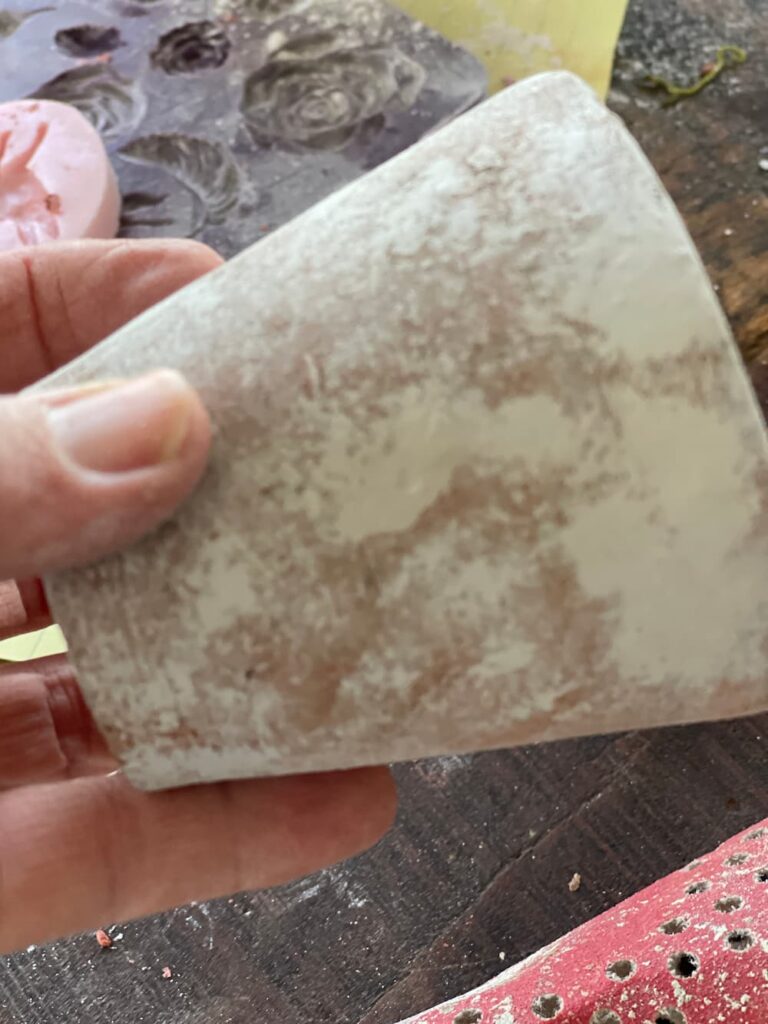
I love the whitewash look. To achieve this look, I used Dixie Belle’s Silk Mineral Paint in Whitecap.
For an extra dimension, I used Dixie Belle’s Best Dang Wax in Brown.
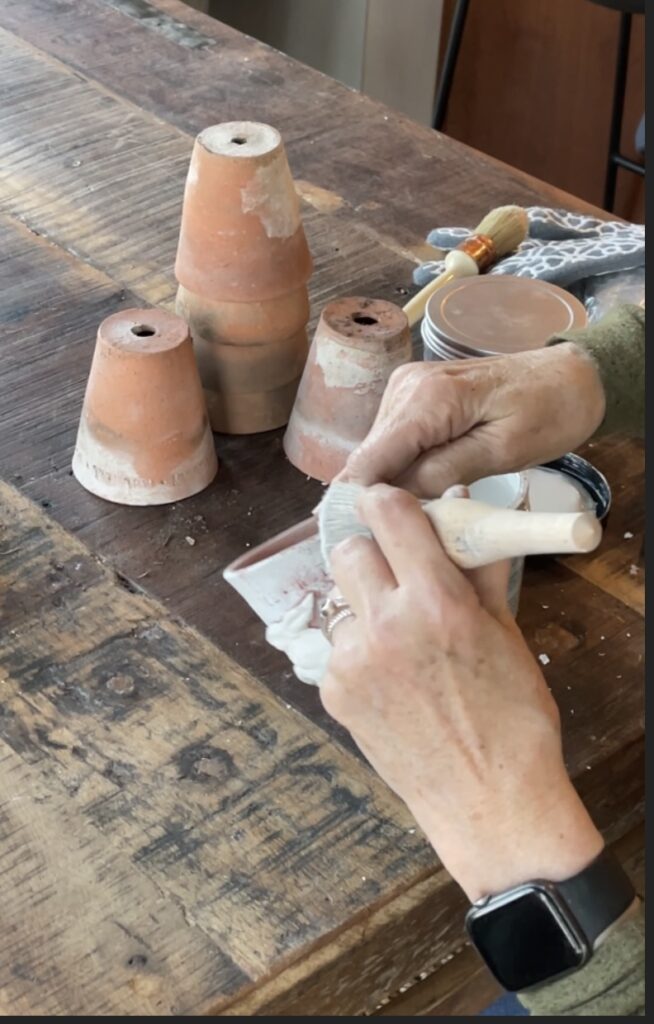
Whitewashing the pots, then wiping some off, then using a little dark wax, I played around with each of them until I liked the look.
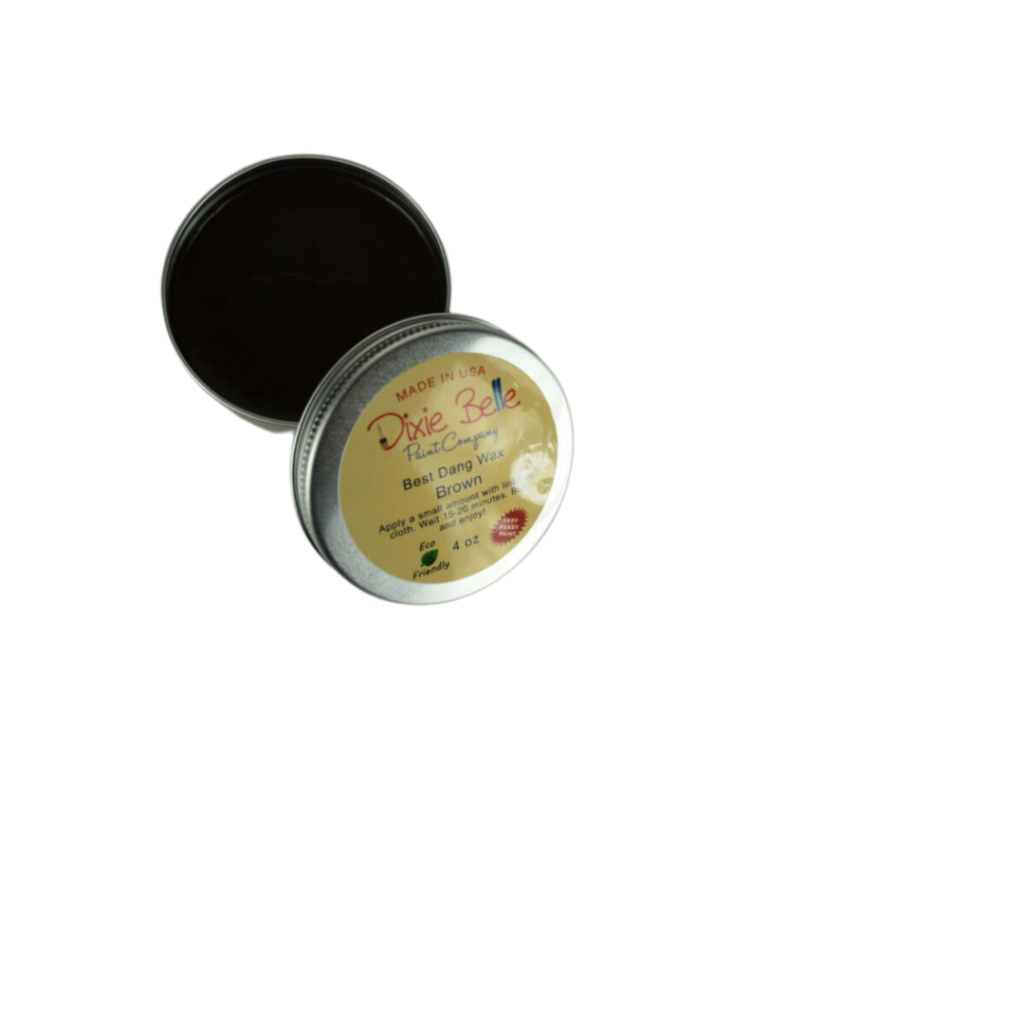
On another project recently I used the gray wax. These are favorites of mine to have on hand.
Next step is to adhere your bunnies and carrots to the pots.
I used both a hot glue gun and E-6000 glue. For speed you can’t beat the glue gun and it can be popped off if you need to reposition.
For a longer lasting and slower drying method, use the E-6000.
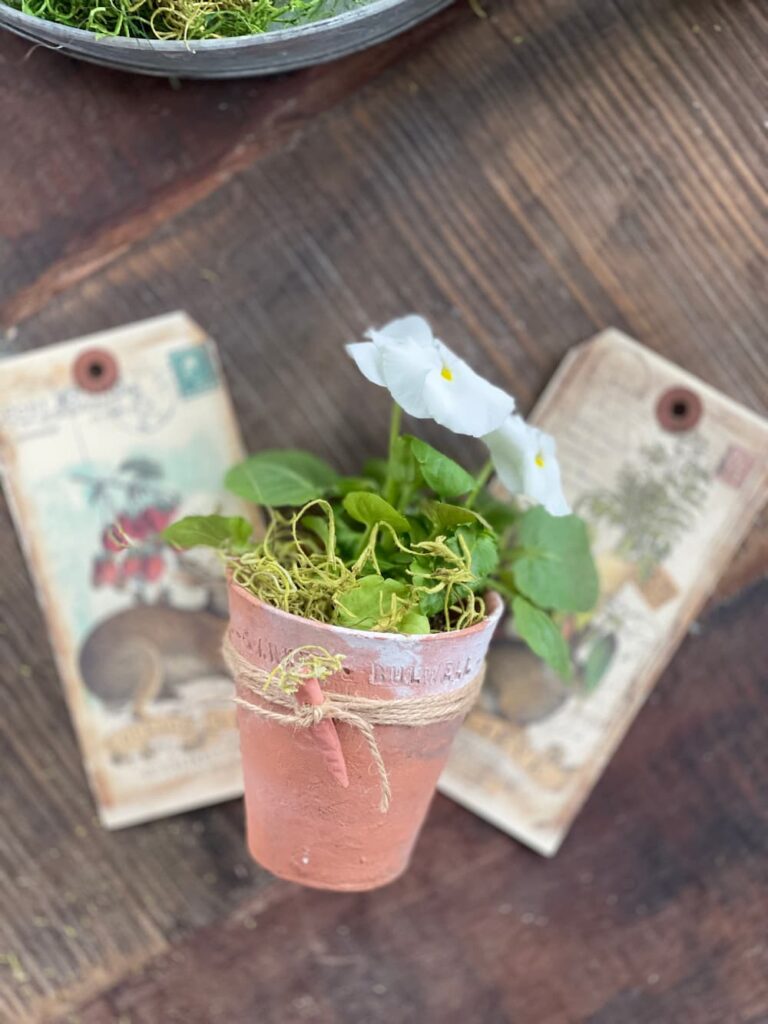
The carrots were attached to twine with a drop of hot glue, then I wrapped the twine several times around the pot and tied it.
They make a great pair.
WAYS TO STYLE YOUR BUNNY POTS
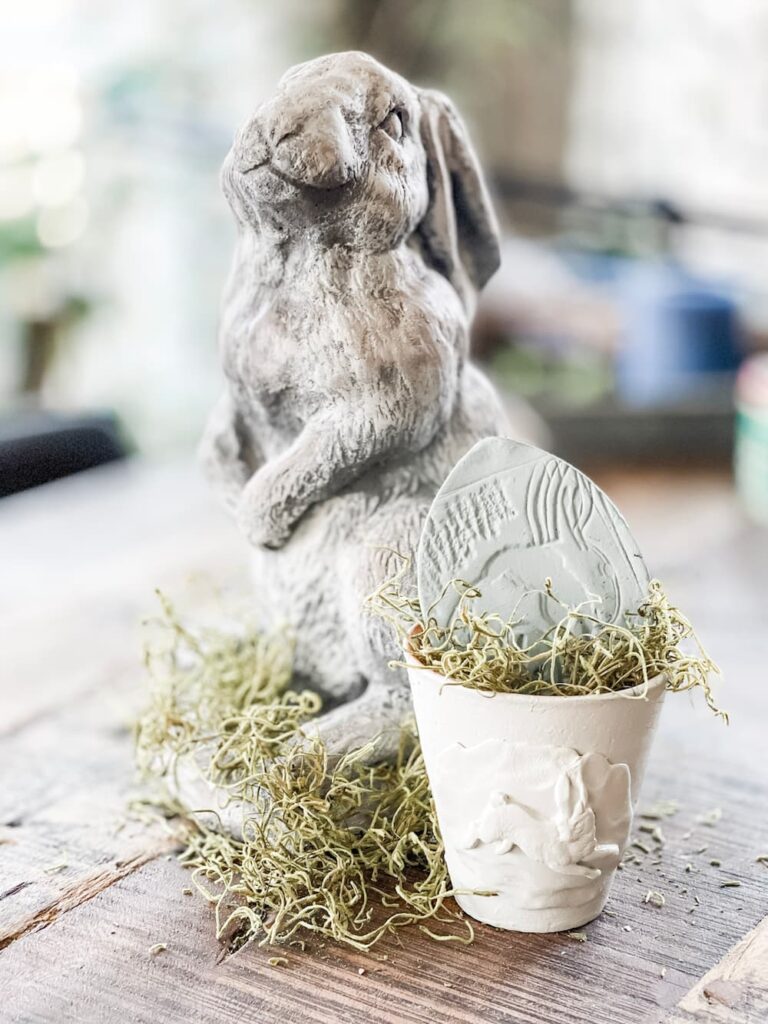
There are endless ways to style these. I used moss to the inside and added one of my Stamped Clay Eggs.
I planted pansies in some of them.
You could add an egg and use that as a name tag for a spring or Easter dinner.
If you have a small bag of goodies, you could glue a twine handle to the inside and use that as a gift.
These are not to have food directly touching them.
Even just the pot with nothing inside appeals to me. I did put some votives in a few of the pots, they would make a great addition to the dining table.
SHOP THIS POST


This post may contain affiliate links. If you purchase from the links provided, I will receive a small commission at no additional cost to you.
Thanks so much for stopping by Saved From Salvage. I hope you enjoyed these bunny pots, for other Easter Ideas, you can see my Easy Easter Egg Wreath and Easter Tablescapes. Oh and don’t miss HOW TO MAKE AN OLD PAINT CAN A PLANTER.
Consider subscribing to my weekly newsletter and stay up to date on all things Saved From Salvage.
Enjoy – XO,
Regina
-

DIY HAND DIPPED PINECONE FIRE STARTERS
It’s that time of year when we are searching for the perfect gift. Functional, useable, beautiful, unique. You can stop searching and start making. These DIY Hand Dipped Pinecone Fire Starters make a perfect gift for neighbors, friends, housewarming or hostesses. Come see just how easy these are to create in an afternoon. Hi, I’m…
-
LATELY ON THE LAKE
Hi and welcome to November and Lately on the Lake. Last weekend it was in the 80’s, I woke up Thursday and it was 29. Yuck. I know many of you have already seen that white stuff. Today I’m sharing what I’ve been up to, what I’m working on, what I’m loving and what’s inspiring…
-

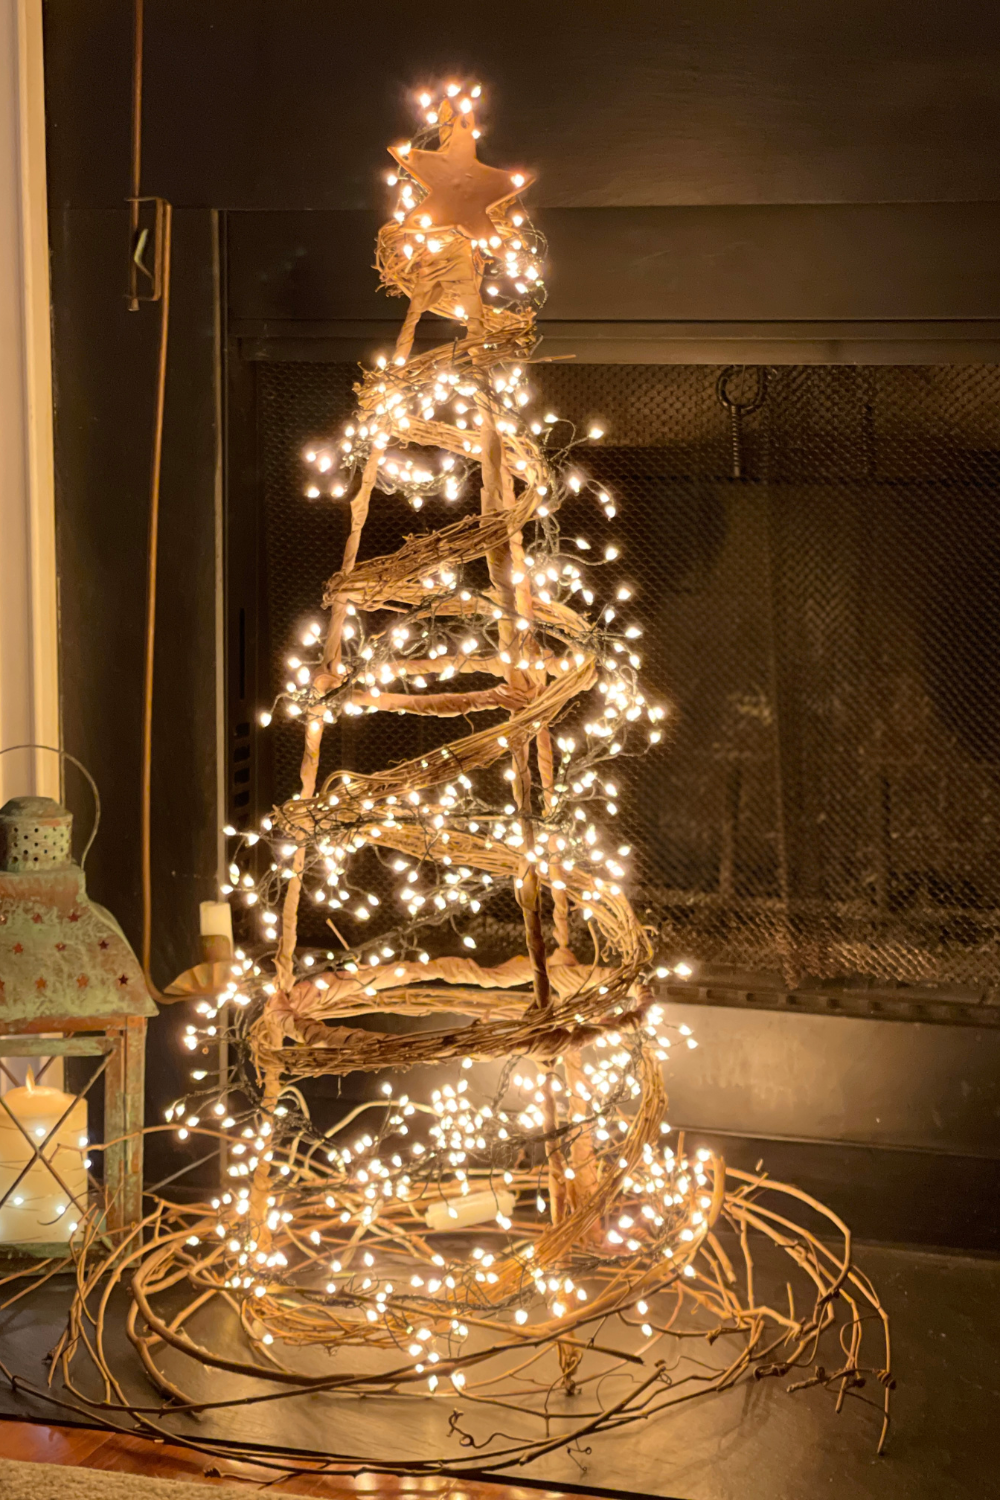
HOW TO DIY A FAUX GRAPEVINE TREE FOR CHRISTMAS
Do you love to use natural elements at the holidays? I do and today I’m sharing how to DIY a faux grapevine tree for Christmas. Inspiration came from the holiday shop at Terrain. If you’ve not been, it’s a great outing for inspiration and gifts. There are two in Pennsylvania that are a few hours…
These are adorable! I am a bunny lover—but those carrots are so cute. Great job!
Regina, your bunny pots are adorable! I love this sweet DIY, and I love how you have them displayed. Thanks for sharing such a creative idea! I’m sharing your post this weekend in my Saturday roundup! Have a great weekend!
Kim – Thanks so very much! Have a great weekend too!
These are the cutest!! I can’t wait to make some.
And thanks so much for sharing them on the Fabulous Friday Link Party. We will be sharing them on the link party this week.
Michele – Yay, how exciting to be featured on your Link Party!
I love those clay bunnies on the pots! So cute!
Wow Regina, I love your bunny pots! I love bunnies like yourself, but I haven’t really expanded my collection. I think I would like to give this one a try. Thank you for sharing with Whimsy Home Wednesday!
Regina this is adorable! Thank you so much for sharing at my weekly link party! I’m happy to be featuring you this week! https://www.ourtinynest.com/2023/04/05/weekly-link-party-343/
Hope you have a great Easter!